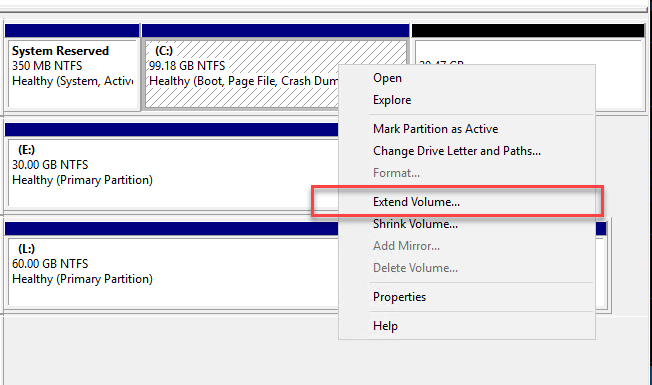
Seguramente te ha pasado: expandes el disco virtual en Proxmox o VMware, entras al Disk Management de Windows con la intención de extender tu partición principal, y te encuentras con que la opción “Extend Volume” está en gris (deshabilitada).
¿Por qué sucede esto? La razón es puramente geométrica. Para que Windows pueda extender una partición, el espacio no asignado (Unallocated Space) debe ser contiguo y estar ubicado inmediatamente a la derecha del volumen que quieres crecer.
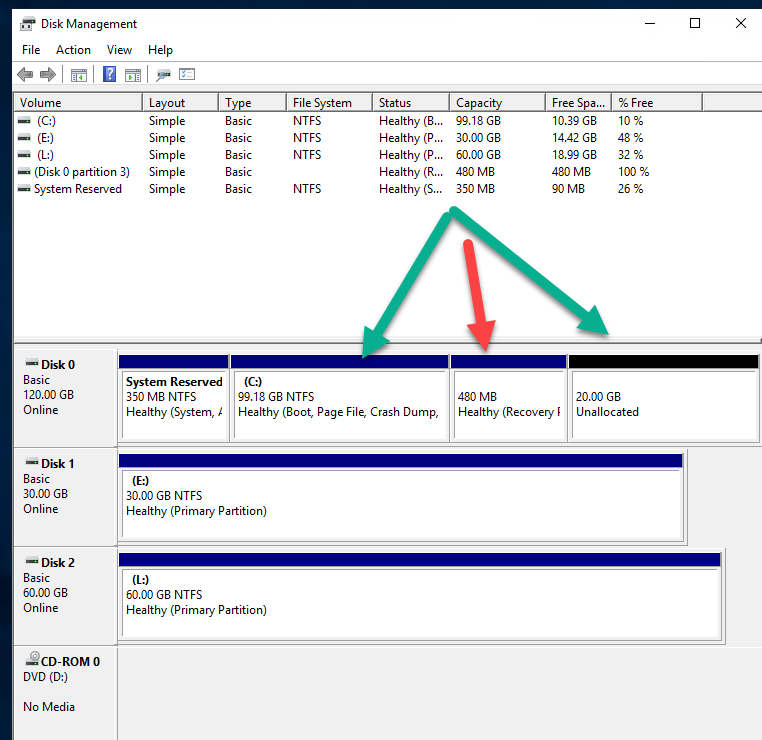
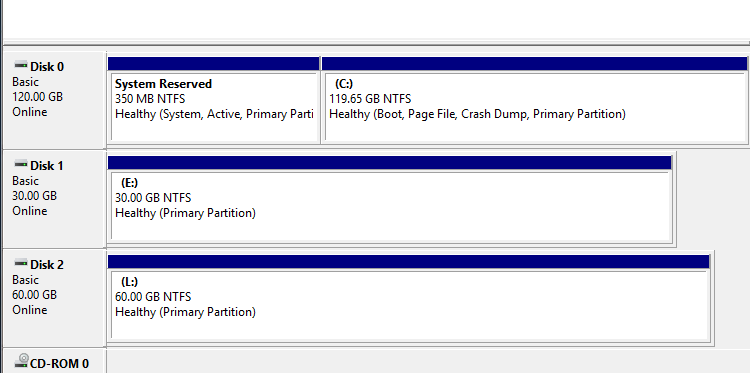
El problema es que, por defecto, las instalaciones de Windows modernas colocan una Partición de Recuperación (Recovery Partition) justo al final del disco C:. Al expandir el almacenamiento desde el hipervisor, el nuevo espacio se añade al final de todo, dejando la partición de recuperación en medio como una barrera física.
Windows no tiene la capacidad nativa de “brincar” sobre esa partición para alcanzar el espacio libre, lo que nos obliga a realizar una pequeña cirugía técnica para moverla o eliminarla.
Al abrir el administrador de discos notarás que hay una partición en medio el cual impide que puedas extender el disco C como se muestra en la imagen.
Para solucionar ese problema deberás abrir CMD como administrador e ingresar el siguiente comando.— #title: “How to extend the disk when there is another partition between” title: “How to extend the disk when there is another partition in between” date: 2026-02-21T10:00:00-07:00 draft: false categories: [“Windows”] tags: [“Windows Server”] image: “Windows_Server_thumbnail.png”
You’ve probably experienced this: you expand a virtual disk in Proxmox or VMware, go to Windows Disk Management intending to extend your main partition, and find that the “Extend Volume” option is grayed out (disabled).
Why does this happen? The reason is purely geometric. For Windows to extend a partition, the unallocated space must be contiguous and located immediately to the right of the volume you want to expand.
The problem is that, by default, modern Windows installations place a Recovery Partition at the very end of the C: drive. When expanding storage from the hypervisor, the new space is added to the end, leaving the recovery partition in the middle like a physical barrier.
Windows doesn’t have the native ability to “jump” over this partition to access the free space, forcing us to perform a minor technical procedure to move or delete it.
When you open Disk Management, you’ll notice a partition in the middle that prevents you from extending the C: drive, as shown in the image.
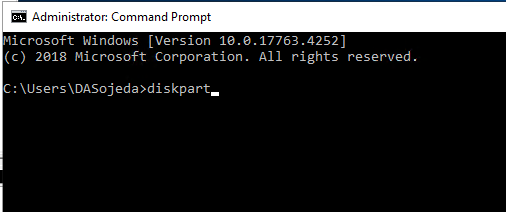
To solve this problem, you’ll need to open Command Prompt as administrator and enter the following command:
``cmd
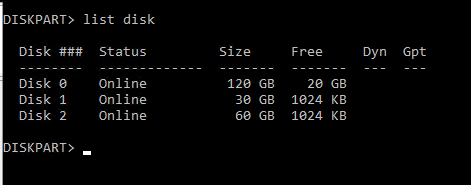
To verify which disk we need to work with, run the following command:
` … ```cmd list disk
You'll notice the one containing 20GB of free space (this will depend on the extra amount you added)

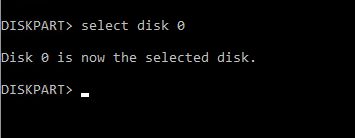
Once you've verified which disk it is, run the following command.
``cmd
Select disk 0
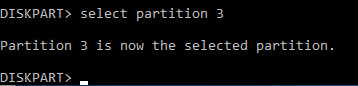
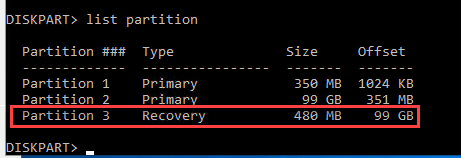
Now, you need to specify the partition that we must delete to extend the disk. To do this, we must list the partitions associated with the previously selected disk. Run the following command.
``cmd

Select the partition with the following command.
``cmd
Select partition 3
Once the partition is selected, we must proceed to delete it with the following command.
delete partition override
Once finished, return to Disk Management. You’ll notice that the partitions are now contiguous, and you can now select the option to extend the volume.
Once extended, you’ll have the full amount of space you allocated.
diskpart
Para verificar cual es el disco en el cual debemos trabajar, ejecuta el siguiente comando.
list isk
Notarás en el que contiene 20GB libres (dependerá de la cantidad extra que hayas agregado)
Una vez que hayas verificado cual es el disco, ejecuta el siguiente comando.
Select disk 0
Ahora, necesitarás especificar la partición la cual debemos eliminar para poder extender el disco, para ello debemos listar las particiones asociadas al disco previamente seleccionado. Ejecuta el siguiente comando.
list partition
Selecciona la partición con el siguiente comando.
Select partition 3
Una vez este esté seleccionada la partición deberemos proceder a eliminarla con el siguiente comando.
delete partition override
Una vez concluido regresamos al administrador de disco, notarás de que las pariciones son continuas y ahora si se puede seleccionar la opción para extender el volumen.
Una vez extendido tendremos la totalidad del espacio que hemos asignado.