Domain Controller in Windows Core
If you’ve followed this series, you already know how to set up a primary and a secondary Domain Controller using the graphical interface (Desktop Experience). But, if we really want to take our infrastructure to the next level and minimize risks,
In this third and final installment, we’re going to deploy a Domain Controller using Windows Server Core and purely the command line (PowerShell).
Why Choose Server Core for Your Active Directory?
If you’re wondering why you should forgo the visual convenience of a graphical interface for such a critical role, the answer boils down to three fundamental pillars for any business environment:
1. Drastic Security (Hardening by Default)
A server without a graphical environment lacks web browsers, media players, and hundreds of DLLs that are irrelevant to an identity server. This dramatically reduces the attack surface. Modern EDR tools, such as Cortex XDR, work wonderfully here, as they operate silently and have a much “cleaner” environment for detecting behavioral anomalies.
2. Resource Efficiency and Maintenance
Server Core consumes a fraction of the RAM (easily below 1GB at idle) and disk space compared to its graphical counterpart. Furthermore, lacking GUI components, it requires up to 60% fewer patches and restarts.
3. Modern Ecosystem
You don’t need RDP for administration. Today, everything is managed remotely using RSAT, Windows Admin Center, or third-party integrations. If you use enterprise-grade backup solutions like Veeam Backup & Replication, they interact seamlessly with Server Core’s VSS services without requiring local interaction, effortlessly securing your ntds.dit databases.
Add Windows Core as a Domain Controller
Implementing a Domain Controller (DC) on Windows Server Core is an excellent practice for reducing the attack surface and optimizing resource consumption. Below, I detail the step-by-step process based on your screenshots, ready for your Hugo blog.
Configure the Network (if necessary)
Ensure your server has a suitable network configuration to join a domain or create your own. You have two ways to do this:
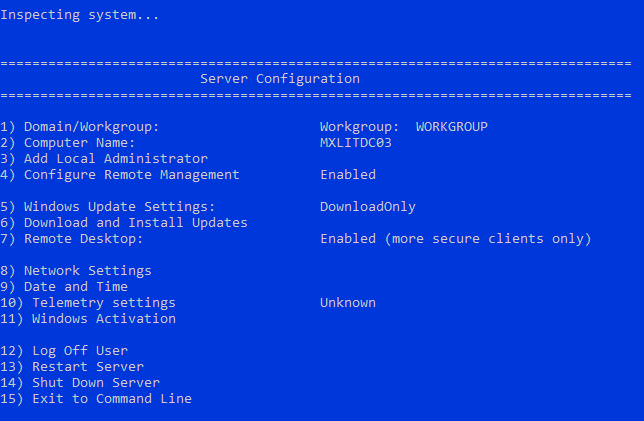
Option A: Using sconfig Use the interactive sconfig tool from the command line to configure the network and other basic parameters such as the computer name and updates.
Type
sconfigand press Enter.Select option 8) Network Settings.
- Select the network adapter.
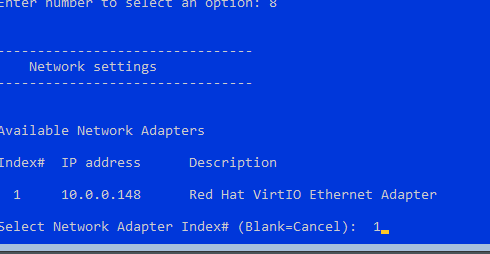
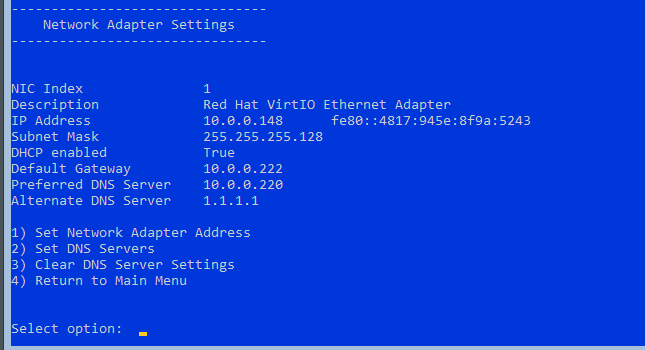
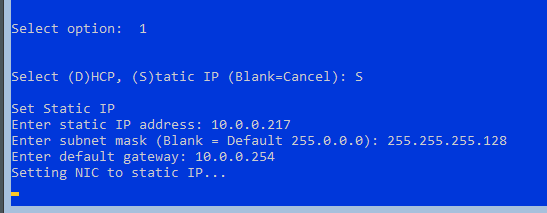
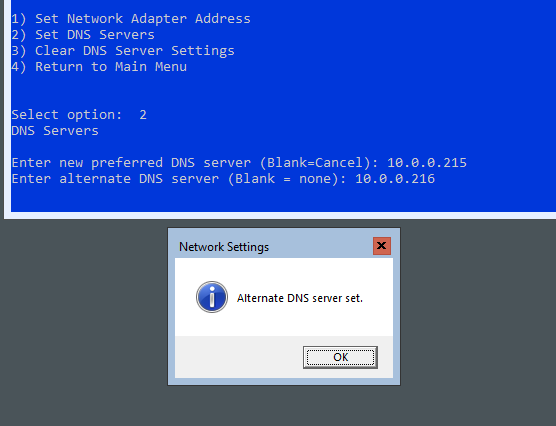
- Assign a static IP address, subnet mask, gateway, and DNS servers (primary and secondary).
** Option B: Using PowerShell To quickly verify or change the IP address, use the following commands:
# Get the available network adapters
Get-NetAdapter
# Disable DHCP on the specified interface
Set-NetIPInterface -InterfaceAlias "Ethernet" -Dhcp Disabled
# Set static IP address and default gateway
New-NetIPAddress -InterfaceAlias "Ethernet" -IPAddress 192.168.1.10 -PrefixLength 24 -DefaultGateway 192.168.1.1
# Set the DNS server addresses
Set-DnsClientServerAddress -InterfaceAlias "Ethernet" -ServerAddresses ("8.8.8.8", "8.8.4.4")
Add the Domain Controller role
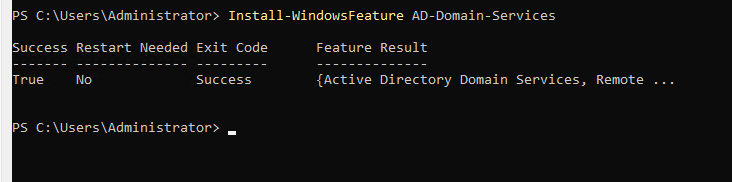
Use PowerShell to add the Active Directory Domain Services (AD DS) role and prepare the server.
First, install the AD DS role:
# Install the Active Directory Domain Services role
Install-WindowsFeature AD-Domain-Services
Promote the server to a Domain Controller
To configure the server as a Domain Controller, you can choose to create a new forest or join an existing domain.
Option 1: Create a new domain (Forest)
Use the following command, adjusting the parameters to your environment:
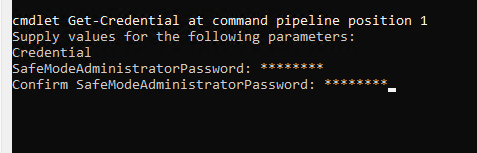
-DomainName: Fully Qualified Domain Name (FQDN) (e.g.,mxlit.com).-DomainNetbiosName: NetBIOS name of the domain.-SafeModeAdministratorPassword: Password for the Active Directory Restore Mode (DSRM) administrator.-InstallDNS: Installs the DNS role along with AD DS.
# Promote the server to a new Domain Controller in a new forest
Install-ADDSForest -DomainName "mxlit.com" -DomainNetbiosName "mxlit" -SafeModeAdministratorPassword (ConvertTo-SecureString "ContraseñaSegura" -AsPlainText -Force) -InstallDNS

Option 2
Add to an Existing Domain
If you already have a domain created and this server will be an additional DC:
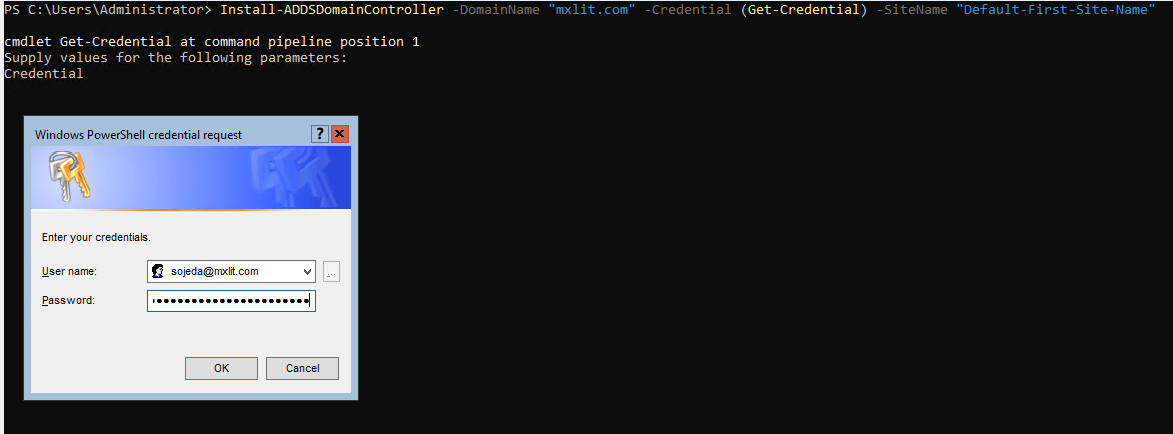
# Add the server as a Domain Controller to an existing domain
Install-ADDSDomainController -DomainName "mxlit.com" -Credential (Get-Credential) -SiteName "Default-First-Site-Name"


Restart the server
Once the Domain Controller installation and promotion process is complete and confirmed, the server will require a restart. If the previous command doesn’t restart automatically, run it manually:
# Restart the server to apply changes
Restart-Computer
Verify the configuration
After restarting, you can verify that the server is functioning correctly as a Domain Controller using several PowerShell commands:
# Get information about the current Active Directory domain
Get-ADDomain
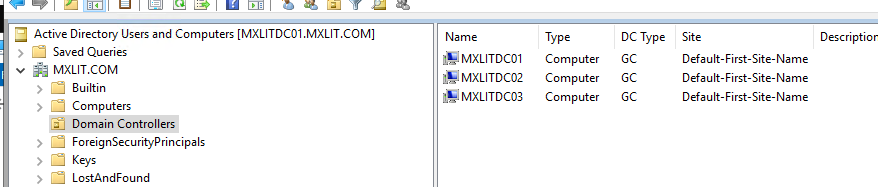
# Get information about the Domain Controllers in the current domain
Get-ADDomainController
To manage your domain from this same server (or enable the tools), install the Remote Server Administration Tools (RSAT):
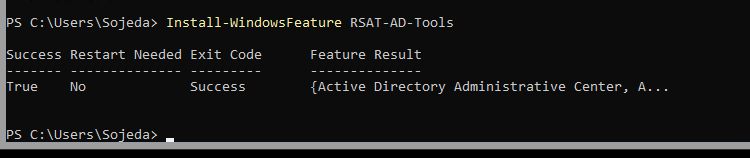
# Install Remote Server Administration Tools for AD DS
Install-WindowsFeature RSAT-AD-Tools

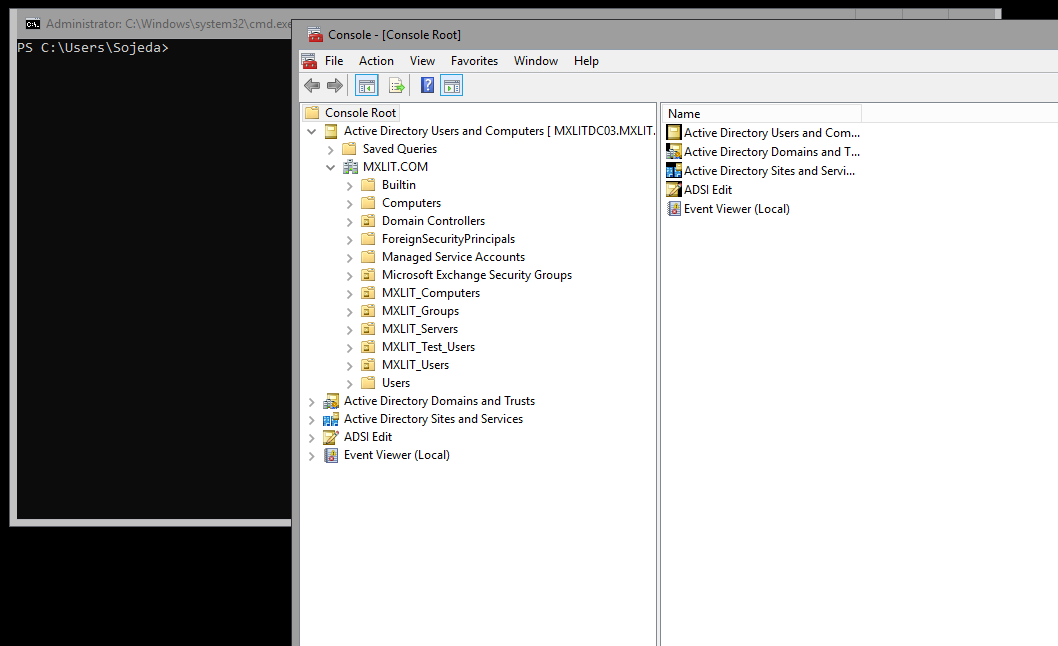
Finally, make sure you have the compatibility plugins if you need to open traditional MMC consoles like “Active Directory Users and Computers” directly by installing the Server Core App Compatibility Feature on Demand.
Conclusion
Deploying a Domain Controller on Windows Server Core is one of the best practices we can implement in our infrastructure. By forgoing the graphical user interface (GUI), we not only drastically reduce the consumption of compute and storage resources—vital when we seek to optimize our virtualization and lab environments—but we also minimize the attack surface and the volume of patches required.
Although the initial configuration via command line or PowerShell requires familiarizing yourself with the syntax, the long-term advantages in performance, stability, and security are well worth it. Once the data center is operational, day-to-day management becomes seamless using remote RSAT.
I hope this guide is helpful for your upcoming deployments!