The Heart of Your Infrastructure: Why You Need vCenter
Managing ESXi servers individually through their web interface is fine for a very small environment, but when you’re looking to scale, automate, and ensure availability, vCenter Server is the critical component. It acts as the centralized control panel for your entire vSphere infrastructure.
Key Advantages of Deploying vCenter:
Centralized Management: Control multiple ESXi hosts, virtual machines, and networks from a single console.
High Availability (HA) and Fault Tolerance (FT): Allows VMs to automatically restart on another host if a physical host fails.
vMotion and Storage vMotion: Migrates active virtual machines between hosts or datastores without downtime.
Distributed Resource Scheduler (DRS): Automatically balances the workload across physical servers.
The vCenter Server Appliance (VCSA) deployment is divided into two phases: creating the base virtual machine and configuring the internal services. Below, I detail the step-by-step process.
Prerequisites (Very Important)
Before launching the installer, ensure you have:
A live and accessible ESXi host.
A static IP address reserved for vCenter.
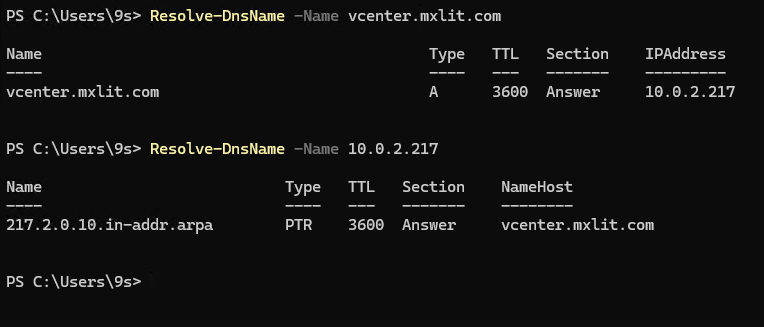
DNS Resolution (Vital): You must have created
A(Forward) andPTR(Reverse) records on your DNS server for the vCenter FQDN. If the DNS fails, the installation will fail.
You can verify the DNS from PowerShell or CMD:
# Verify forward DNS resolution
Resolve-DnsName -Name vcenter.mxlit.com
# Verify reverse DNS resolution
Resolve-DnsName -Name 10.0.2.x
Phase 1: Appliance Deployment (VCSA)
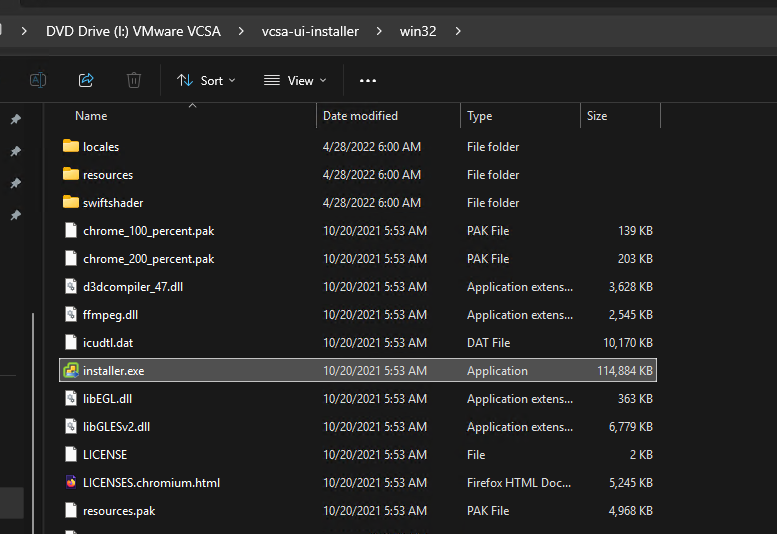
1. Run the Installer
Mount the ISO file downloaded from the VMware portal on your management machine. Navigate to the \vcsa-ui-installer\win32\ directory and run the installer.exe application.
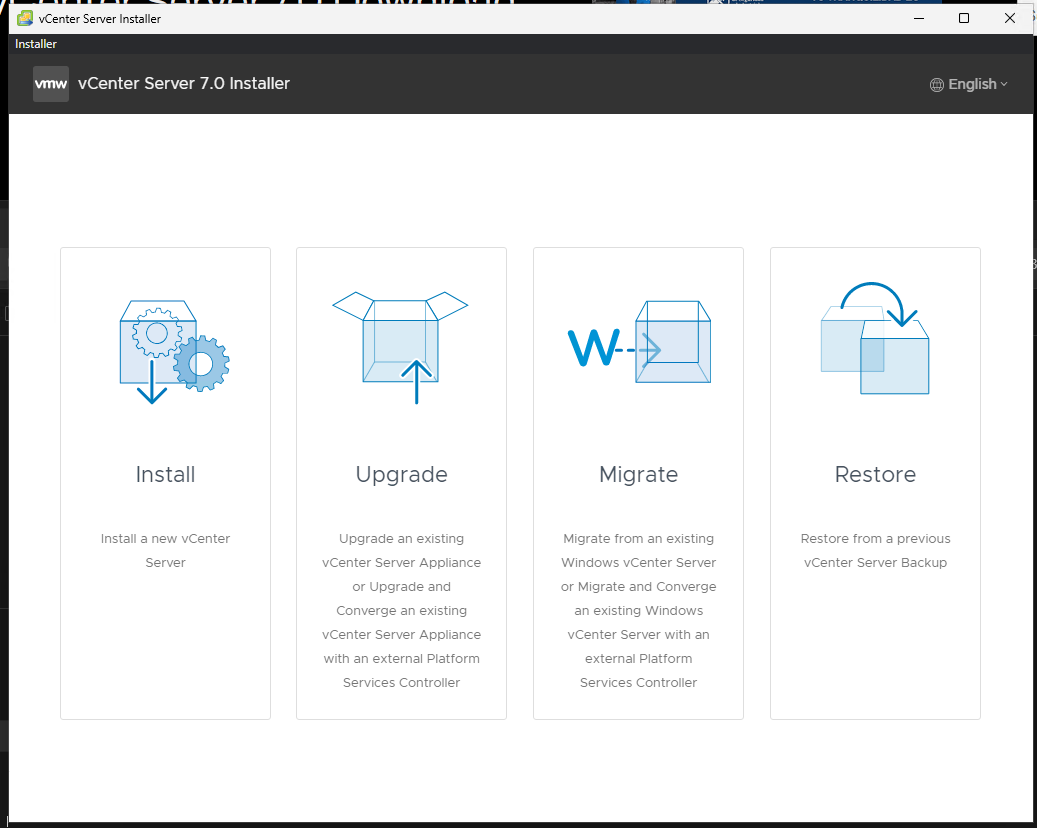
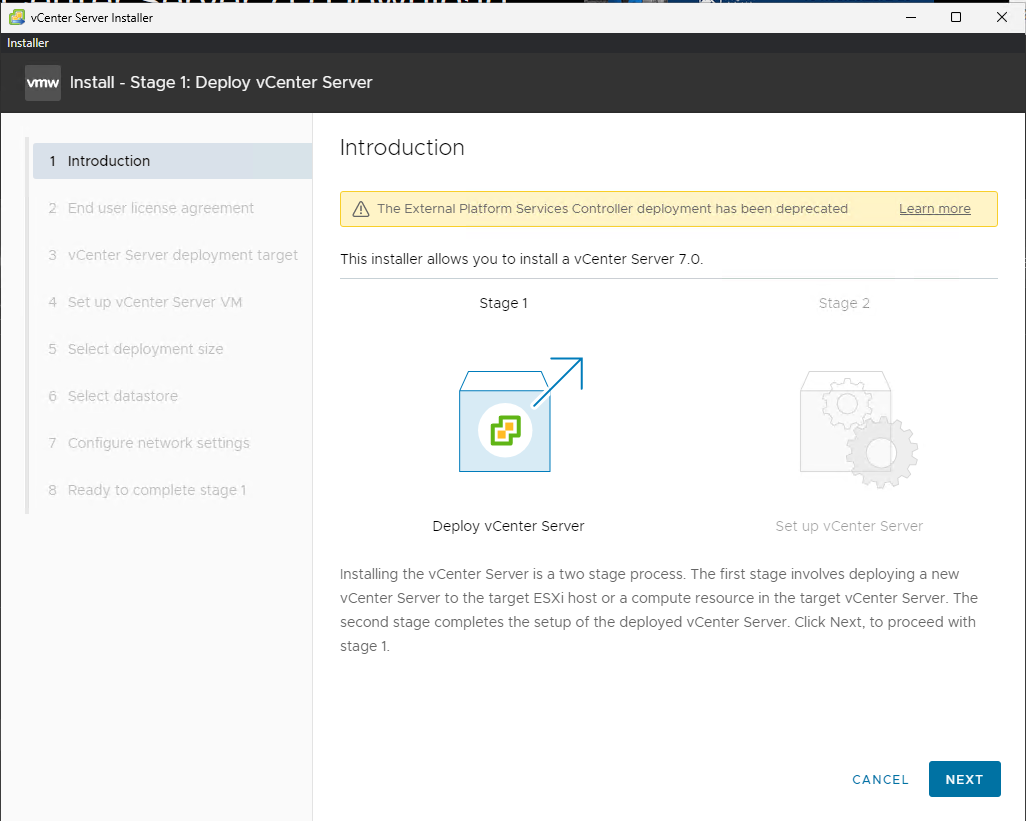
Once the wizard is open, select the Install option to begin a new deployment.
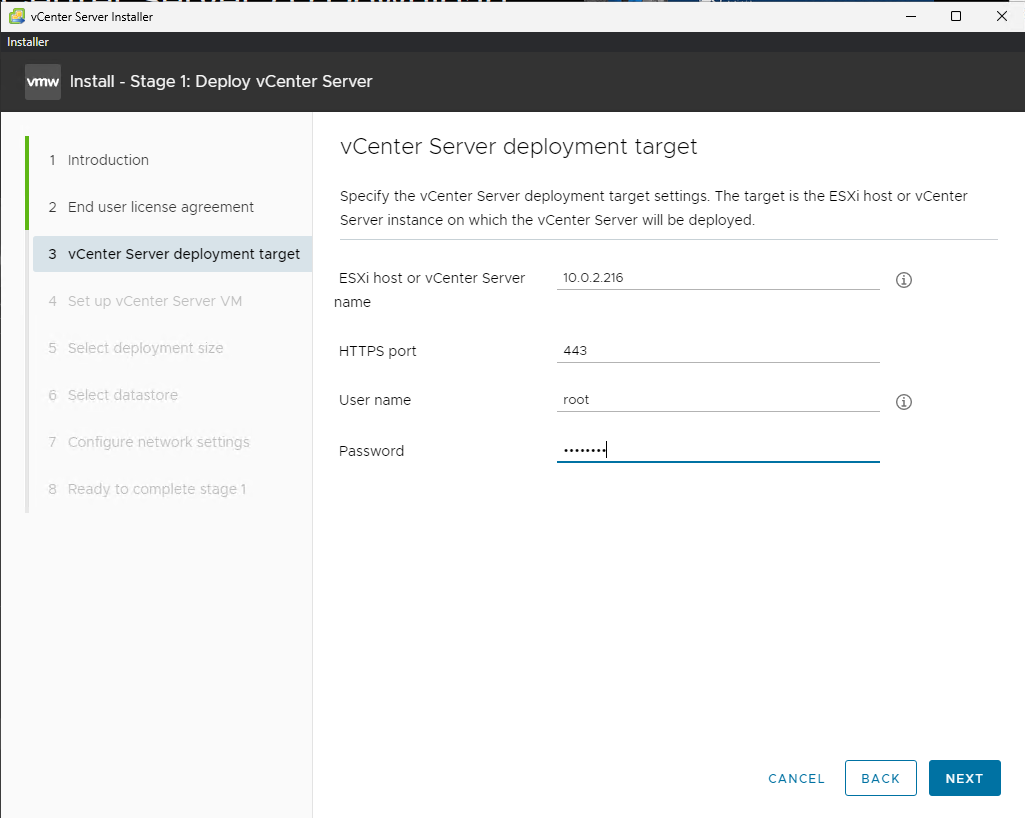
2. Accept License and Define Target
Read and accept the End User License Agreement (EULA). In the next step, specify the ESXi host where this new virtual machine will be located. Enter the host’s IP address or FQDN, the root user, and the password.
Acceptance of EULA and ESXi Target

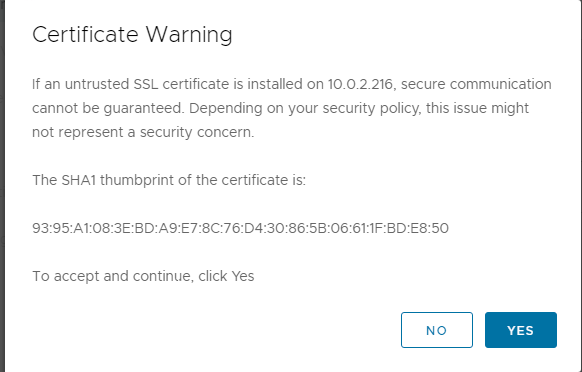
Accept the certificate
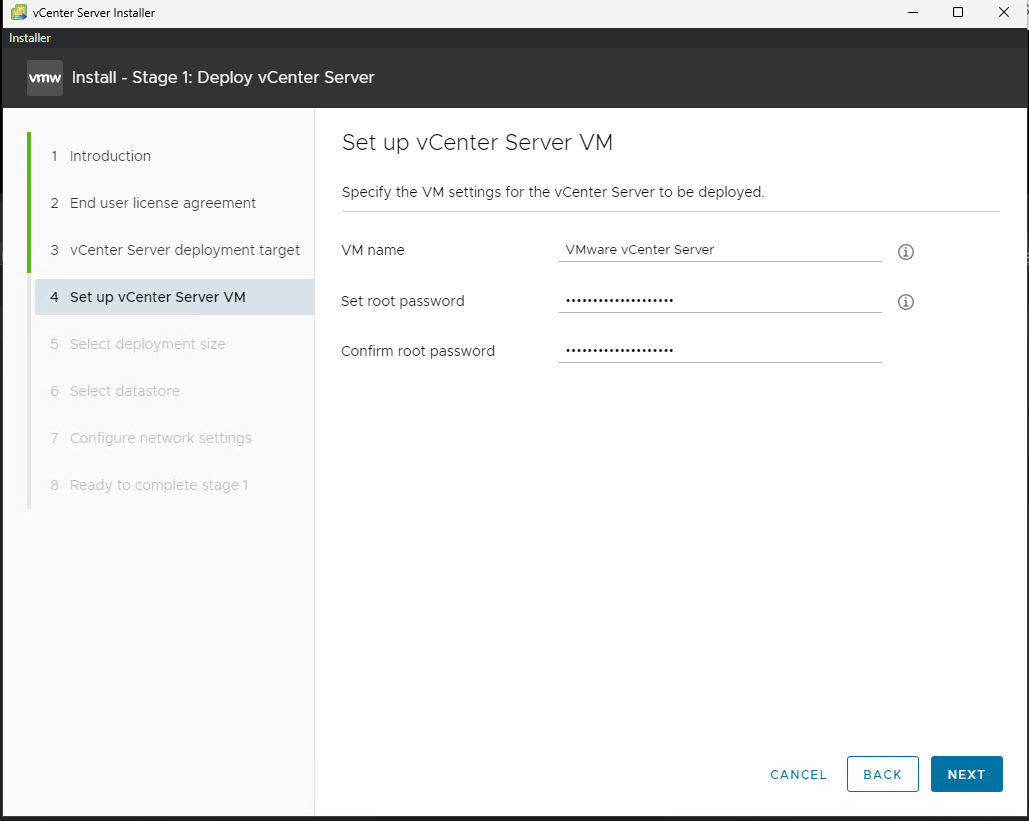
Add your VM (vCenter) name and assign a password to root
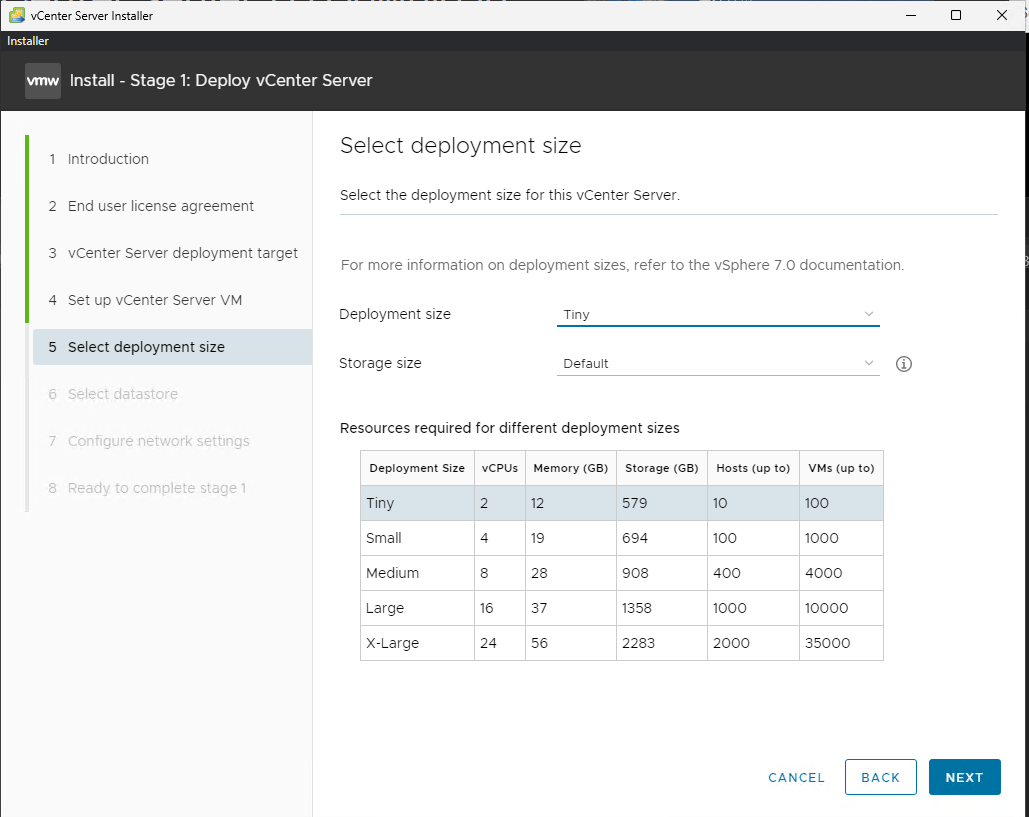
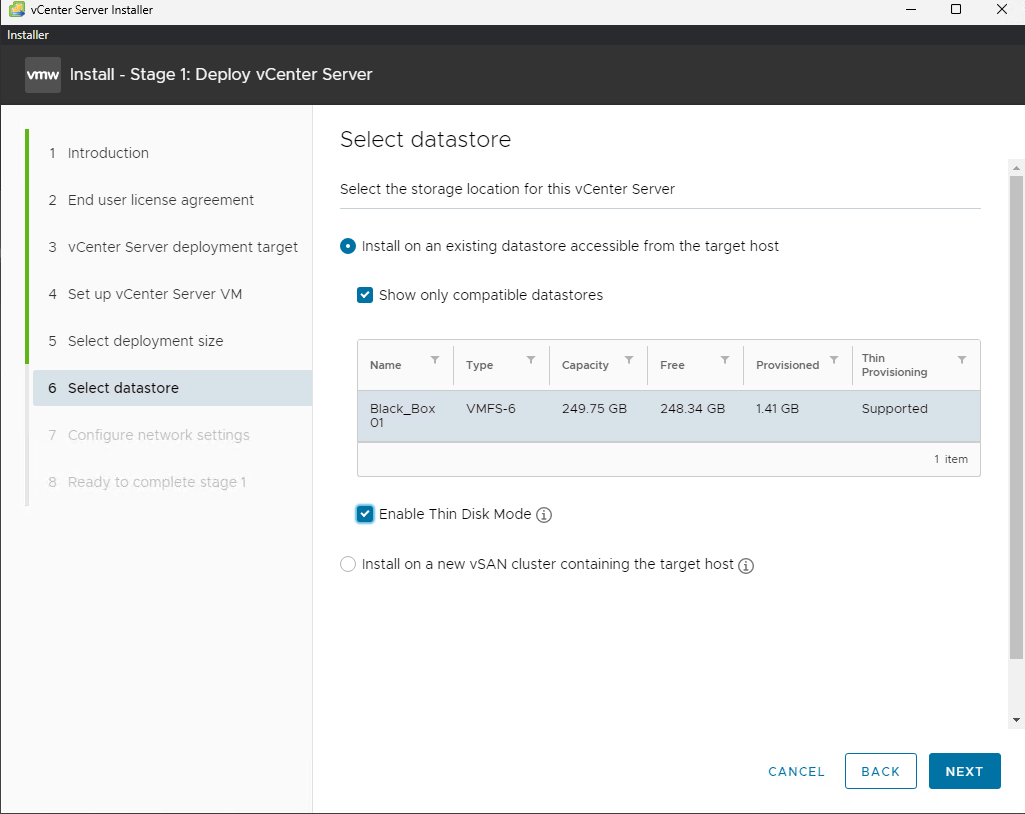
3. Storage (Thin Provisioning)
After naming the virtual machine, select the Datastore where the files will be stored.
Recommendation: Check the Enable Thin Disk Mode box. This prevents provisioning all the storage space at once; the disk will only grow as vCenter actually uses the space.
Datastore and Thin Disk Selection
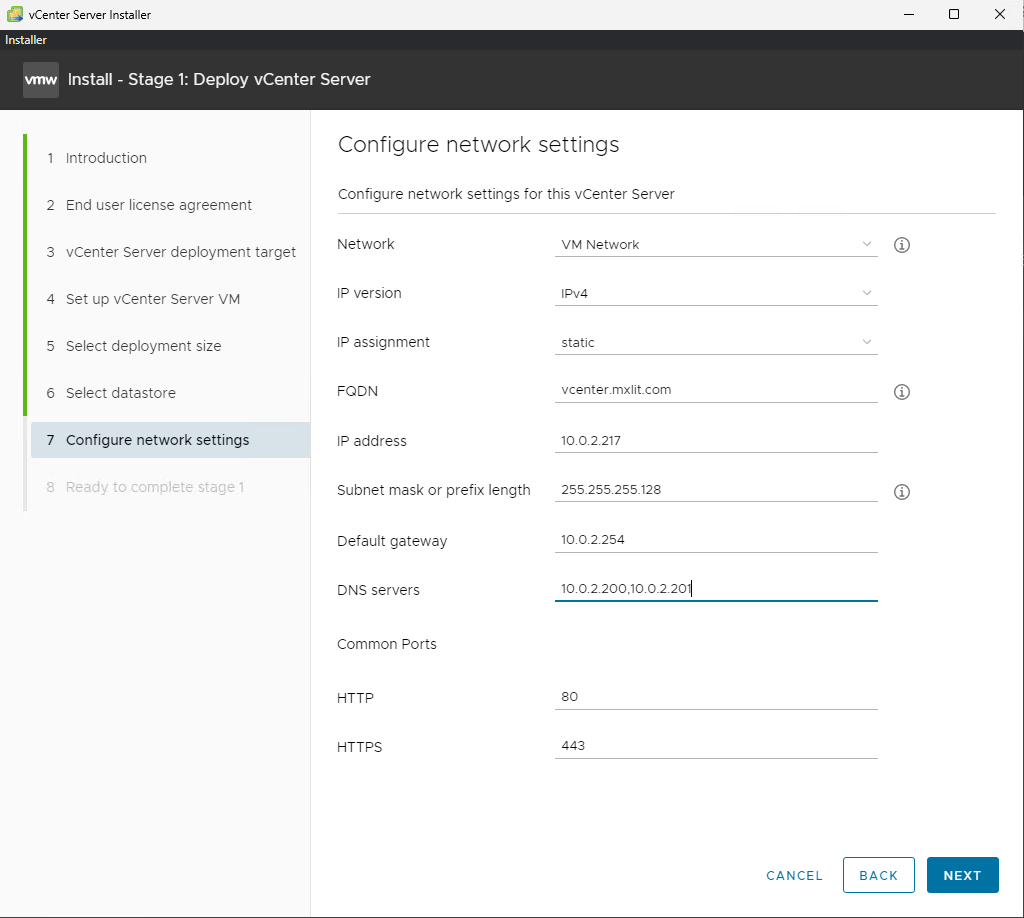
4. Network Configuration and Deployment
Enter the network parameters (Static IP, FQDN, Gateway, DNS). Finish the wizard to begin deploying the OVA file to your ESXi host.
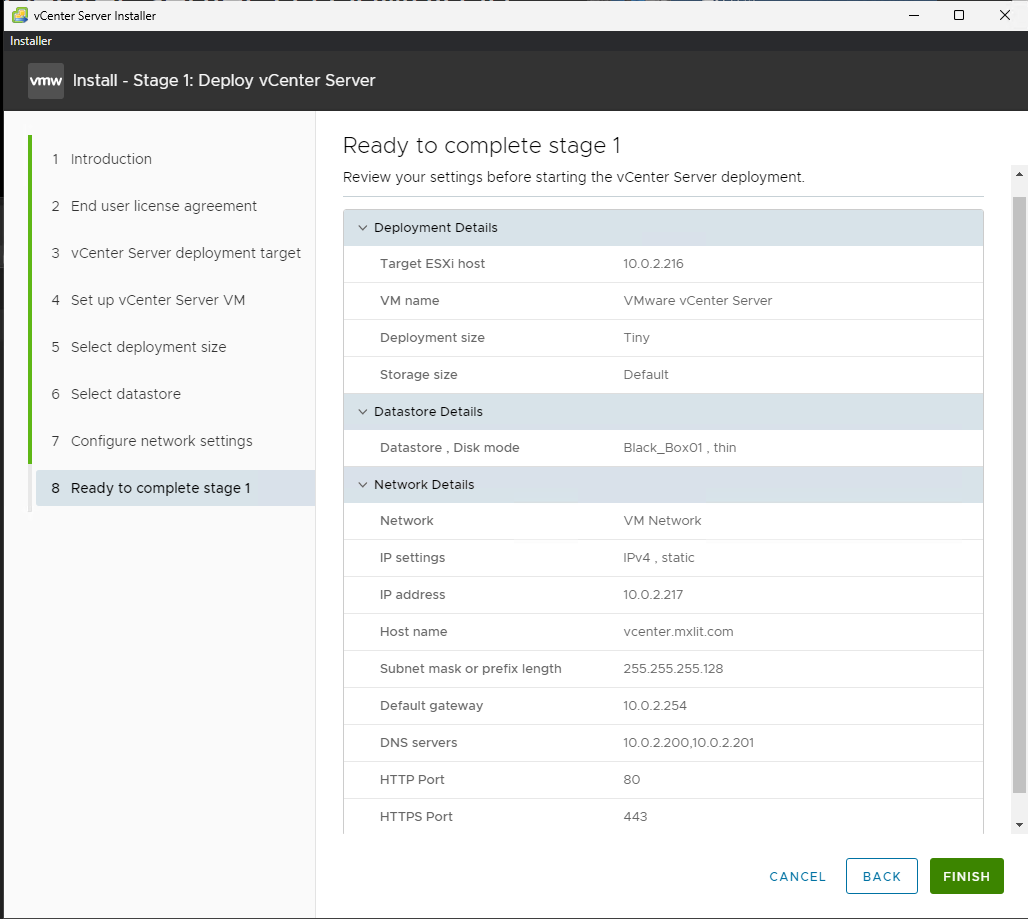
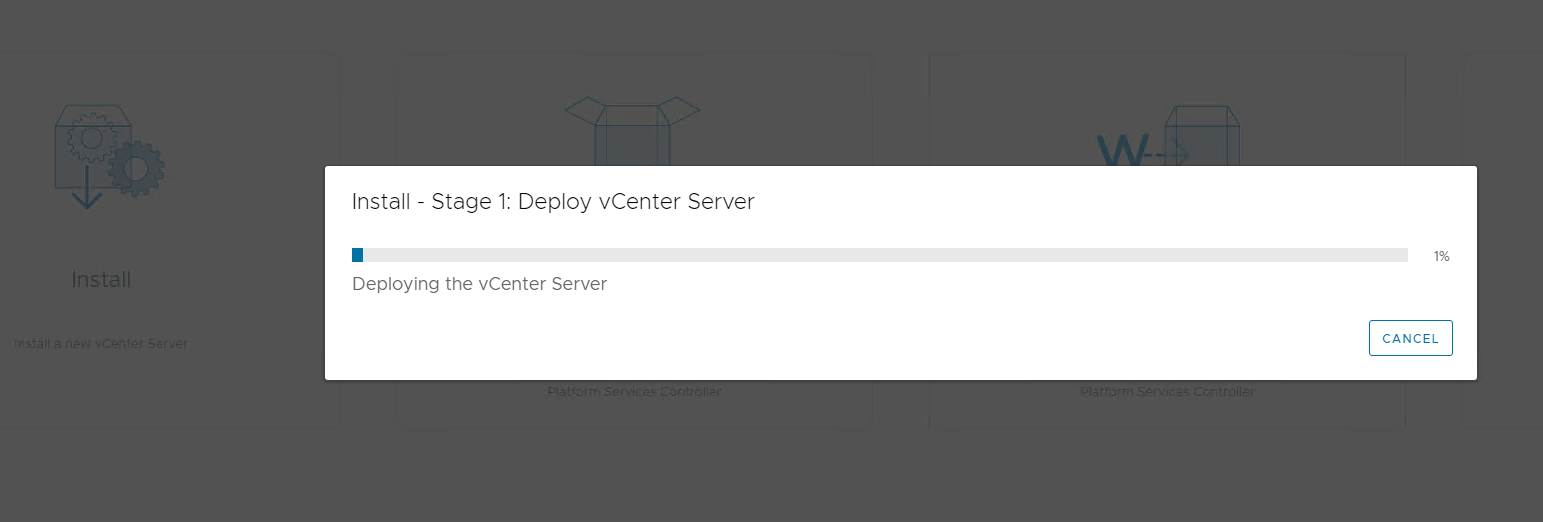
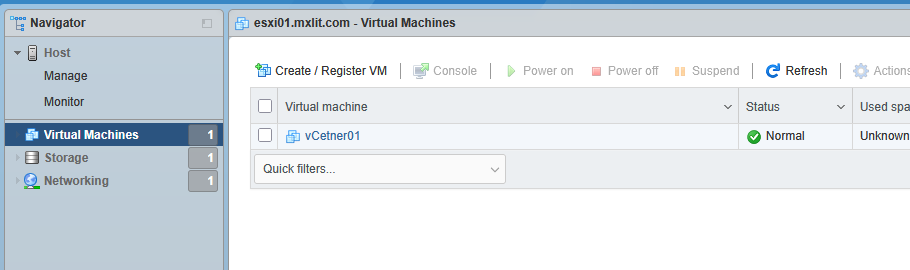
You will see a progress bar. If you go to your ESXi web console, you will see the virtual machine (e.g., vCetner01) being created and starting automatically.
Phase 1 Progress and VM on ESXi
Phase 2: vCenter Server Configuration
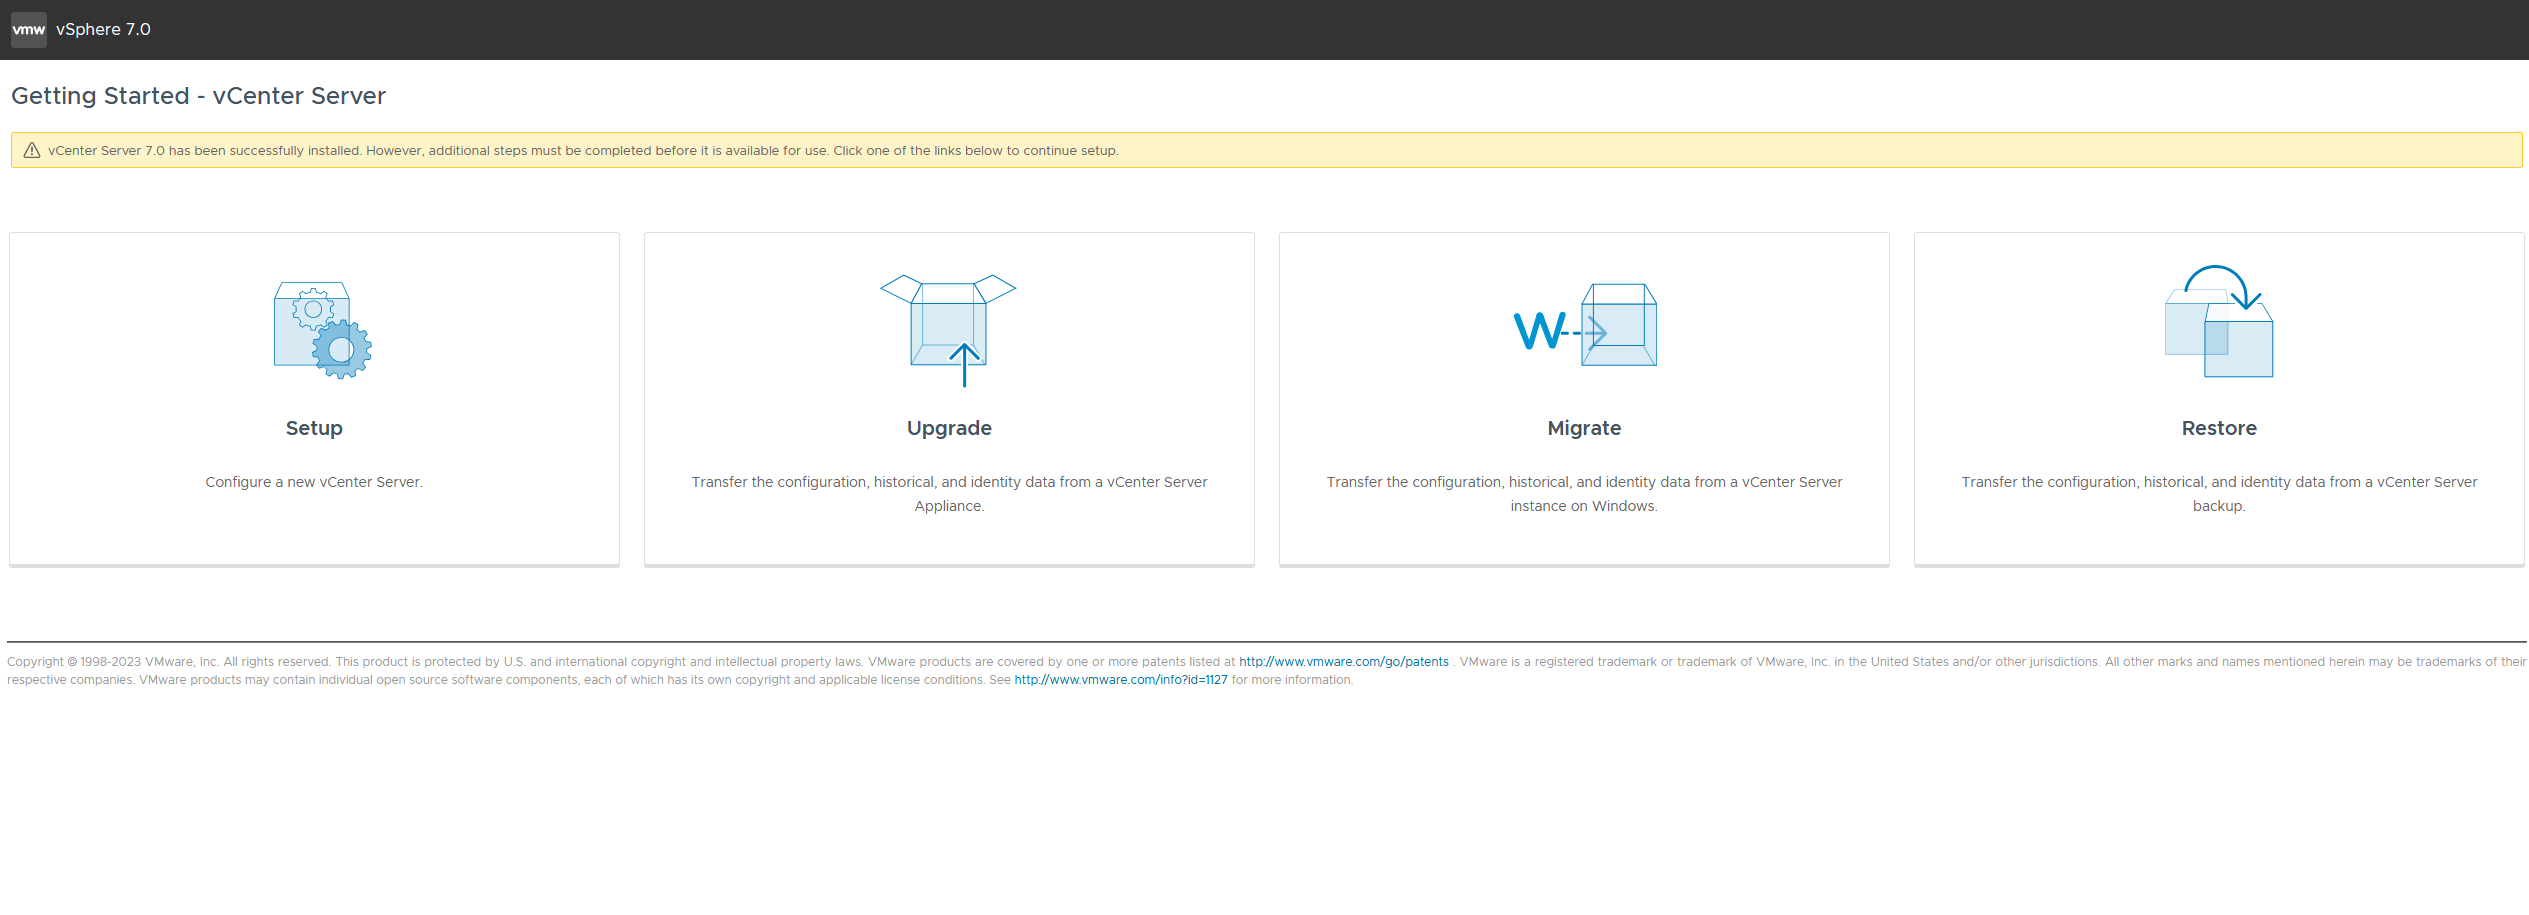
Once Phase 1 completes successfully with the message “vCenter Server has been successfully installed”, the installer will take you directly to Phase 2.
1. Start the Setup Wizard
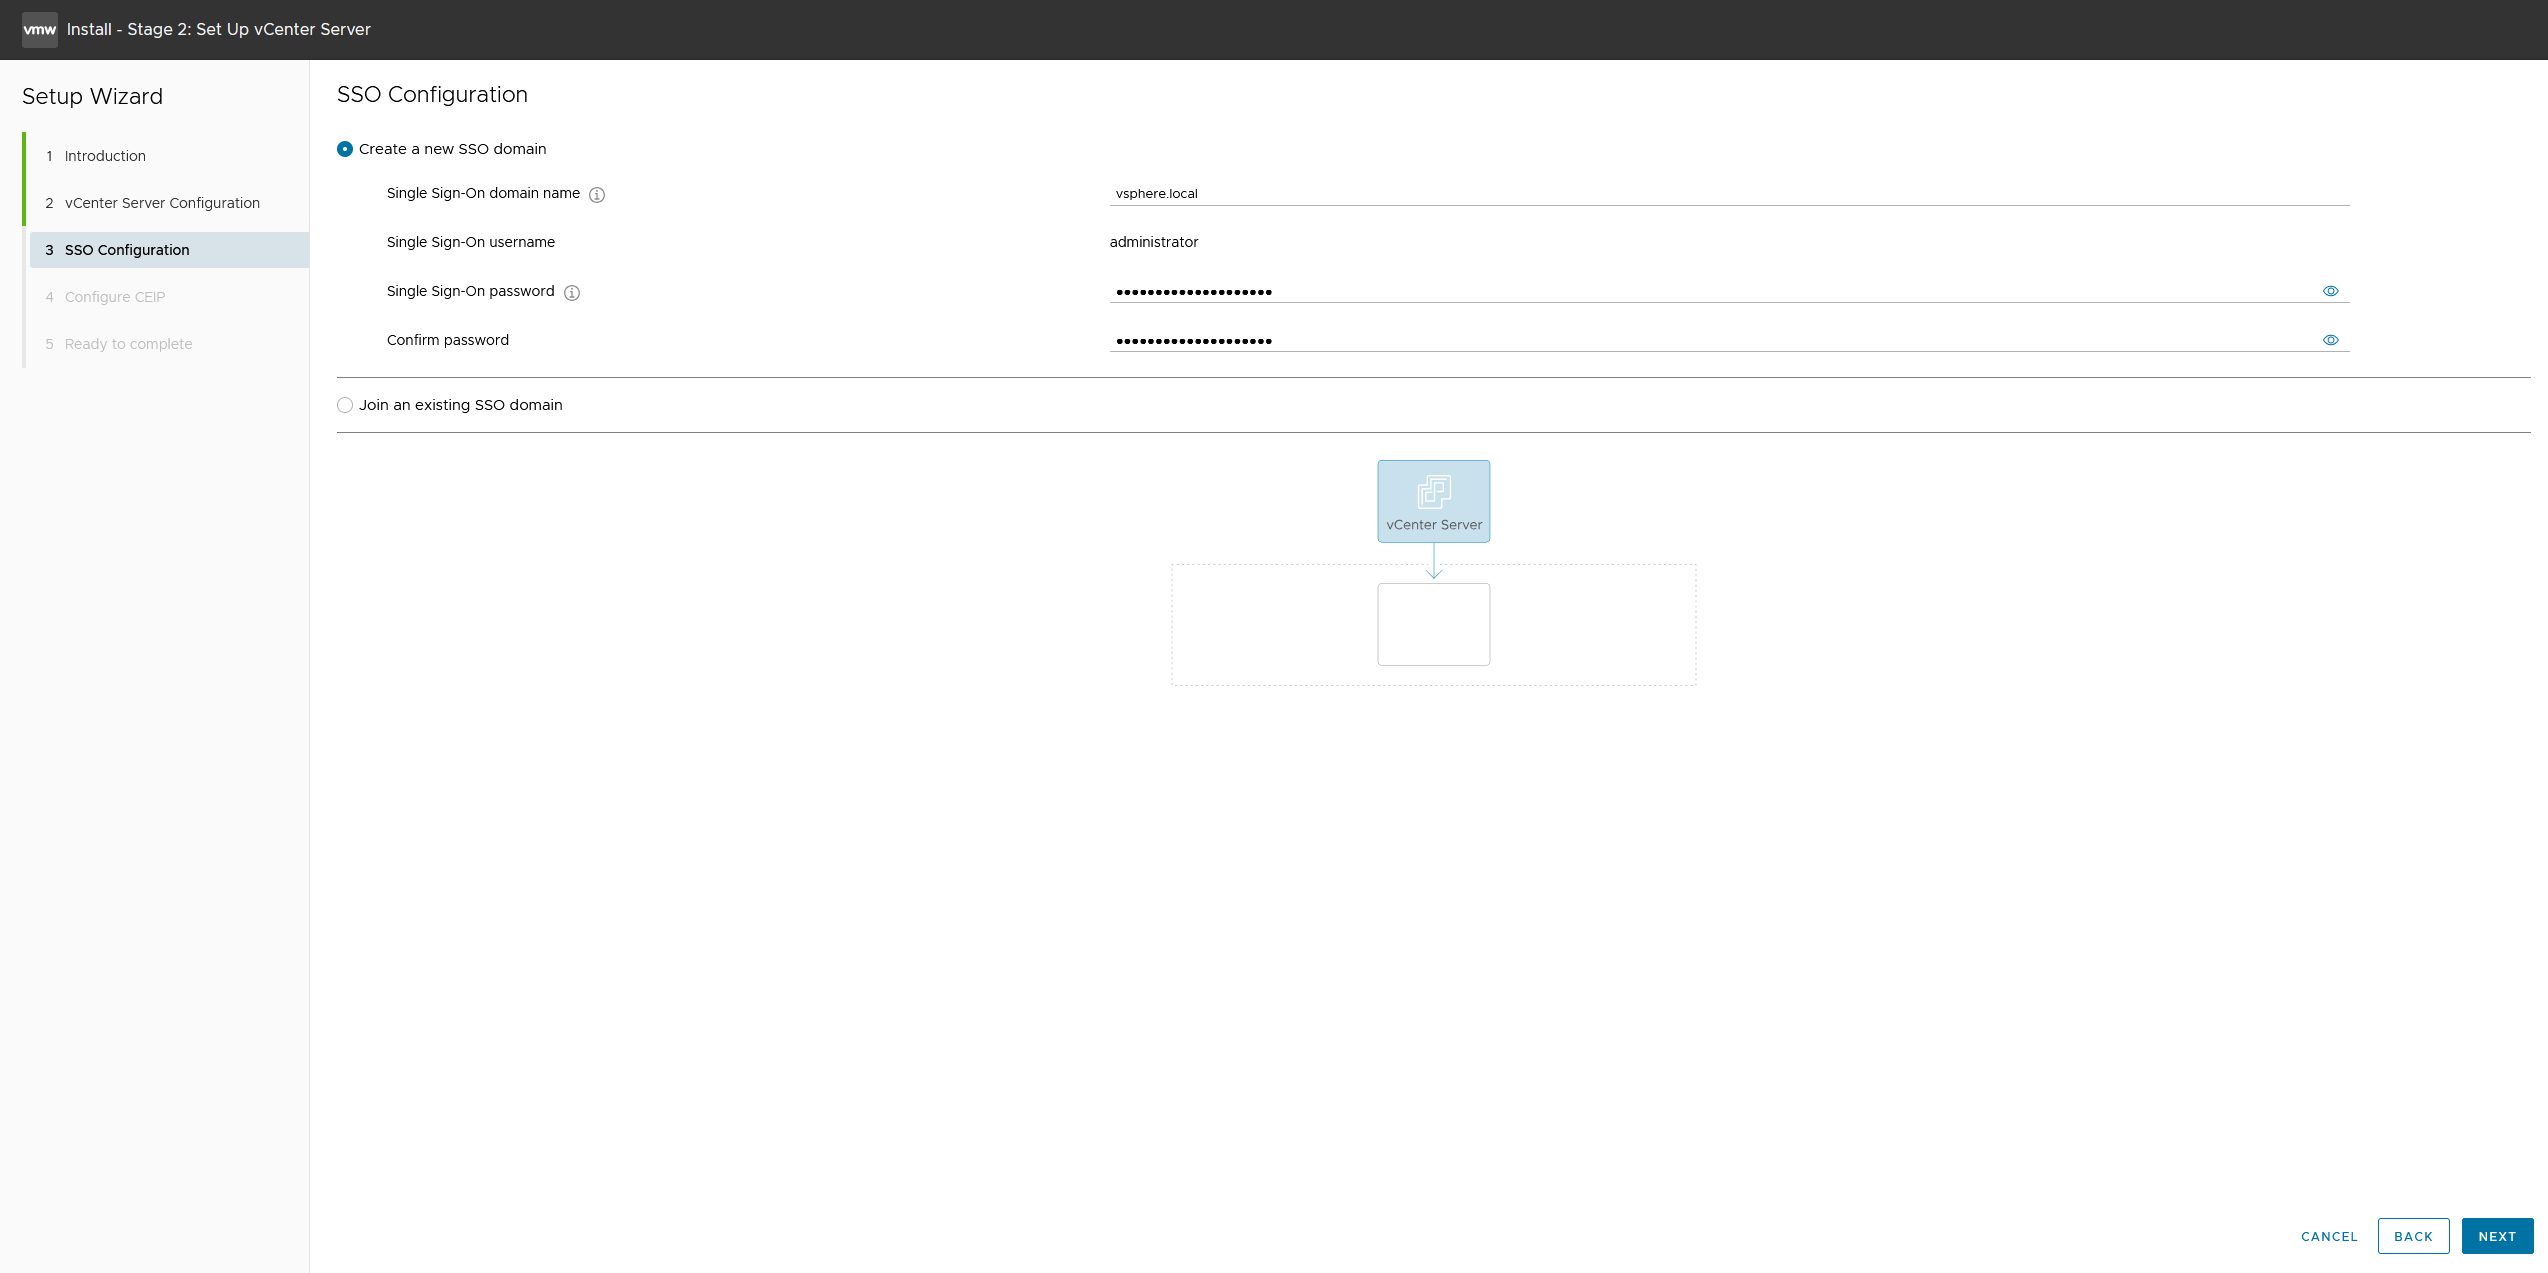
Click Next in the Phase 2 introduction to begin configuring the Single Sign-On (SSO) domain and internal network services.
Start of Phase 2

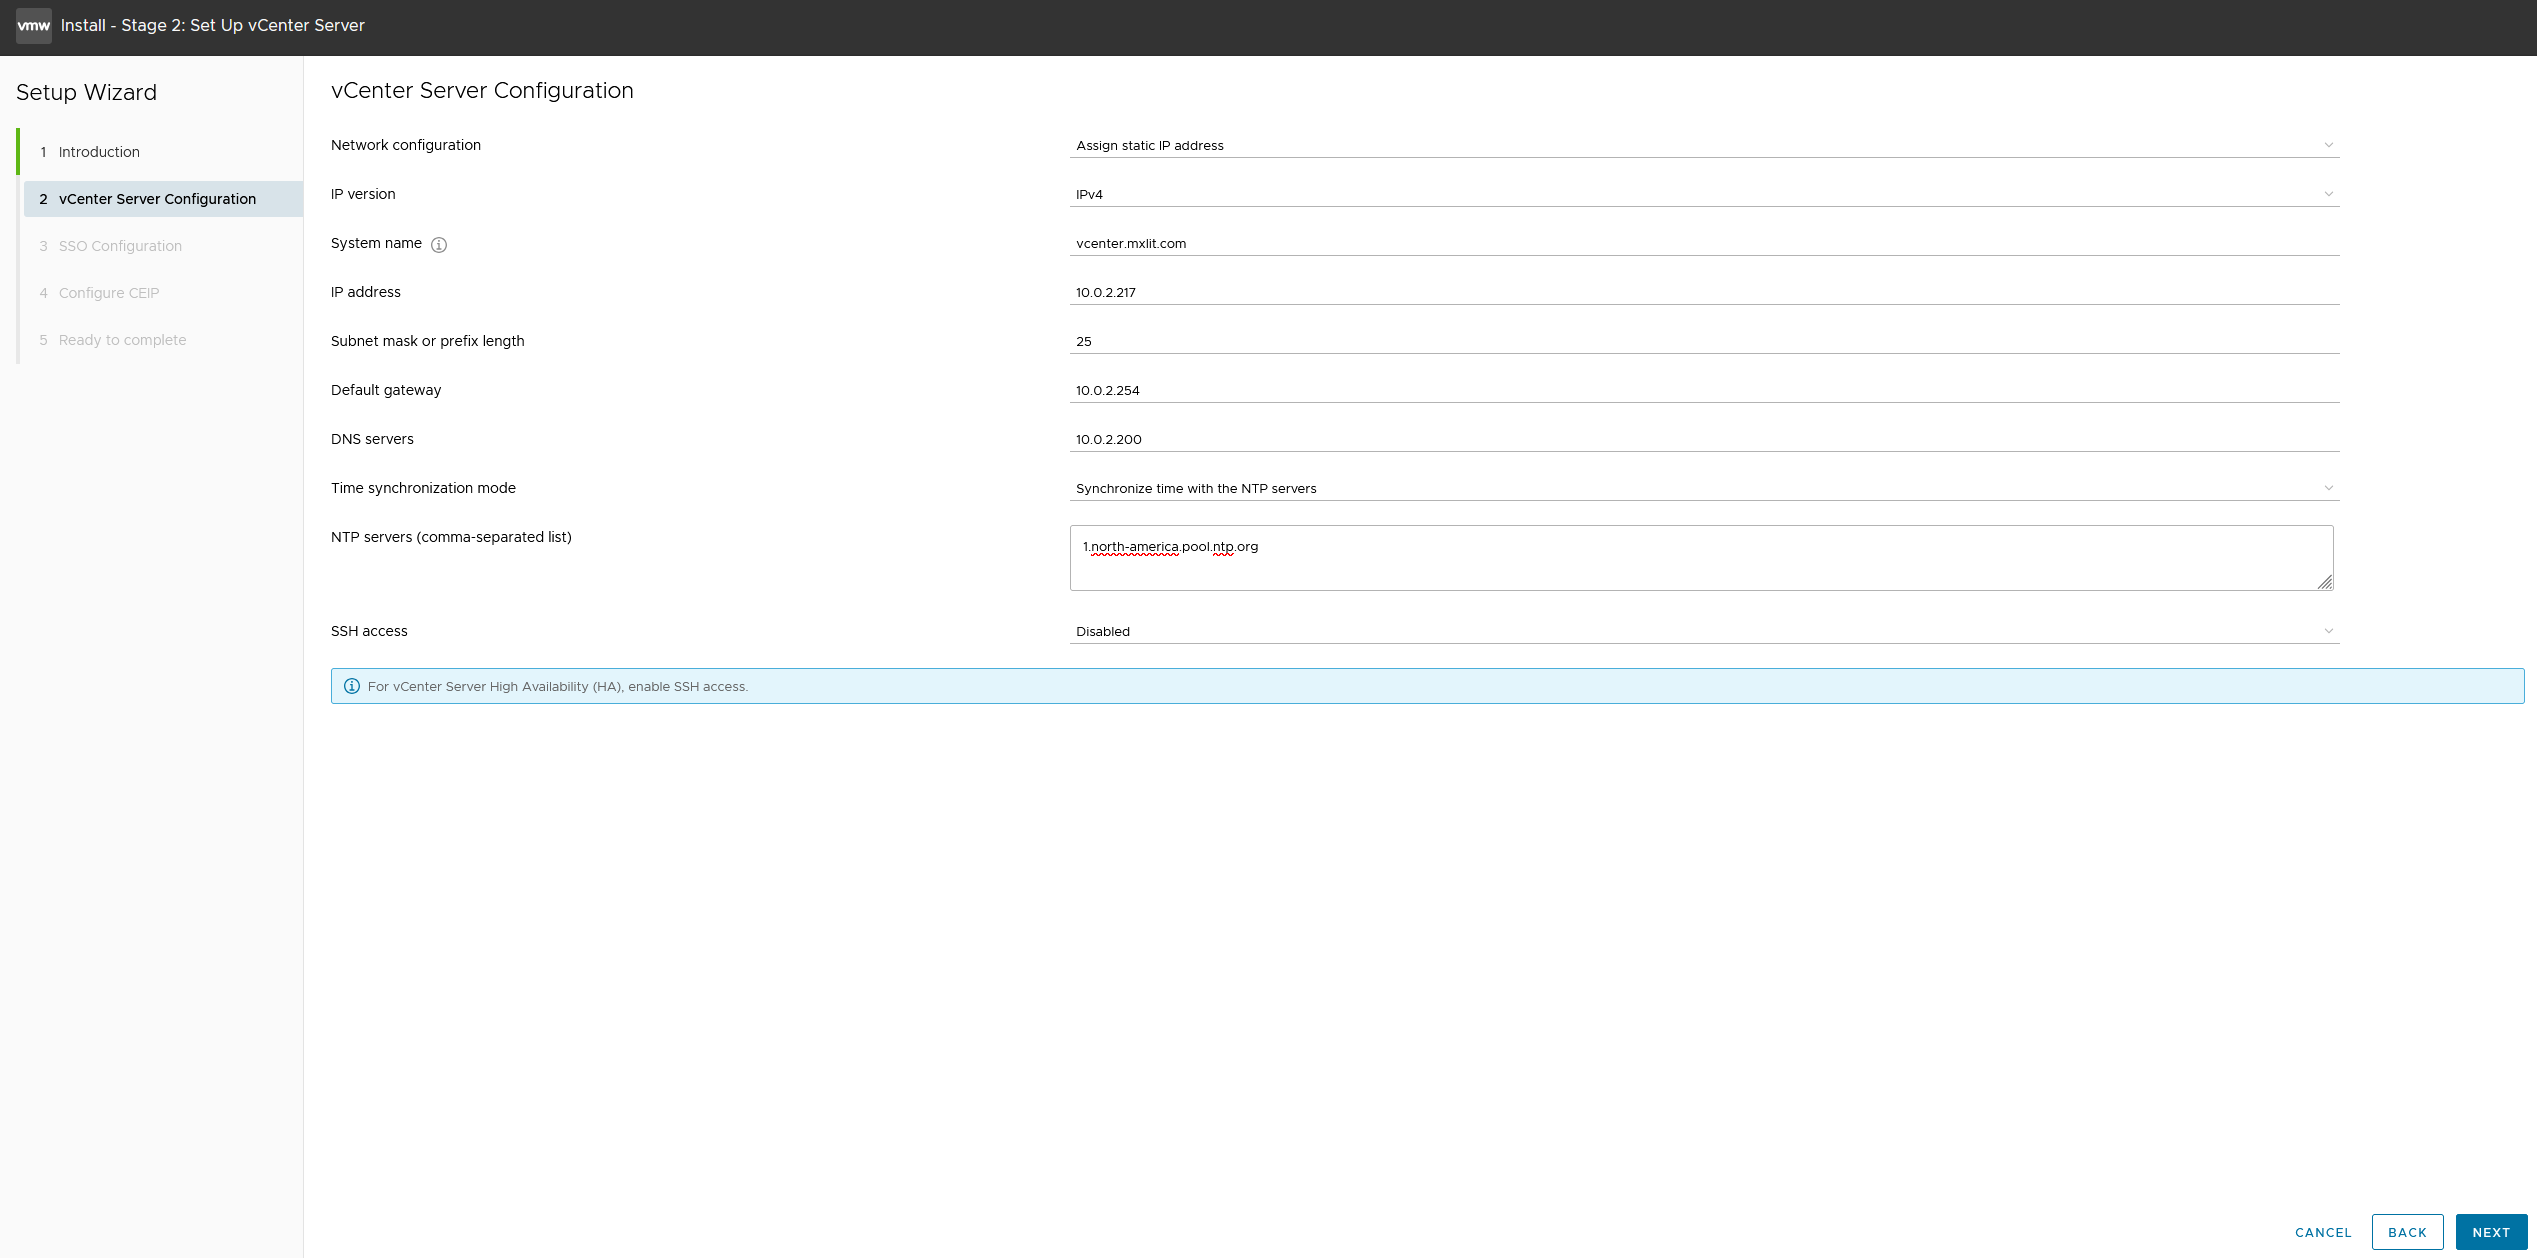
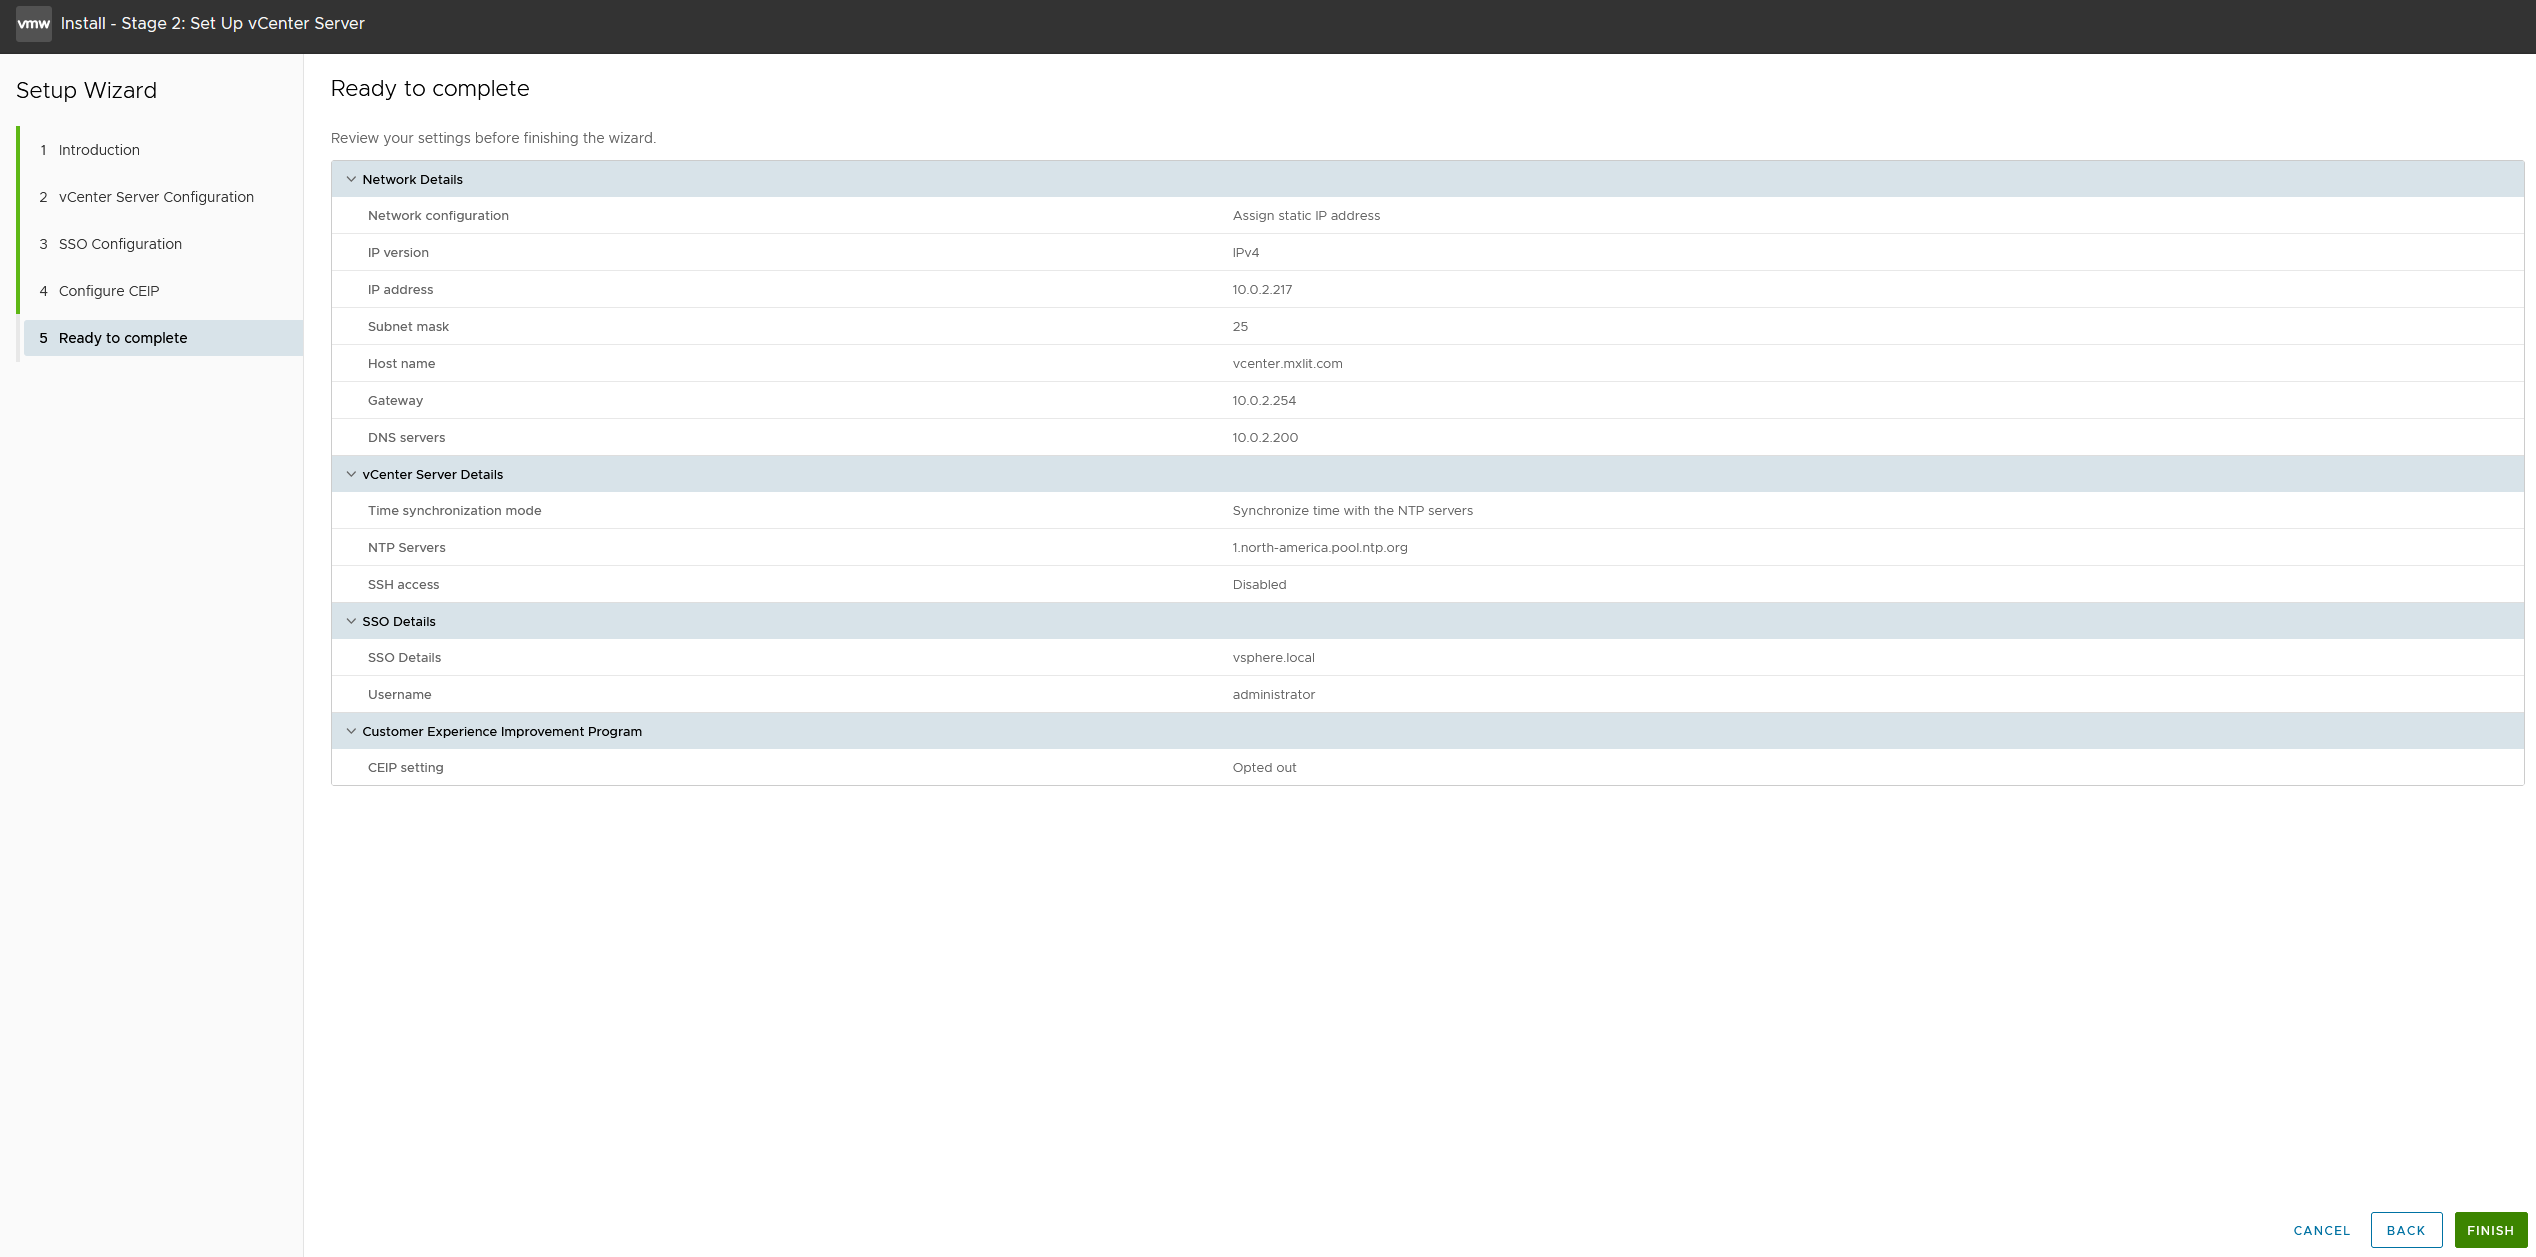
2. Review and Confirmation
The wizard will prompt you to configure the SSO domain (by default vsphere.local) and review the network configuration. Once you’ve verified that everything is correct, click Finish.
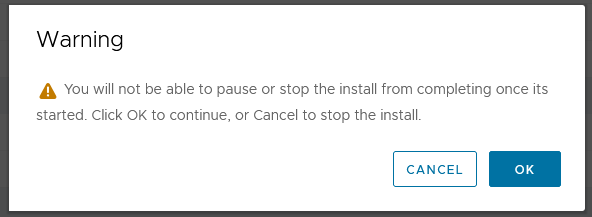
A Warning will appear indicating that once the process has started, you will not be able to pause or stop it. Click OK to proceed.
Installation Review and Warning

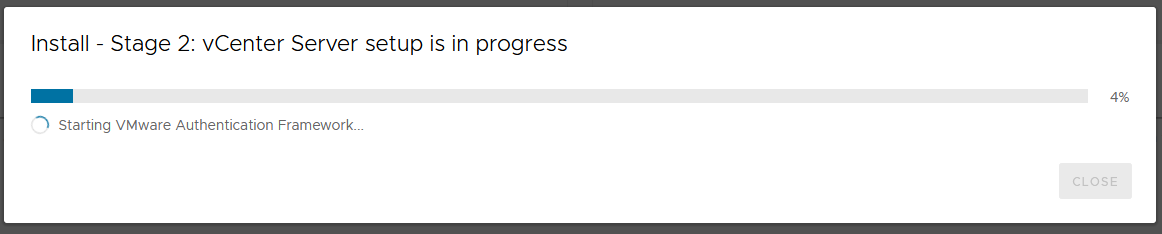
3. Service Installation
You will see a progress bar indicating “vCenter Server setup is in progress”. This step takes time as it initializes the database and starts services such as the VMware Authentication Framework.
Phase 2 Progress
4. Final Verification
When the process is complete, you will be provided with the access URL. InAccess the vSphere Client Dashboard from your web browser and authenticate with the SSO credentials you configured (e.g., [email protected]).
vSphere Client Dashboard
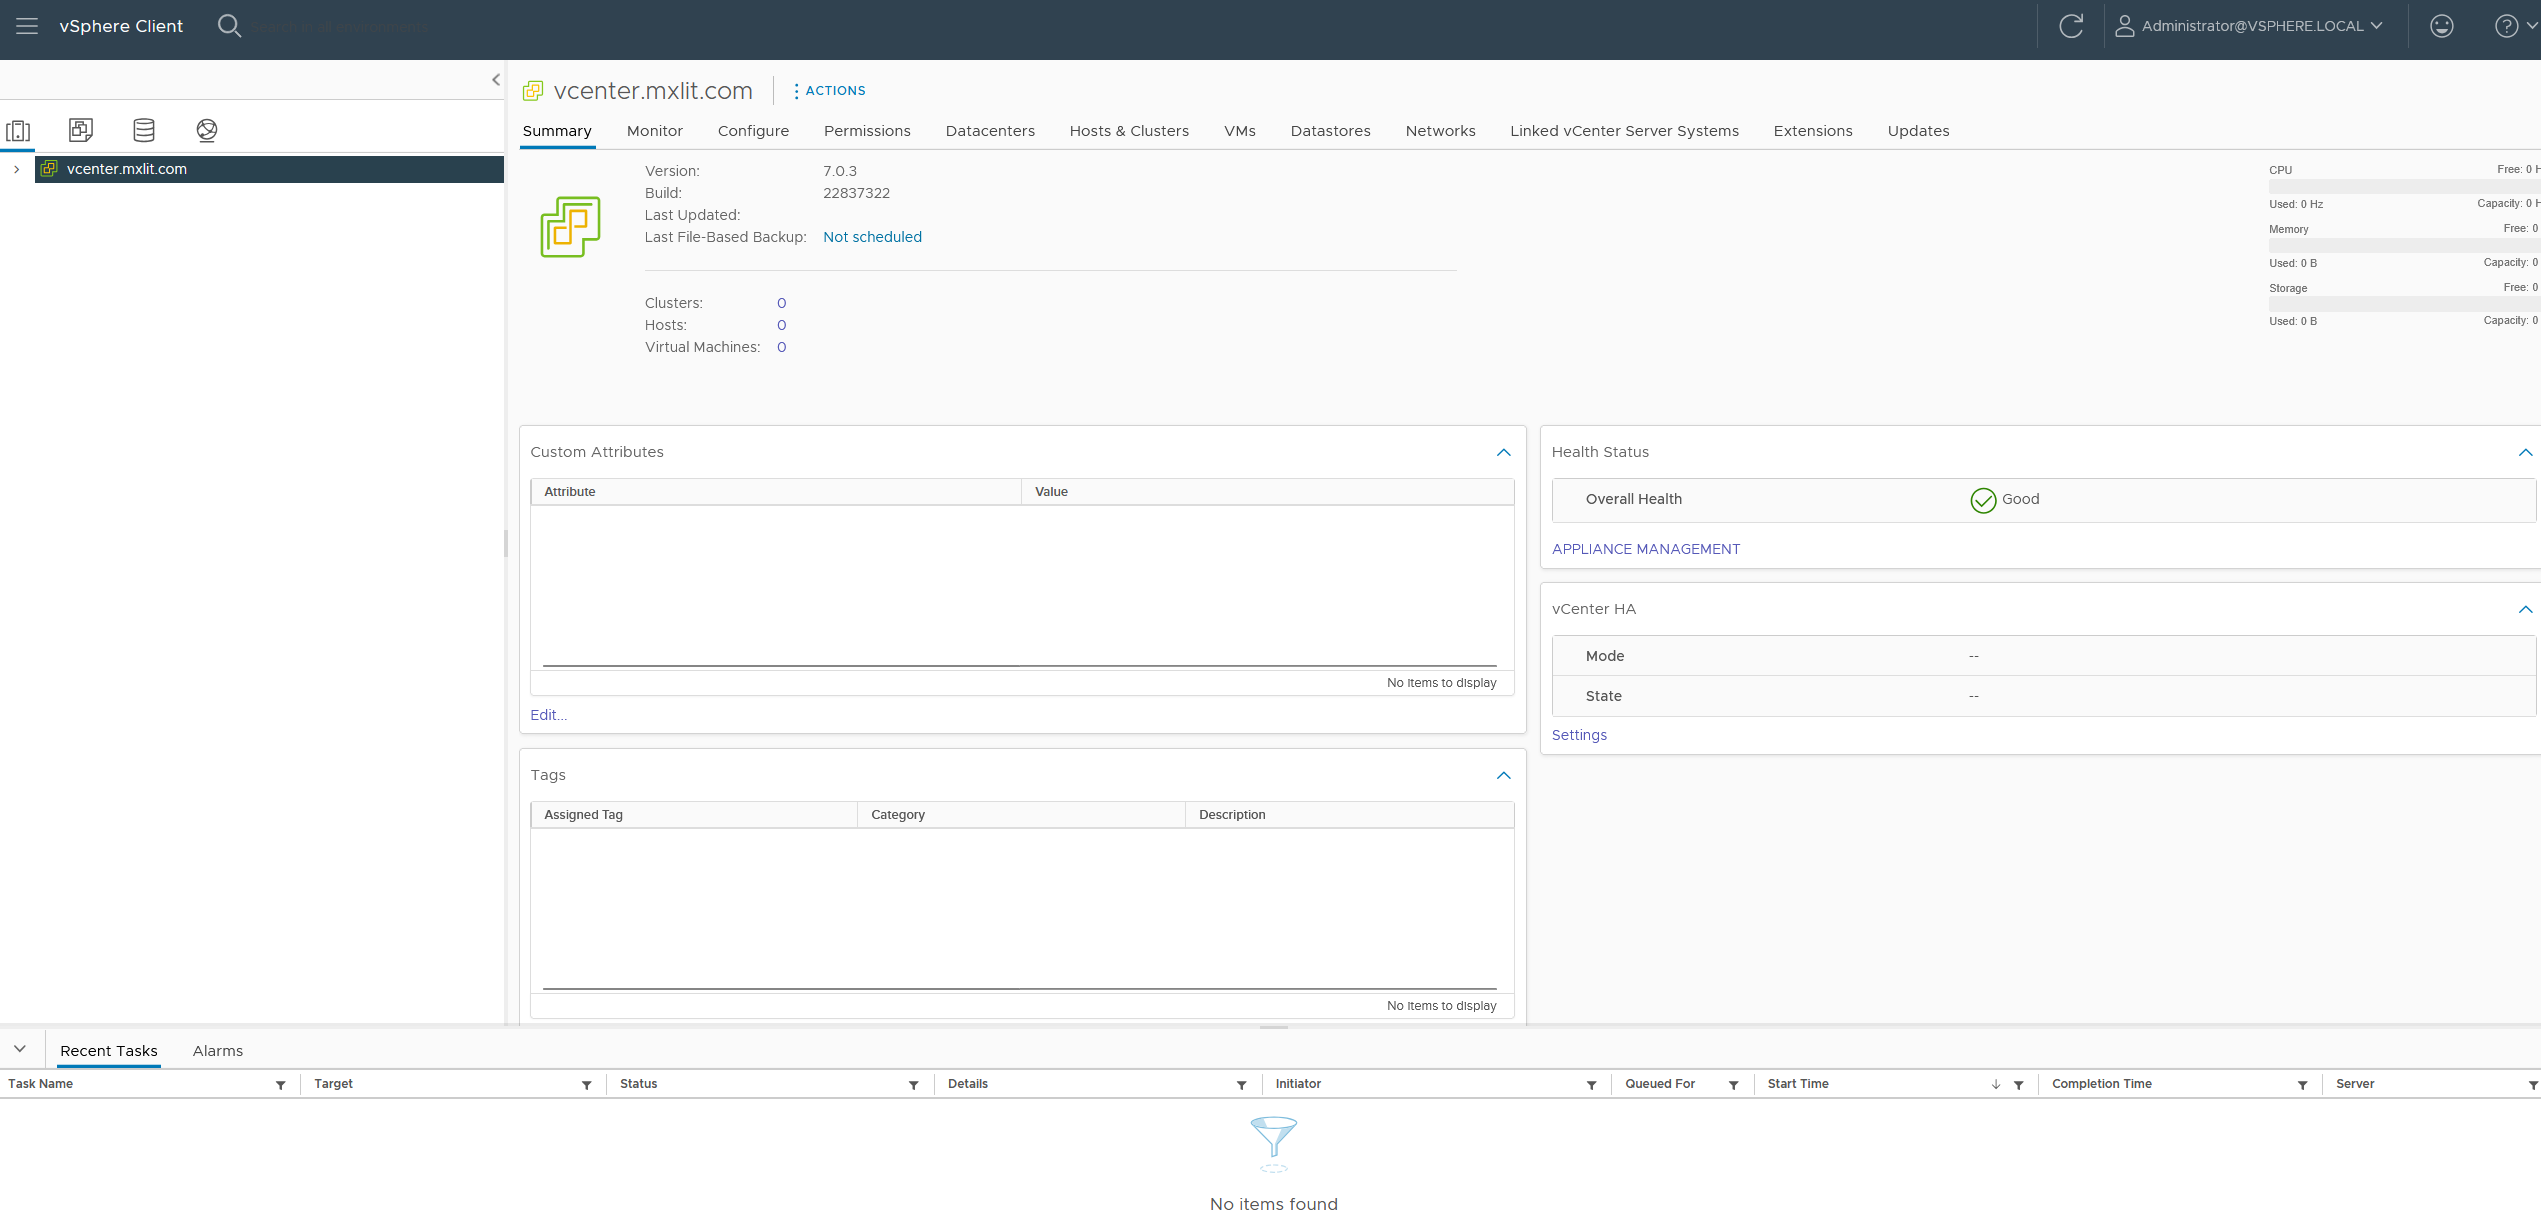
Done! You now have access to the vSphere Client dashboard, and your vCenter is fully operational.
Conclusion
Deploying vCenter Server may seem like a lengthy process, divided into two phases, but the installer makes it quite intuitive. The real trick lies in the preparation: ensuring a static IP address, correct DNS records (both forward and reverse), and enabling thin disk provisioning to avoid consuming your datastore storage from day one.
With your vCenter up and running, the next logical step is to create your first data center, add your ESXi hosts, and start exploring advanced features such as creating templates or configuring distributed networks.