
Static site generators (SSGs) like Hugo are unbeatable in speed and security. By compiling everything into pure HTML files, we eliminate attack vectors and database dependencies. However, a classic problem arises: How do we add basic interactivity, such as a “Likes” counter, without ruining the static nature of the site?
Initially, the easy answer is to integrate a third-party service (SaaS). It’s fast and it works. But as infrastructure engineers, relying on an external API presents us with two fundamental problems: the loss of sovereignty over our data and the inevitable paywalls that arise when traffic increases. The ultimate solution isn’t to look for a heavyweight open-source clone, but to build our own minimalist microservice.
Minimalist Architecture and Zero-Trust Security
The goal was to build a near-zero resource consumption backend (less than 30MB of RAM) using Python (FastAPI) and SQLite. To protect the infrastructure, we implemented a two-layer security model supported by Cloudflare Tunnels:
- Network Isolation: The API container doesn’t expose any ports to the host. It resides in an internal Docker network (
cloudflare_internal_net) where thecloudflareddaemon routes it to the outside (api.mydomain.com). - Access Control (CORS and API Key): Public routes (for logging likes) are protected by strict CORS policies. Administrative routes (the dashboard) require a secret key (
X-API-Key) injected into the HTTP headers. - Local Anti-Spam: Instead of saturating the database by logging IPs, we use
localStoragein the user’s browser to block duplicate interactions, leaving Cloudflare’s WAF to stop actual volumetric attacks.
1. Create the structure
Create a dedicated folder for this microservice.

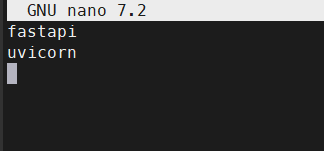
Create the requirements
requirements.txt
 Add
Add
- fastapi
- uivorn
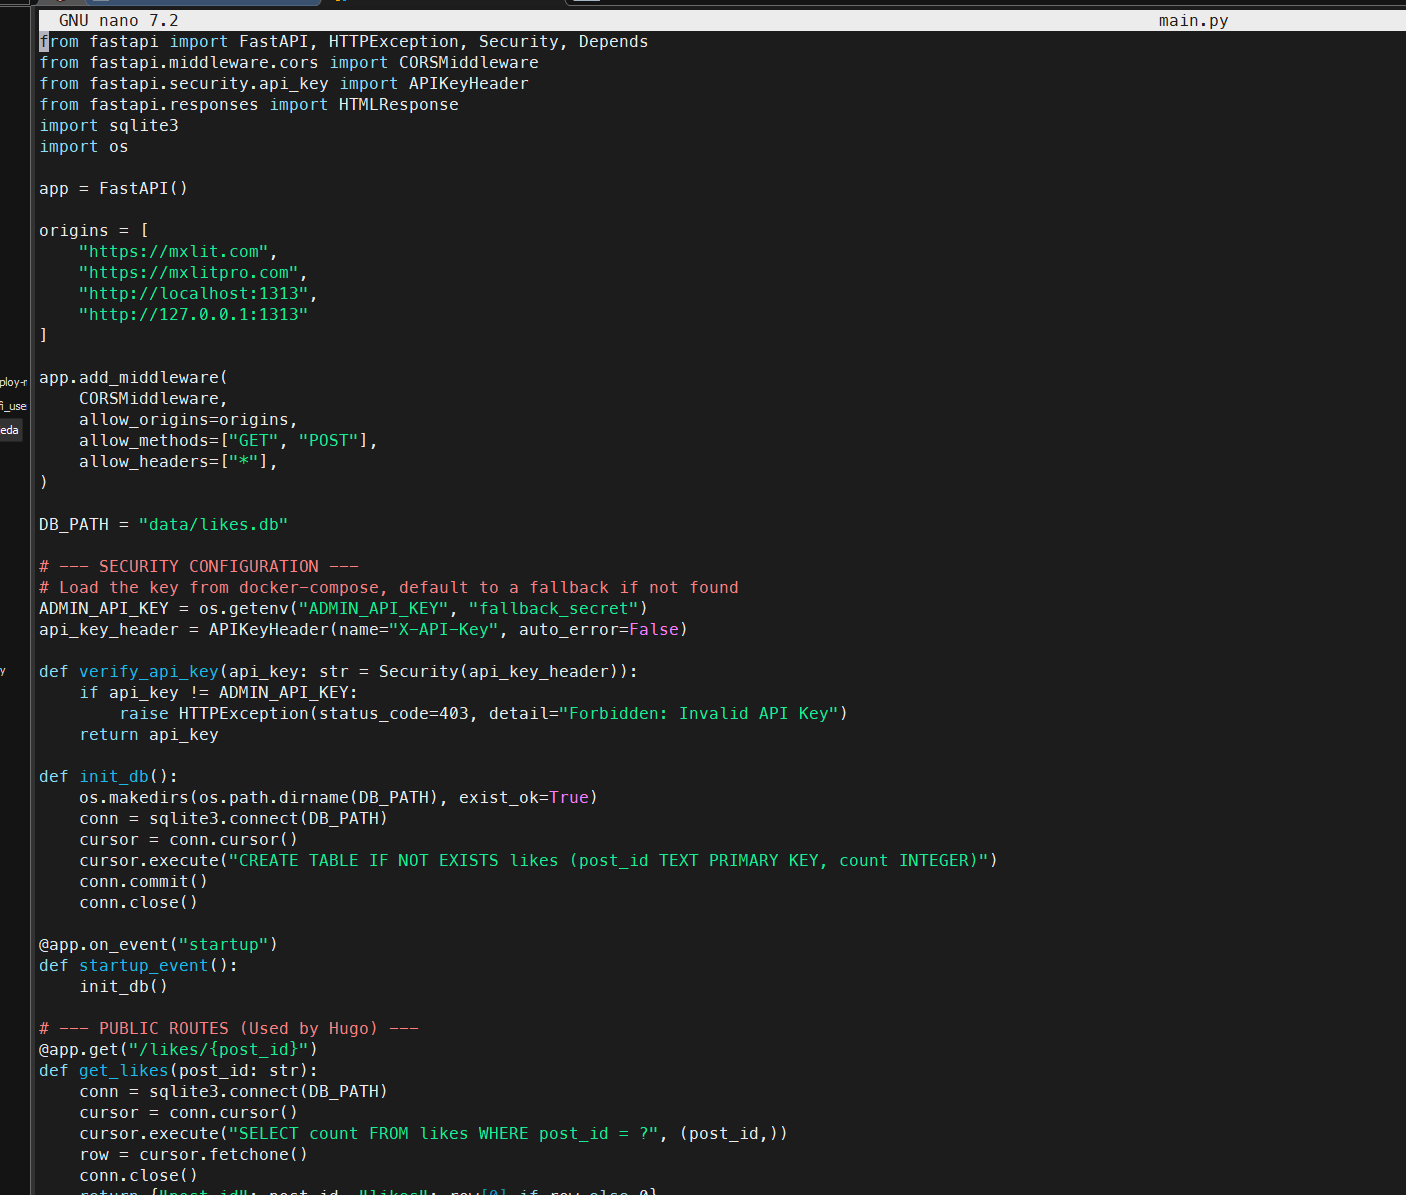
1. The Backend (main.py)
This FastAPI script starts the database, exposes the public endpoints for the blog, and protects the administrative paths.
from fastapi import FastAPI, HTTPException, Security, Depends
from fastapi.middleware.cors import CORSMiddleware
from fastapi.security.api_key import APIKeyHeader
from fastapi.responses import HTMLResponse
import sqlite3
import os

app = FastAPI()

# Allow CORS only from approved domains
origins = [
    "[https://mxlit.com](https://mxlit.com)",
    "http://localhost:1313",
    "[http://127.0.0.1:1313](http://127.0.0.1:1313)" #<-- Add your local IP for testing!
]

app.add_middleware(
    CORSMiddleware,
    allow_origins=origins,
    allow_methods=["GET", "POST"],
    allow_headers=["*"],
)

DB_PATH = "data/likes.db"

# --- SECURITY CONFIGURATION ---
# Load the secret key from environment variables
ADMIN_API_KEY = os.getenv("ADMIN_API_KEY", "fallback_secret")
api_key_header = APIKeyHeader(name="X-API-Key", auto_error=False)

def verify_api_key(api_key: str = Security(api_key_header)):
    if api_key != ADMIN_API_KEY:
        raise HTTPException(status_code=403, detail="Forbidden: Invalid API Key")
    return api_key

def init_db():
    # Ensure directory exists and create table on first run
    os.makedirs(os.path.dirname(DB_PATH), exist_ok=True)
    conn = sqlite3.connect(DB_PATH)
    cursor = conn.cursor()
    cursor.execute("CREATE TABLE IF NOT EXISTS likes (post_id TEXT PRIMARY KEY, count INTEGER)")
    conn.commit()
    conn.close()

@app.on_event("startup")
def startup_event():
    init_db()

# --- PUBLIC ROUTES (Used by Hugo) ---
@app.get("/likes/{post_id}")
def get_likes(post_id: str):
    conn = sqlite3.connect(DB_PATH)
    cursor = conn.cursor()
    cursor.execute("SELECT count FROM likes WHERE post_id = ?", (post_id,))
    row = cursor.fetchone()
    conn.close()
    return {"post_id": post_id, "likes": row[0] if row else 0}

@app.post("/likes/{post_id}")
def add_like(post_id: str):
    conn = sqlite3.connect(DB_PATH)
    cursor = conn.cursor()
    cursor.execute("SELECT count FROM likes WHERE post_id = ?", (post_id,))
    row = cursor.fetchone()

    if row:
        new_count = row[0] + 1
        cursor.execute("UPDATE likes SET count = ? WHERE post_id = ?", (new_count, post_id))
    else:
        new_count = 1
        cursor.execute("INSERT INTO likes (post_id, count) VALUES (?, ?)", (post_id, new_count))

    conn.commit()
    conn.close()
    return {"post_id": post_id, "likes": new_count}

# --- PRIVATE ADMIN ROUTES (Secured with API Key) ---
@app.get("/api/stats")
def get_all_stats(api_key: str = Depends(verify_api_key)):
    conn = sqlite3.connect(DB_PATH)
    cursor = conn.cursor()
    # Fetch all posts, ordered by most liked
    cursor.execute("SELECT post_id, count FROM likes ORDER BY count DESC")
    rows = cursor.fetchall()
    conn.close()
    return [{"post_id": row[0], "likes": row[1]} for row in rows]

@app.get("/dashboard", response_class=HTMLResponse)
def serve_dashboard():
    # Serve the static HTML dashboard file
    try:
        with open("dashboard.html", "r", encoding="utf-8") as f:
            return f.read()
    except FileNotFoundError:
        raise HTTPException(status_code=404, detail="Dashboard UI file not found")
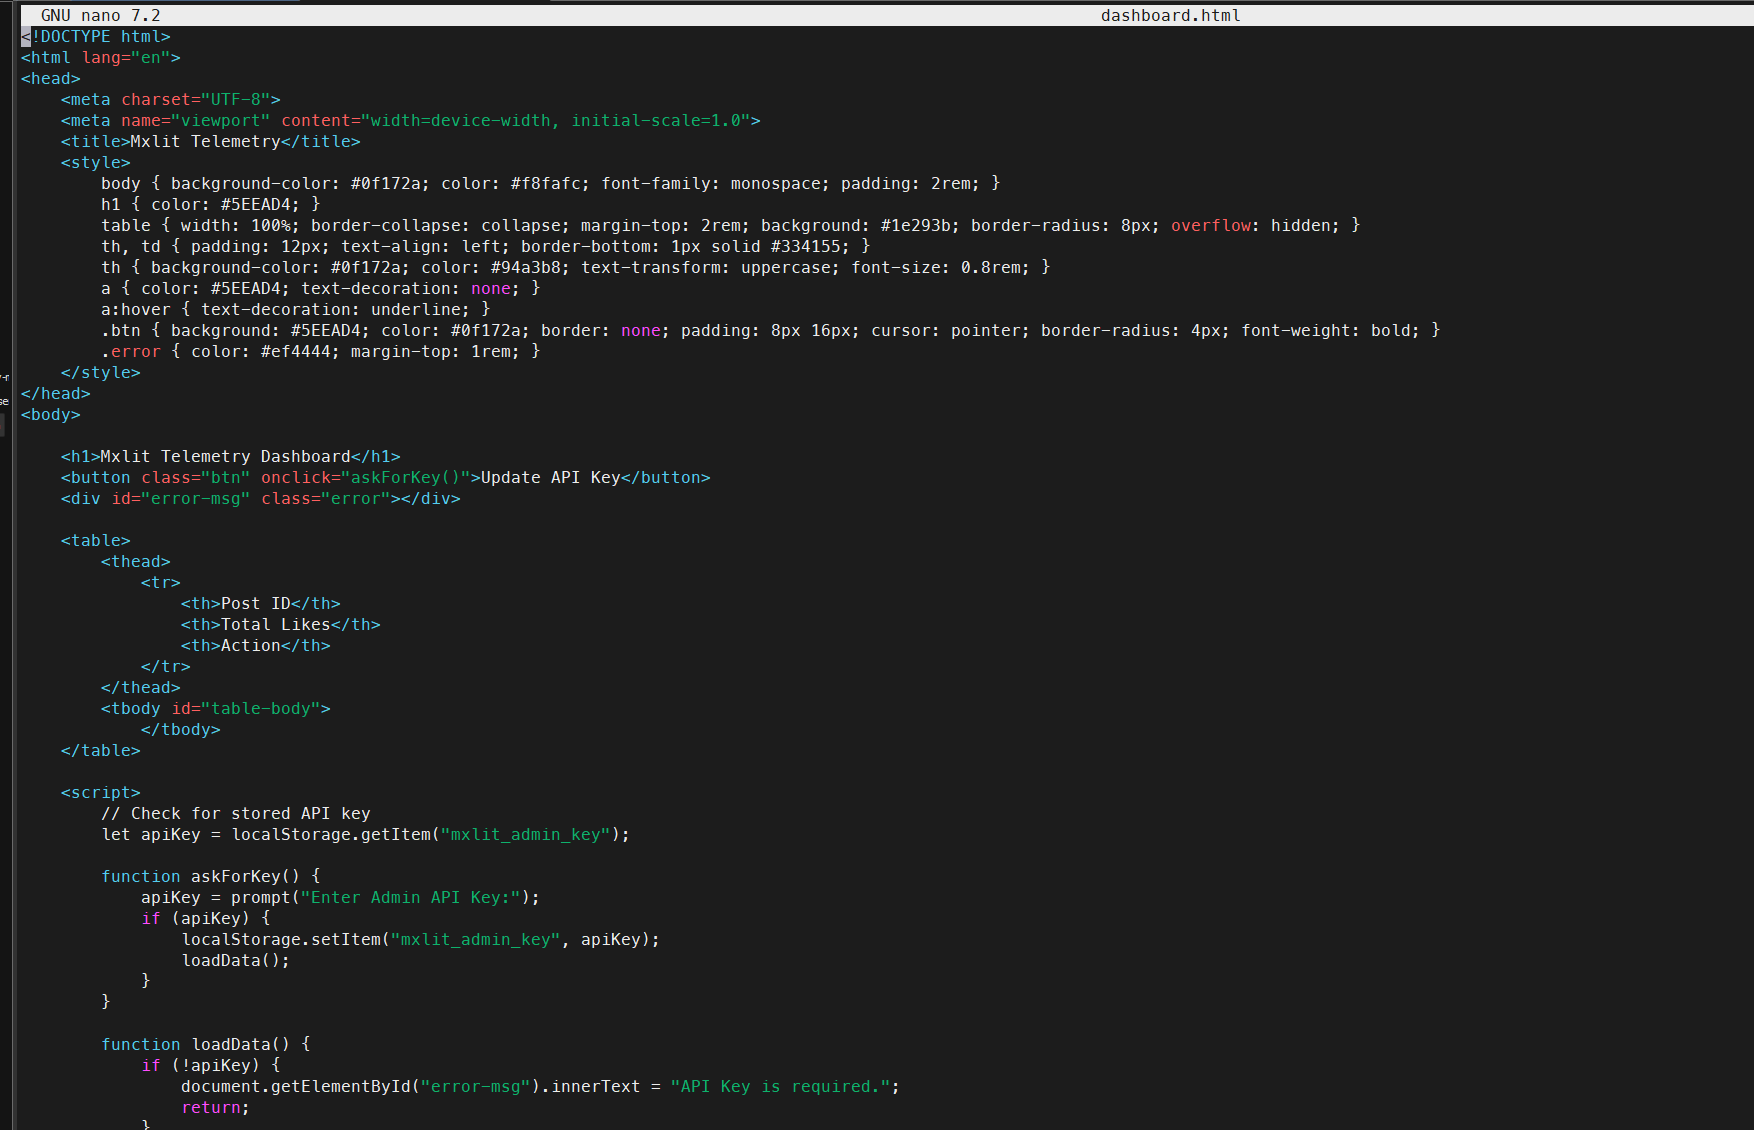
2. The Secure Dashboard (dashboard.html)
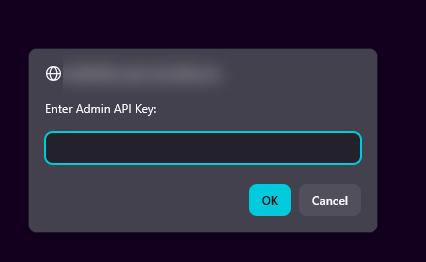
To avoid sending the secret key in plain text through URLs or parameters, the dashboard requests the password using a local prompt and sends it securely in the headers of the HTTP request.
<!DOCTYPE html>
<html lang="en">
<head>
    <meta charset="UTF-8">
    <meta name="viewport" content="width=device-width, initial-scale=1.0">
    <title>Mxlit Telemetry</title>
    <style>
        body { background-color: #0f172a; color: #f8fafc; font-family: monospace; padding: 2rem; }
        h1 { color: #5EEAD4; }
        table { width: 100%; border-collapse: collapse; margin-top: 2rem; background: #1e293b; border-radius: 8px; overflow: hidden; }
        th, td { padding: 12px; text-align: left; border-bottom: 1px solid #334155; }
        th { background-color: #0f172a; color: #94a3b8; text-transform: uppercase; font-size: 0.8rem; }
        a { color: #5EEAD4; text-decoration: none; }
        a:hover { text-decoration: underline; }
        .btn { background: #5EEAD4; color: #0f172a; border: none; padding: 8px 16px; cursor: pointer; border-radius: 4px; font-weight: bold; }
        .error { color: #ef4444; margin-top: 1rem; }
    </style>
</head>
<body>

    <h1>Mxlit Telemetry Dashboard</h1>
    <button class="btn" onclick="askForKey()">Update API Key</button>
    <div id="error-msg" class="error"></div>

    <table>
        <thead>
            <tr>
                <th>Post ID</th>
                <th>Total Likes</th>
                <th>Action</th>
            </tr>
        </thead>
        <tbody id="table-body">
            </tbody>
    </table>

    <script>
        // Check for stored API key in browser storage
        let apiKey = localStorage.getItem("mxlit_admin_key");

        function askForKey() {
            apiKey = prompt("Enter Admin API Key:");
            if (apiKey) {
                localStorage.setItem("mxlit_admin_key", apiKey);
                loadData();
            }
        }

        function loadData() {
            if (!apiKey) {
                document.getElementById("error-msg").innerText = "API Key is required.";
                return;
            }

            // Fetch protected stats endpoint using Headers
            fetch("/api/stats", {
                headers: { "X-API-Key": apiKey }
            })
            .then(response => {
                if (!response.ok) throw new Error("Invalid API Key or Server Error");
                return response.json();
            })
            .then(data => {
                document.getElementById("error-msg").innerText = "";
                const tbody = document.getElementById("table-body");
                tbody.innerHTML = "";

                data.forEach(row => {
                    const tr = document.createElement("tr");
                    const postLink = `https://mxlit.com/${row.post_id}`;

                    tr.innerHTML = `
                        <td>${row.post_id}</td>
                        <td style="color: #5EEAD4; font-weight: bold;">${row.likes}</td>
                        <td><a href="${postLink}" target="_blank">View Post ↗</a></td>
                    `;
                    tbody.appendChild(tr);
                });
            })
            .catch(err => {
                document.getElementById("error-msg").innerText = err.message;
            });
        }

        // Load data on start if key exists
        if (!apiKey) askForKey();
        else loadData();

    </script>
</body>
</html>
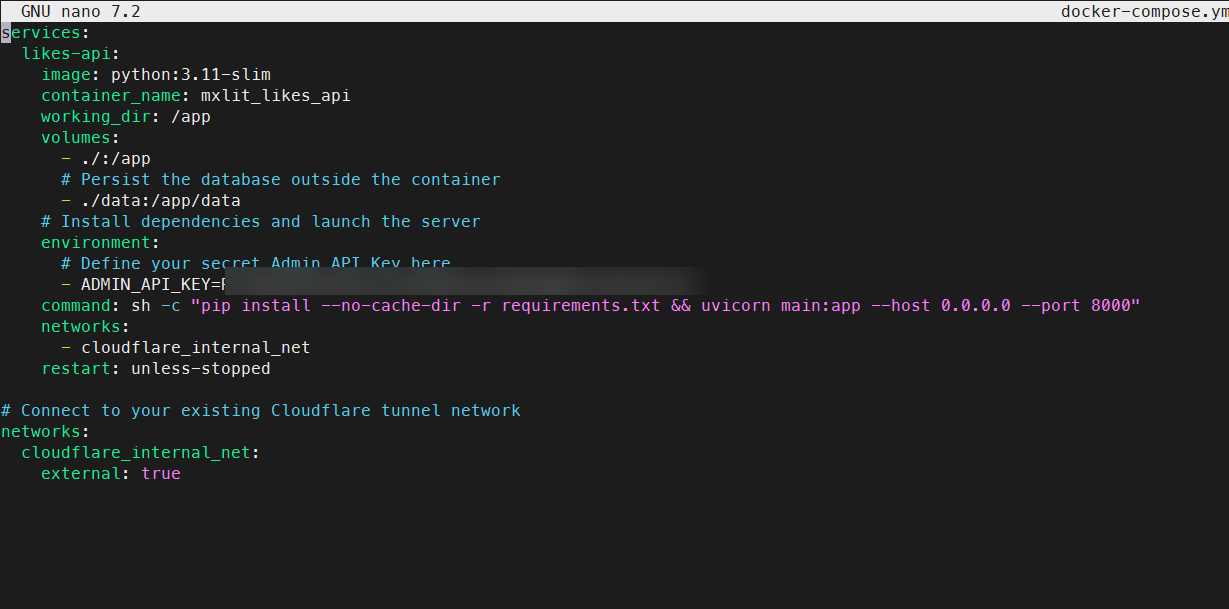
3. Deployment (docker-compose.yml)
The container does not expose ports and defines the secret key as an environment variable, securely injecting itself into the Cloudflare network.
services:
  likes-api:
    image: python:3.11-slim
    container_name: mxlit_likes_api
    working_dir: /app
    volumes:
      - ./:/app
      # Persist the SQLite database outside the container
      - ./data:/app/data
    environment:
      # Define your secret Admin API Key here
      - ADMIN_API_KEY=TuSuperPasswordSecreto123
    # Install dependencies and launch the server
    command: sh -c "pip install --no-cache-dir -r requirements.txt && uvicorn main:app --host 0.0.0.0 --port 8000"
    networks:
      - cloudflare_internal_net
    restart: unless-stopped

# Connect to your existing Cloudflare tunnel network
networks:
  cloudflare_internal_net:
    external: true
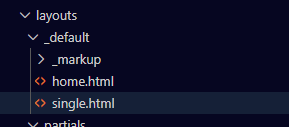
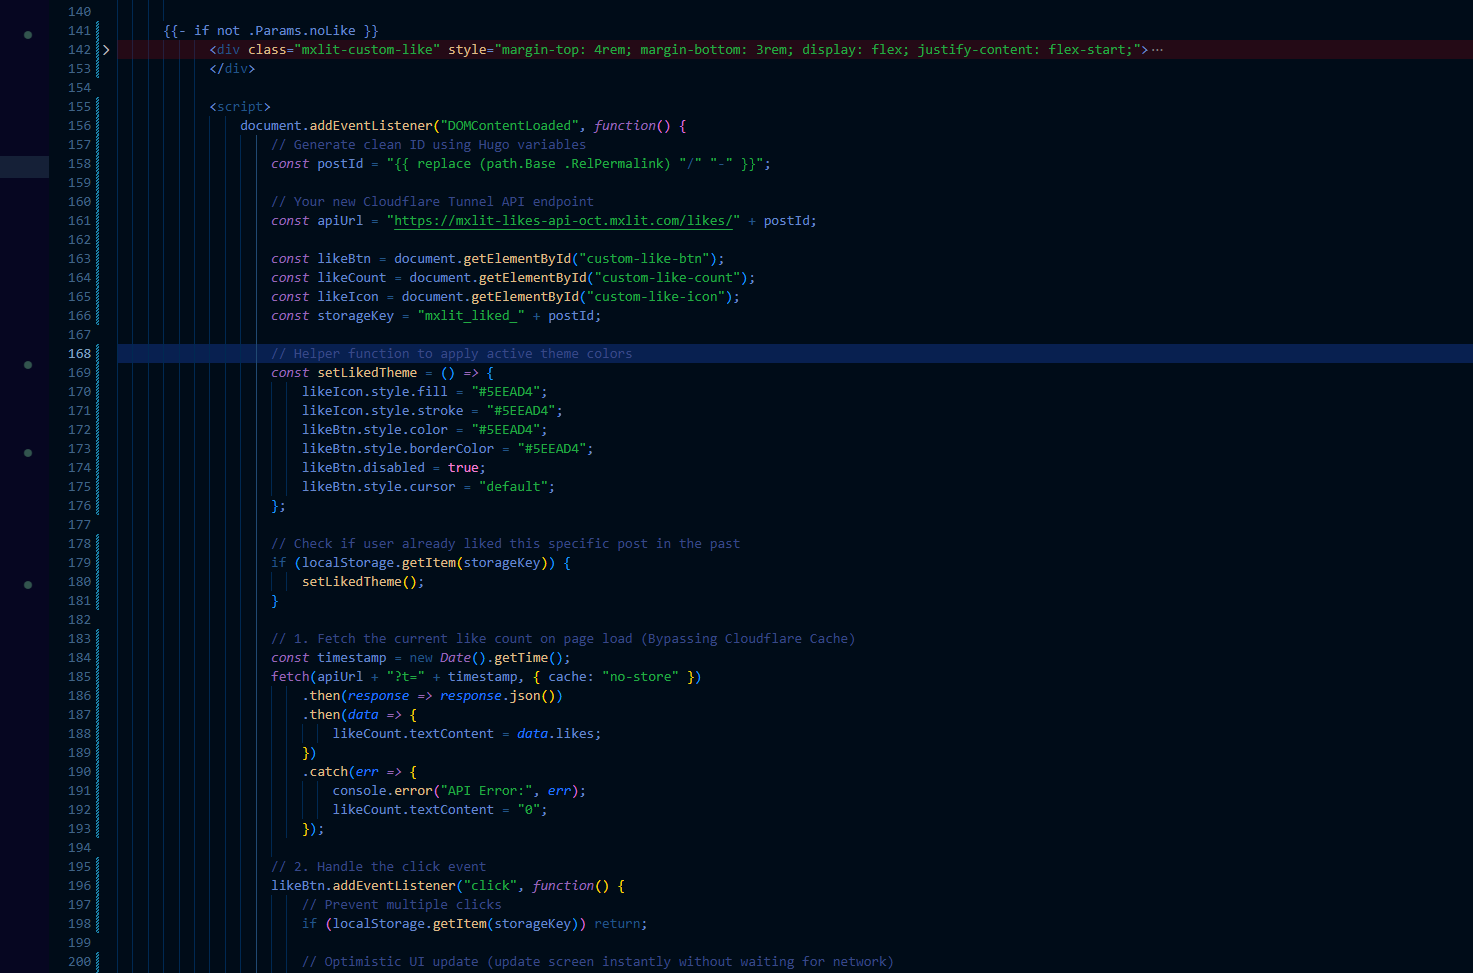
4. Hugo Frontend Integration (Vanilla JS)
On the Hugo side, we implemented a lightweight widget using native JavaScript. This script performs two vital tasks:
Optimistic UI: Updates the on-screen counter instantly upon click.
Cache-Busting & Anti-Spam: Adds a timestamp to the
fetchto bypass Cloudflare’s aggressive caching, and saves the state to the browser’slocalStorageto disable the button and prevent accidental duplicate votes.
Add this block in
{{- if not .Params.noLike }}
<div class="mxlit-custom-like" style="margin-top: 4rem; margin-bottom: 3rem; display: flex; justify-content: flex-start;">

    <button id="custom-like-btn" style="background: none; border: 1px solid rgba(94, 234, 212, 0.2); border-radius: 6px; padding: 8px 16px; cursor: pointer; display: flex; align-items: center; gap: 8px; color: #FFFFFF; font-family: monospace; transition: all 0.2s ease;">

        <svg id="custom-like-icon" width="20" height="20" viewBox="0 0 24 24" fill="none" stroke="currentColor" stroke-width="2" stroke-linecap="round" stroke-linejoin="round">
            <path d="M20.84 4.61a5.5 5.5 0 0 0-7.78 0L12 5.67l-1.06-1.06a5.5 5.5 0 0 0-7.78 7.78l1.06 1.06L12 21.23l7.78-7.78 1.06-1.06a5.5 5.5 0 0 0 0-7.78z"></path>
        </svg>

        <span id="custom-like-count">...</span>
    </button>

</div>

<script>
    document.addEventListener("DOMContentLoaded", function() {
        // Generate clean ID using Hugo variables
        const postId = "{{ replace (path.Base .RelPermalink) "/" "-" }}";

        // Target your internal Cloudflare Tunnel API endpoint
        const apiUrl = "[https://api.midominio.com/likes/](https://api.midominio.com/likes/)" + postId;

        const likeBtn = document.getElementById("custom-like-btn");
        const likeCount = document.getElementById("custom-like-count");
        const likeIcon = document.getElementById("custom-like-icon");
        const storageKey = "mxlit_liked_" + postId;

        // Helper function to apply active theme colors
        const setLikedTheme = () => {
            likeIcon.style.fill = "#5EEAD4";
            likeIcon.style.stroke = "#5EEAD4";
            likeBtn.style.color = "#5EEAD4";
            likeBtn.style.borderColor = "#5EEAD4";
            likeBtn.disabled = true;
            likeBtn.style.cursor = "default";
        };

        // Check if user already liked this specific post
        if (localStorage.getItem(storageKey)) {
            setLikedTheme();
        }

        // 1. Fetch the current like count on page load (Bypassing Cloudflare Cache)
        const timestamp = new Date().getTime();
        fetch(apiUrl + "?t=" + timestamp, { cache: "no-store" })
            .then(response => {
                if (!response.ok) throw new Error("HTTP Status " + response.status);
                return response.json();
            })
            .then(data => {
                // Apply real number from database
                likeCount.textContent = data.likes;
            })
            .catch(err => {
                // Fail silently (Graceful degradation for Ad-Blockers)
                console.warn("API unreachable, degrading to 0");
                likeCount.textContent = "0";
            });

        // 2. Handle the click event
        likeBtn.addEventListener("click", function() {
            // Prevent multiple clicks
            if (localStorage.getItem(storageKey)) return;

            // Optimistic UI update
            let currentLikes = parseInt(likeCount.textContent) || 0;
            likeCount.textContent = currentLikes + 1;
            setLikedTheme();

            // Save state to browser storage
            localStorage.setItem(storageKey, "true");

            // Send POST request to increment DB
            fetch(apiUrl, { method: "POST" })
                .catch(err => console.error("API Post Error:", err));
        });
    });
</script>
{{- end }}
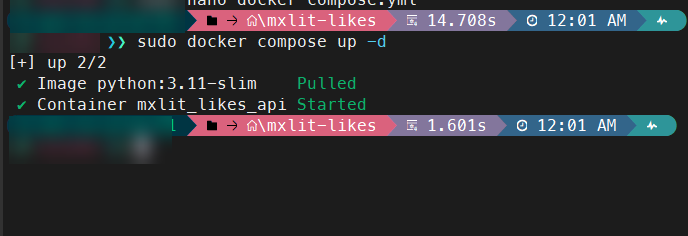
Start the container
It’s time for the truth Start the container with
sudo docker compose up -d
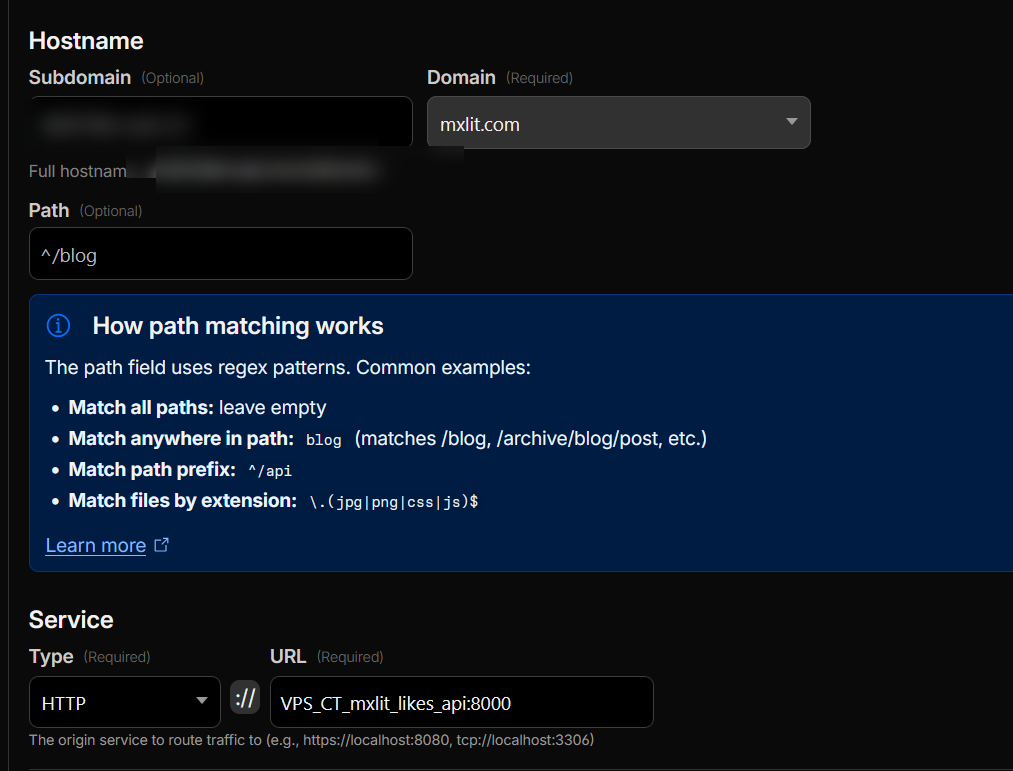
Cloudflare Configuration
Log into Cloudflare Tunnels, create a new hostname, and use HTTP to connect your container to port 8000. Remember that we are using the Cloudflare network in Docker.
Verification
Access your Dashboard.
Posts now include a like button

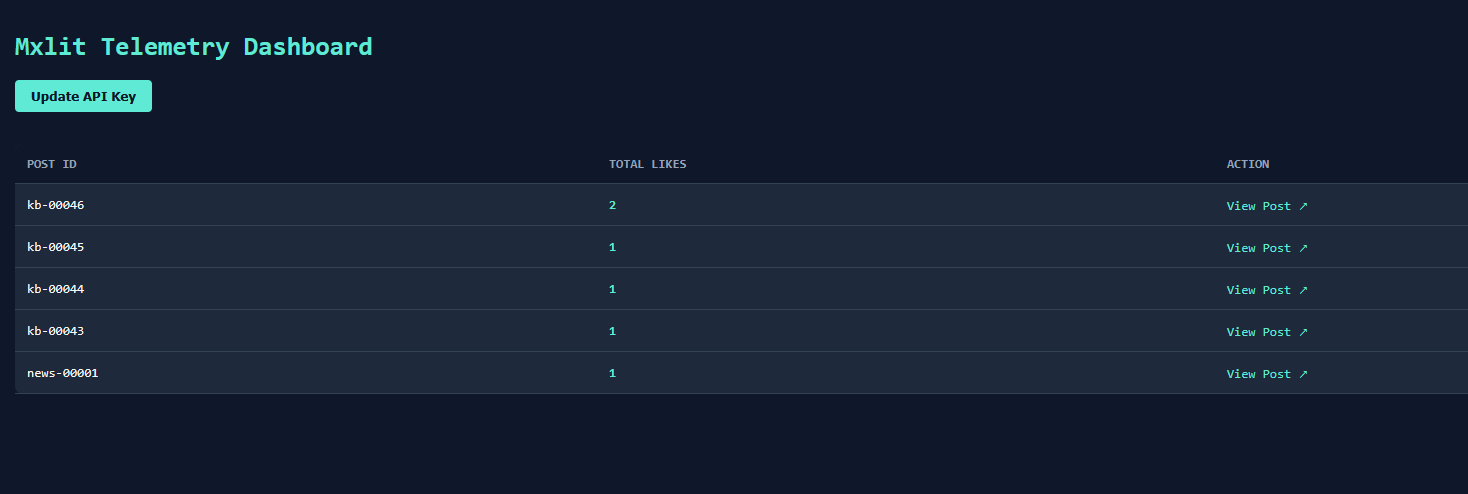
Dashboard
If you go to https://api.yourdomain.com/dashboard, you should be able to see your dashboard by entering the previously defined API key.
Final Steps: Rate Limiting in Cloudflare
Because CORS does not protect against spam, we will add a rage limit. We delegate the heavy lifting to the peri layer.Metral: Cloudflare.
Since your traffic passes through a Cloudflare tunnel, we can create a free rule in their WAF (Web Application Firewall) to stop this spam in its tracks, before it even reaches your server.
How to configure it:
Log in to your Cloudflare dashboard and go to your domain
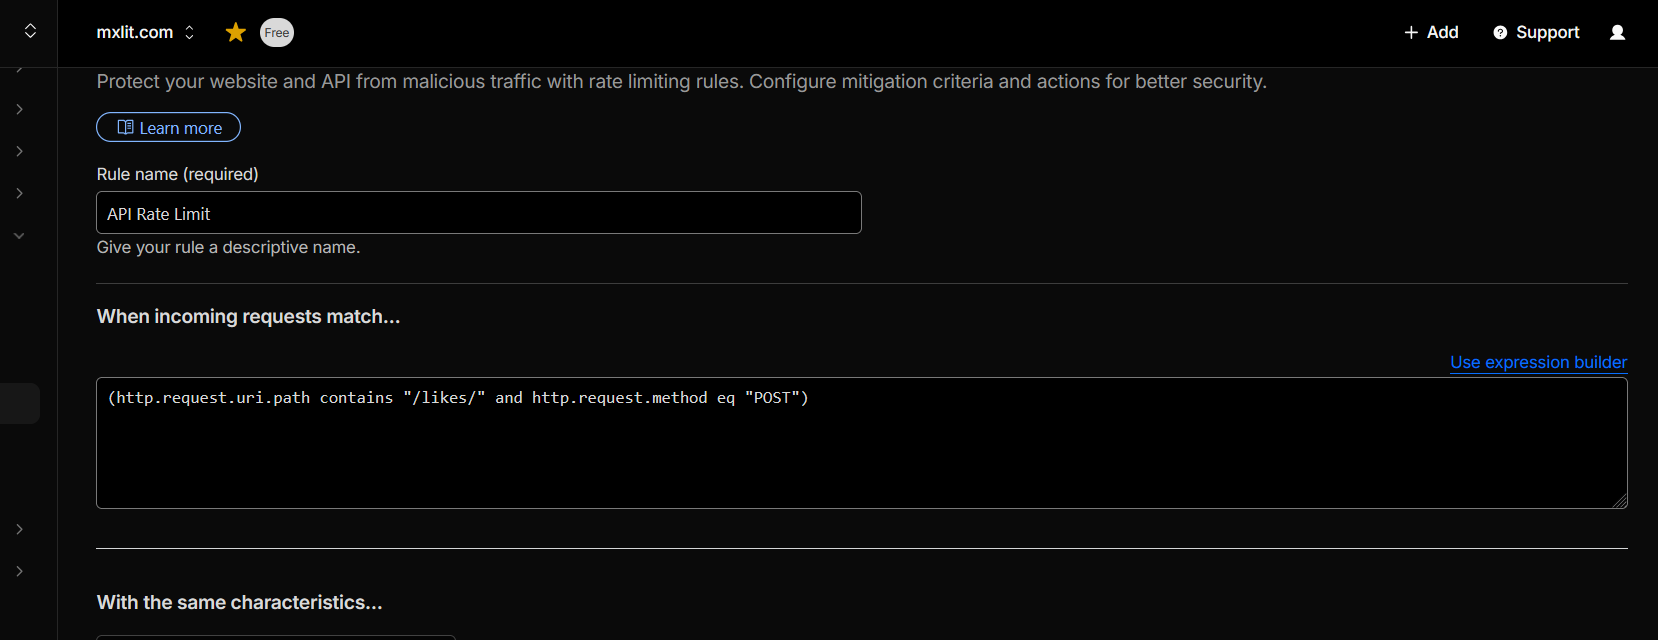
mxlit.com.In the sidebar menu, go to Security -> WAF -> Rate Limiting Rules tab.
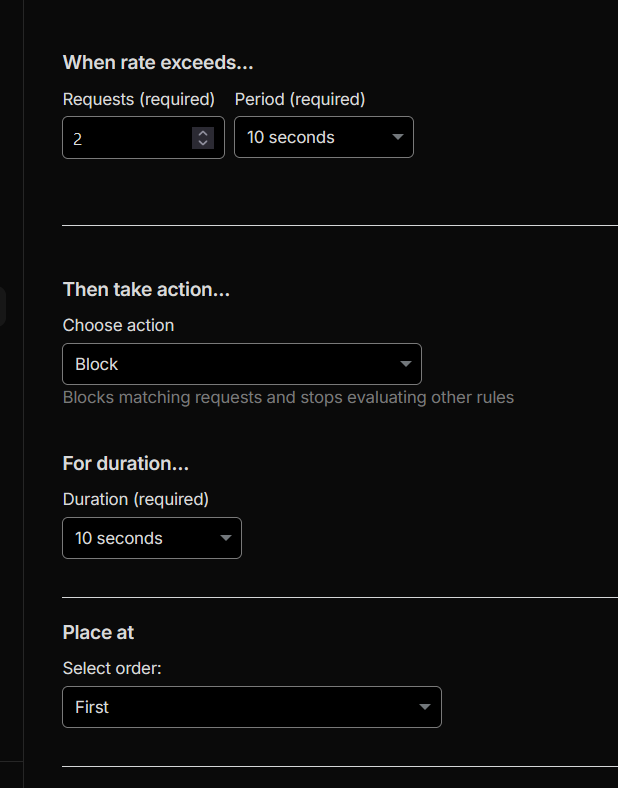
Create a new rule with this logic:
If incoming requests match:
Field:
URI Path-> Operator:contains-> Value:/likes/AND * Field:
Request Method-> Operator:equals-> Value:POSTWith the same characteristics:
IPWhen rate exceeds:
2requestsPeriod:
10 secondsThen take action:
Block(for 10 seconds, for example).
If you don’t see these options, you can use an expression:
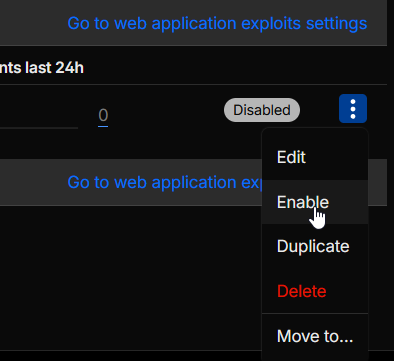
Once the rule is created, just activate it

The Result
With this rule active, a legitimate user reading your blog will never notice anything. But if a “joker” discovers your URL and tries to send a loop of 100 curl requests per second from their terminal, Cloudflare will let the first 5 requests through and then shut them down by returning a 429 Too Many Requests error or blocking them completely, keeping your SQLite database clean and your server free of CPU load.
Conclusion
Leaving a SaaS doesn’t always mean installing gigantic Open Source applications of hundreds of megabytes. Sometimes, the best solution is to reverse engineer the actual need and program a custom tool. With this architecture, we can maintain a 100% static site while incorporating dynamic telemetry without sacrificing performance, privacy, or control of our infrastructure.