
Securing your vCenter Server (VCSA) with an authentic SSL certificate is a crucial step towards maintaining a robust virtualization environment. By default, vCenter uses self-signed certificates, which prompt annoying and potentially dangerous browser security warnings. Replacing these with a certificate signed by your own Internal Certificate Authority (CA) not only eliminates these warnings but also ensures that all communication within your management plane is encrypted and trusted natively by your domain devices.
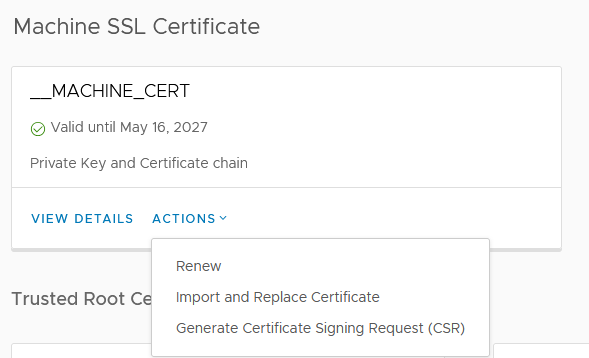
1. Request a New CSR
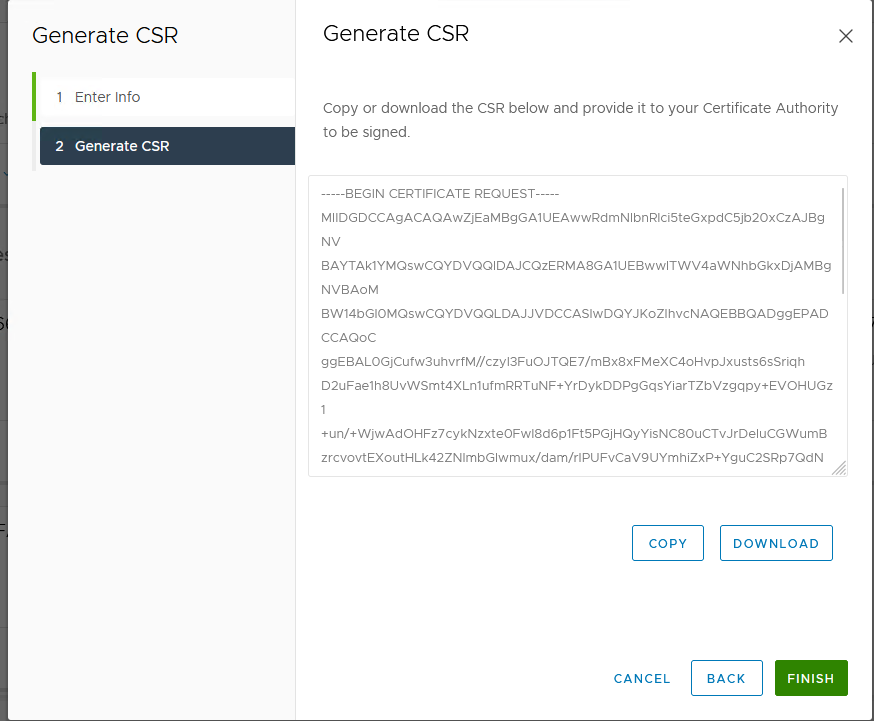
Start by navigating to your vCenter Server’s Certificate Management section. Generate a new Certificate Signing Request (CSR).
Ensure you add the correct Subject Alternative Name (SAN) so the certificate is valid for the FQDN and IP address.
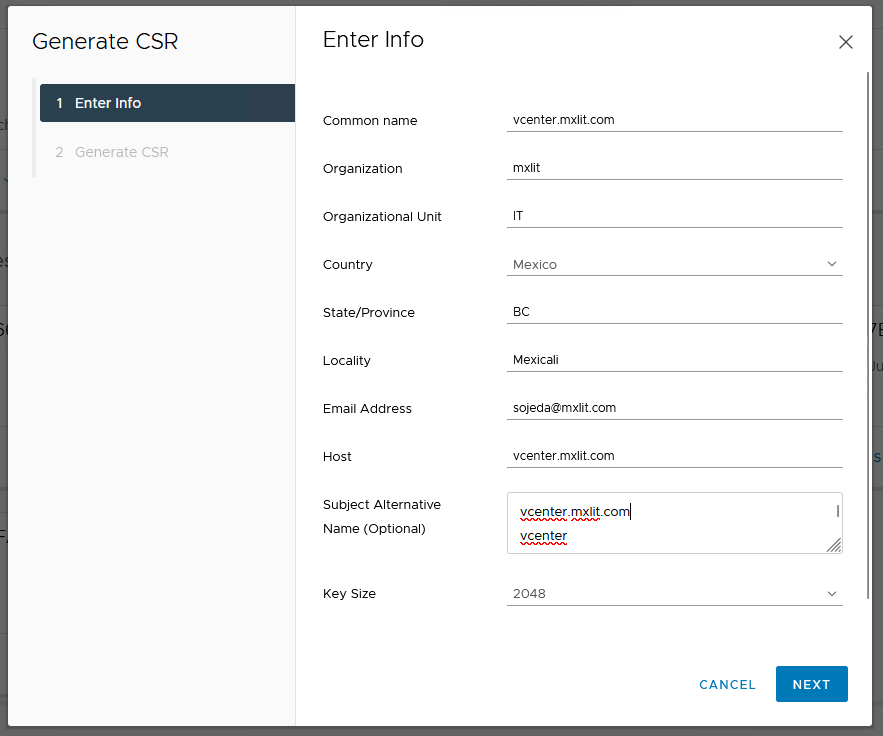
Download the generated CSR file to your local machine.
2. Issue the Certificate from the Internal CA
Open your Internal Microsoft Certificate Authority web portal:
http://mxlitca01/certsrv/
Click on Request a certificate.
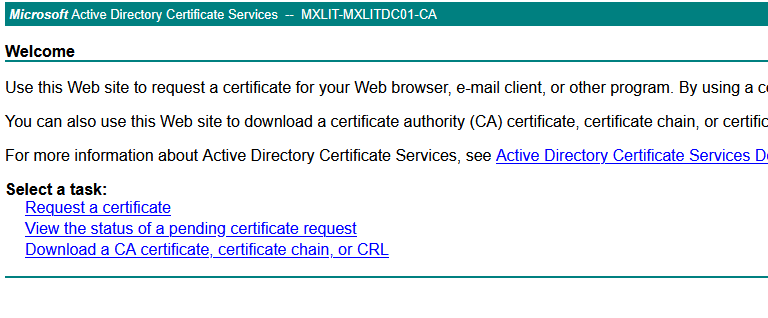
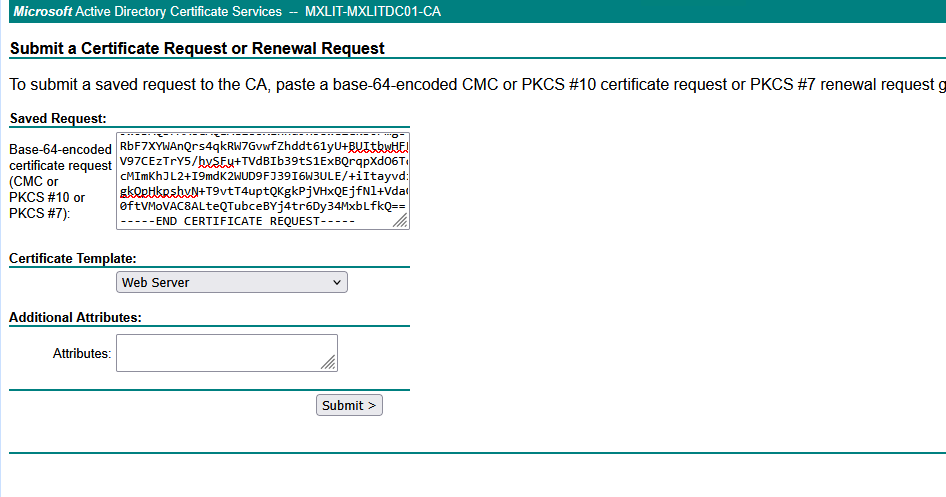
Select Advanced certificate request.
Open your downloaded CSR file with a text editor, copy its contents, and paste it into the Base-64-encoded certificate request field. Ensure you select the Web Server certificate template.
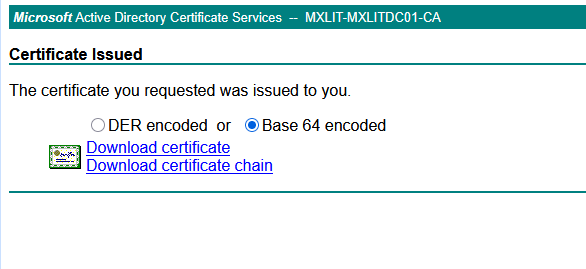
Once issued, download the newly generated certificate. Make sure to select Base 64 encoded.
3. Download the CA Certificate Chain
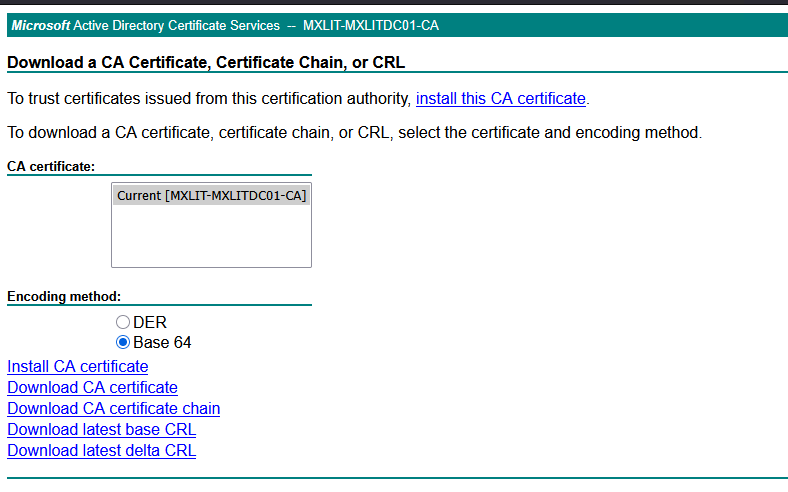
Return to the CA web portal home and click Download a CA certificate, certificate chain, or CRL.
Select Base 64 and click Download CA certificate.
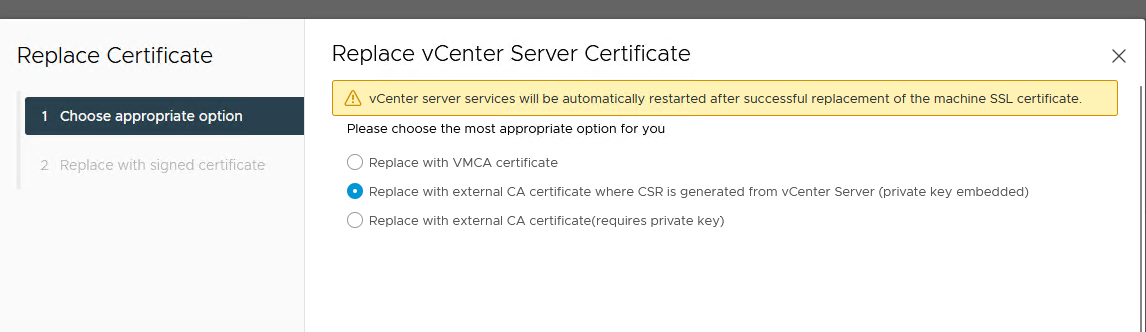
4. Install the Certificate in vCenter
Go back to the vCenter Certificate Management page where you generated the CSR. Select the option to replace the certificate using the CSR previously generated.
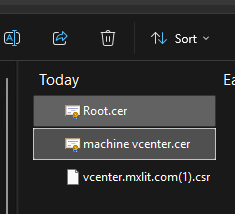
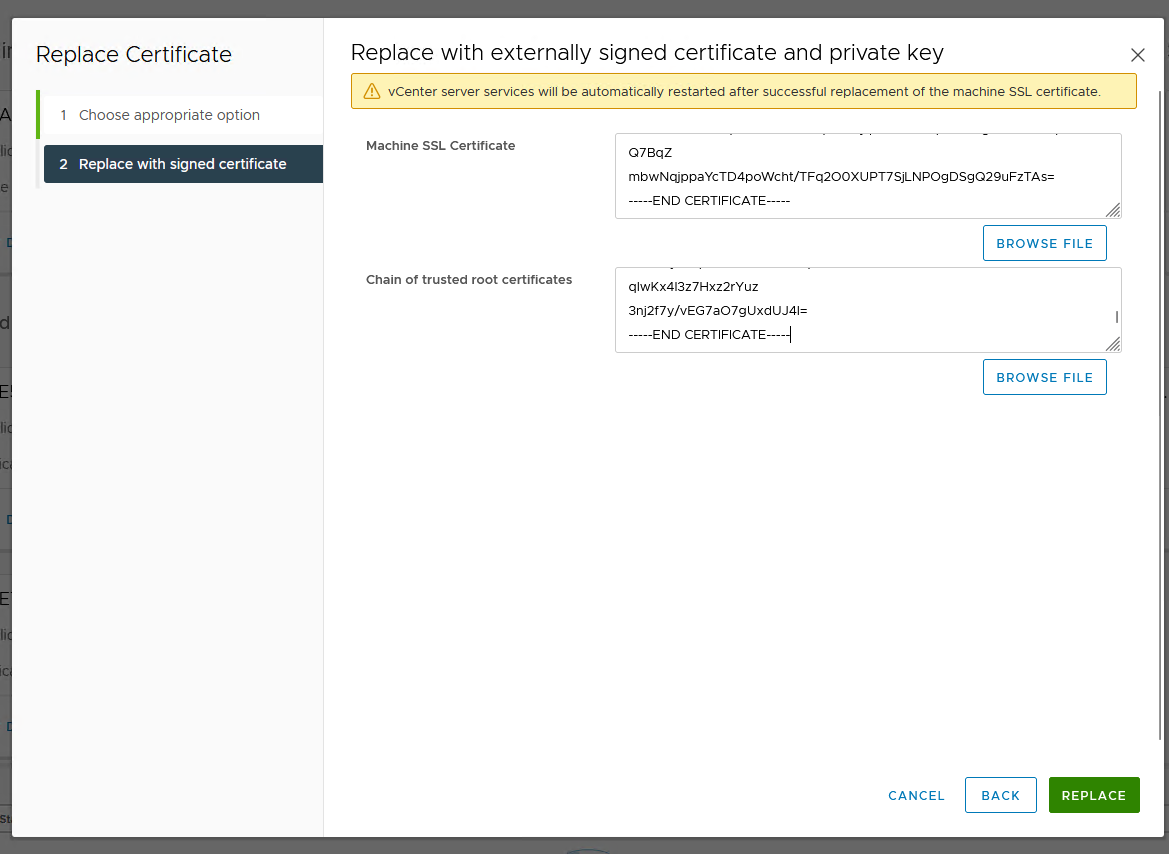
Upload the machine certificate you received from the CA, along with the CA root certificate chain.
Important: Open your certificate files in a text editor and ensure there are no extra spaces or blank lines after
-----END CERTIFICATE-----.
The vCenter Server services will now need to be restarted to apply the new certificate.
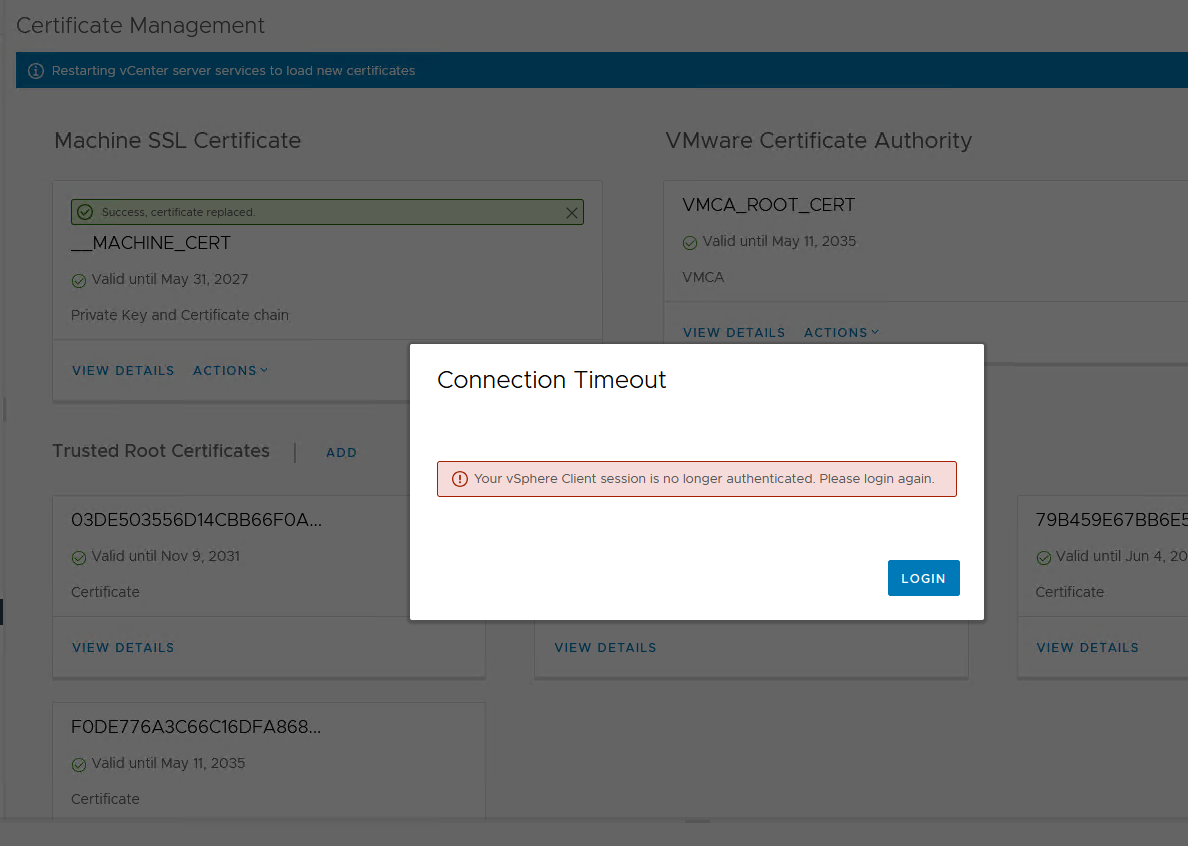
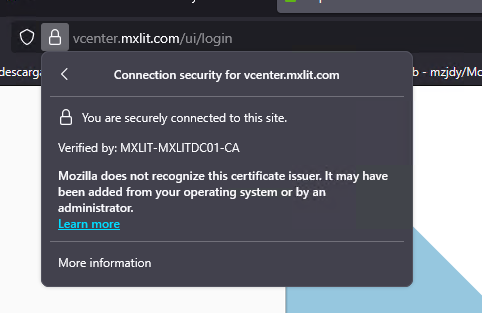
Once the services are back online, your vCenter will display a valid SSL connection, fully trusted and signed by your Internal CA.
Conclusion
Implementing a trusted SSL certificate from your internal CA on vCenter drastically improves your compliance posture and the user experience for administrators. It eliminates daily browser warnings and ensures that API calls from external tools (like backups, monitoring systems, and automation scripts) can connect securely and seamlessly without manual certificate bypasses. Maintain your CA infrastructure securely and remember to track certificate expiration dates to avoid unexpected service interruptions.