
Introduction: What is TrueNAS?
TrueNAS is universally recognized as the world’s most robust Open Storage operating system, directly heavily relying on the legendary ZFS (Zettabyte File System) architecture. It delivers absolute enterprise-grade features straight out of the box: proactive data self-healing, intelligent RAM tier caching (ARC), and unlimited instantaneous snapshots.
Whether deploying the FreeBSD-based CORE or the modern Debian Linux-based SCALE, TrueNAS effectively transforms commodity servers into high-performance, resilient storage arrays meticulously built to serve virtualization clusters, heavy backup targets, and enterprise media streams.
The Golden Rule of ZFS: IT Mode Passthrough
Never use hardware RAID cards. Whether TrueNAS is running on bare metal or virtualized under a hypervisor like Proxmox or ESXi, you must ensure your data disks are passed through directly to the system via an HBA (Host Bus Adapter) card flashed to “IT Mode”.
Why? ZFS functions as both a file system and a volume manager. It relies entirely on reading raw S.M.A.R.T. data to actively monitor disk health, perform proactive checksum scrubbing, and automatically heal silent data corruption. If a hardware RAID abstraction layer hides your disks, ZFS becomes completely blind to underlying hardware degradation, neutralizing its greatest enterprise features and severely risking massive data loss during a rebuild.
High-Level Installation Workflow
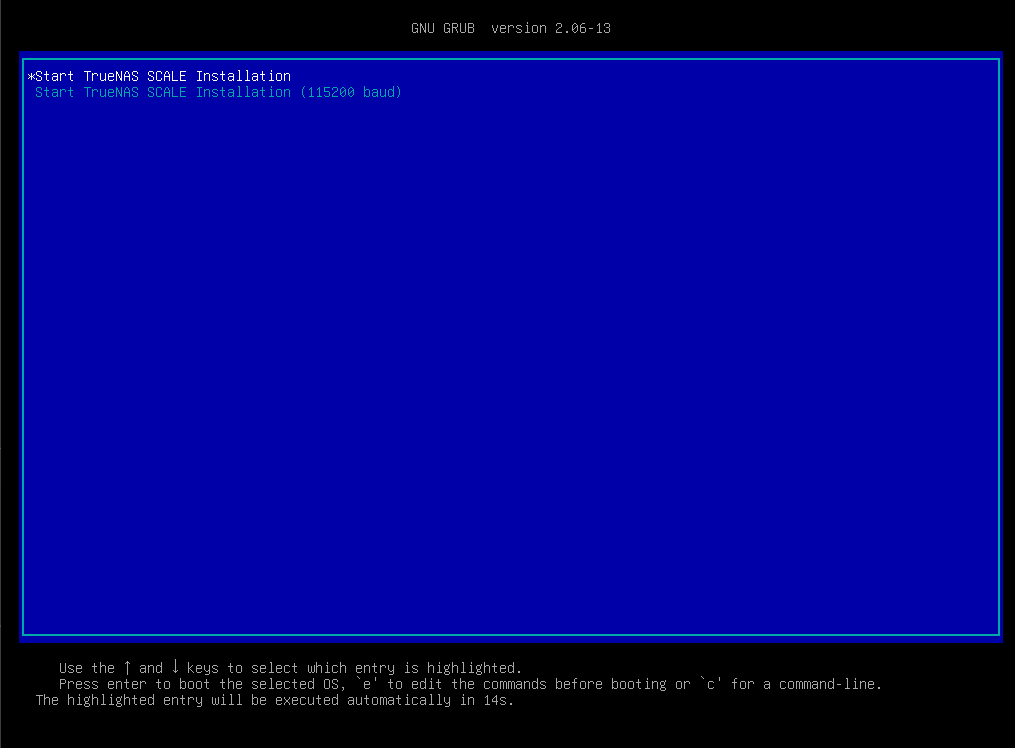
1. Booting the Installer
After preparing a dedicated boot drive (a small SSD or SATADOM) and flashing your preferred TrueNAS ISO onto a bootable USB drive, boot your server.
Choose the primary Boot TrueNAS Installer option from the GRUB loader.
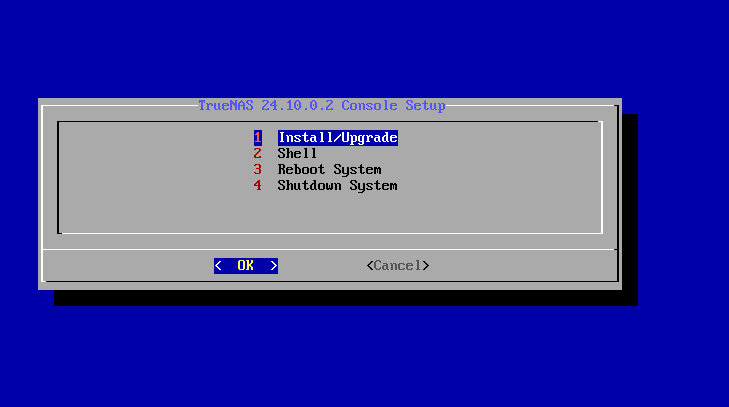
In the Console Setup screen, hit Enter on Install/Upgrade.
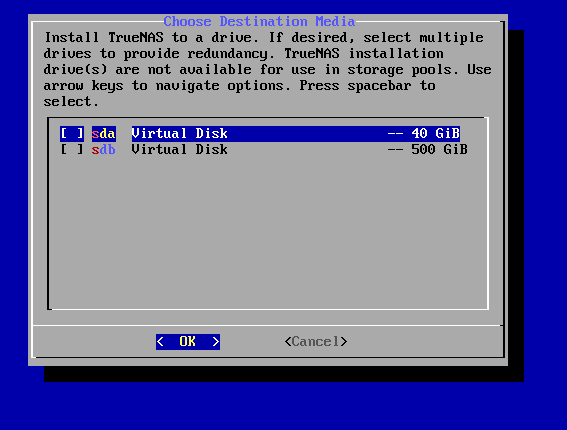
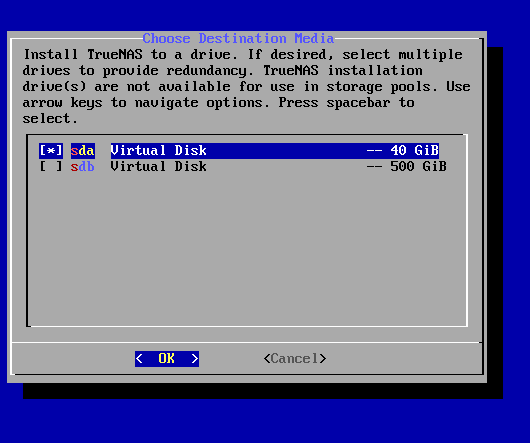
2. Drive Selection and Credentials
The system will detect all attached disks. Select your intended boot drive by pressing the SPACE bar (an asterisk will appear). Never select your large data drives for the OS!
The installer will warn you that all data on the selected boot drive will be irrevocably destroyed. Read and accept the warning.
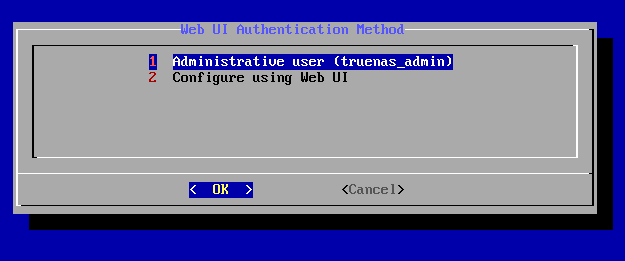
The wizard will prompt you to choose an authentication method for the web UI. Select Administrative user (truenas_admin).
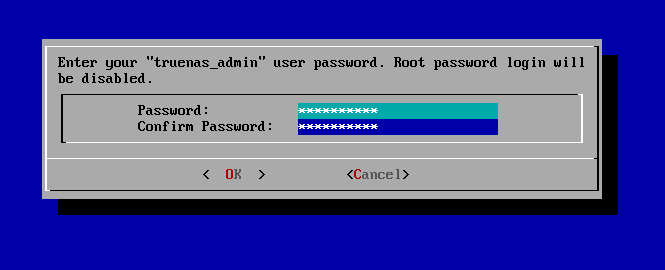
Set the critical password for the truenas_admin account. Make sure this is a highly secure password.
(Note: Depending on your hardware age, the installer might silently skip UEFI prompts if it detects a clear boot method, or you can verify bios settings directly on your motherboard).
3. Finalizing Install and First Boot
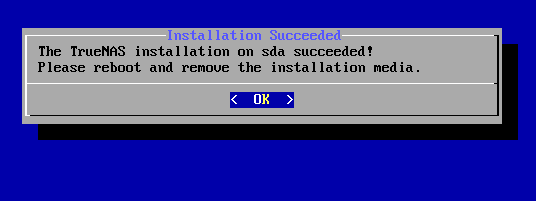
Once the wizard finishes writing the OS blocks, you will see a success message. Remove your USB drive and press OK to reboot the server.
4. Console Network Configuration
Upon a successful boot, the system will initialize its services and you’ll be greeted by the iconic TrueNAS Console Interface menu. It will dynamically list any IP addresses assigned via DHCP.
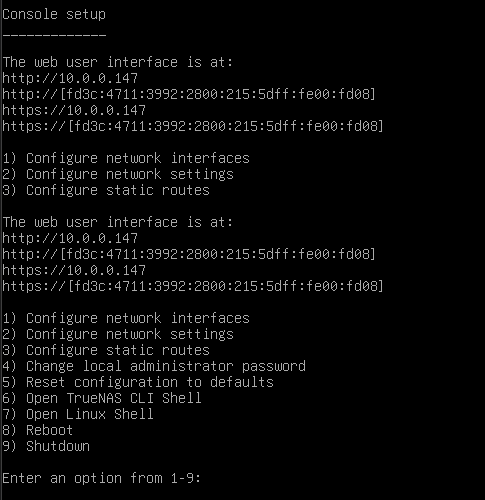
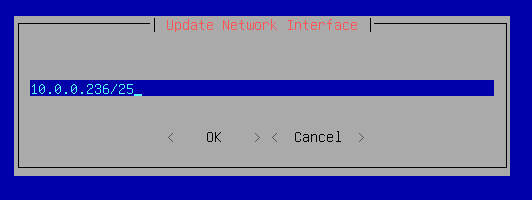
Before jumping straight into the web browser, it is paramount that your NAS operates on a persistent Static IP. We will configure this right now from the console menu. Press 1 (Configure network interfaces).
Select your interface, disable DHCP, and enter your static IP address using the CIDR format prefix (e.g., 10.0.0.236/25).
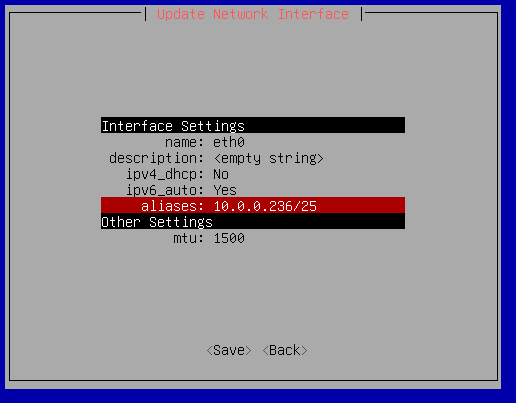
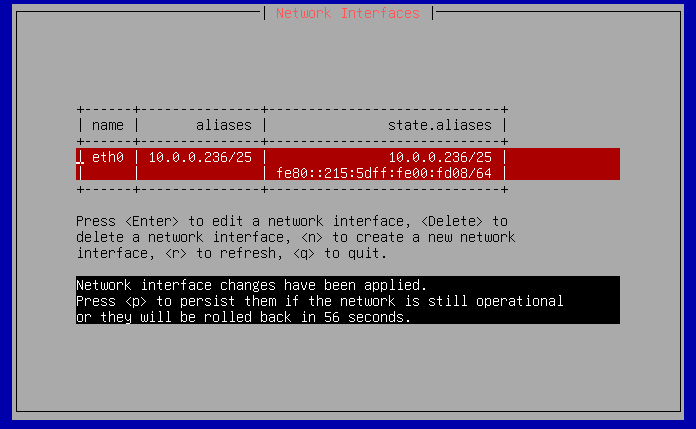
The interface settings menu will summarize your changes, explicitly showing DHCP set to No and your newly baked static Alias IP. Save the changes.
5. Web Interface Access
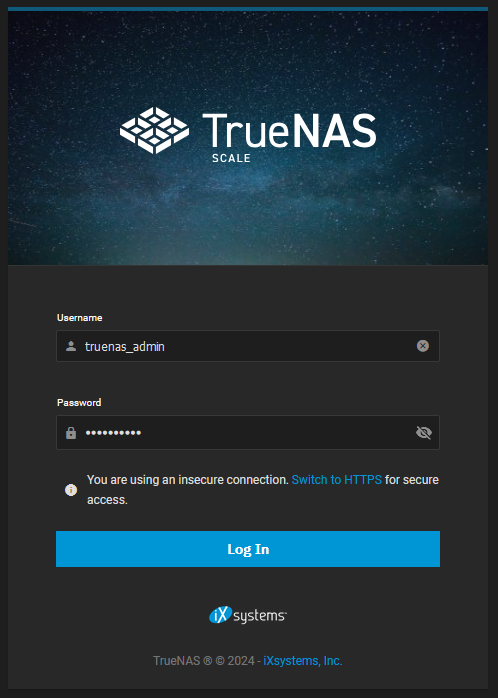
With the networking locked in locally, use another computer on the network to navigate to your newly assigned static IP. You will be greeted by the sleek TrueNAS login portal. Enter your truenas_admin credentials.
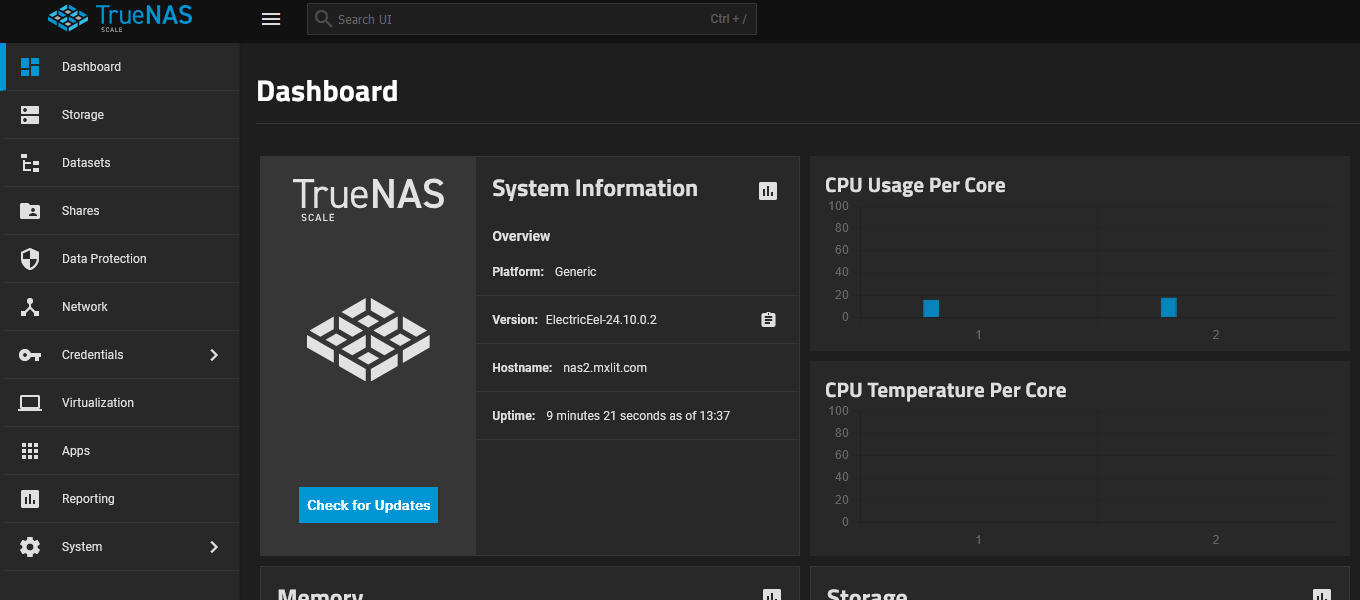
Once inside, you will see the primary Dashboard detailing system specs, memory usage, and CPU load. You’re now ready to navigate the Storage menus and initialize your ZFS Pools!
Conclusion
Installing TrueNAS is incredibly straightforward, thanks to its minimalist installer. The true complexity and power of the system lie strictly within the web interface where you orchestrate ZFS VDEVs, SMB file permissions, and iSCSI virtualization blocks. Dive into the Web UI and begin unleashing the power of ZFS!