
When it comes to building an enterprise-grade homelab or deploying production hypervisors on a budget, Proxmox Virtual Environment (VE) is the undisputed king. Built on Debian GNU/Linux, it provides native integration with KVM (Kernel-based Virtual Machine) for virtual machines and LXC for lightweight containers, completely free of licensing traps.
In this guide, we will walk through the bare-metal installation of Proxmox VE, paying special attention to the often-overlooked storage partitioning step to ensure you aren’t leaving performance on the table.
Prerequisites
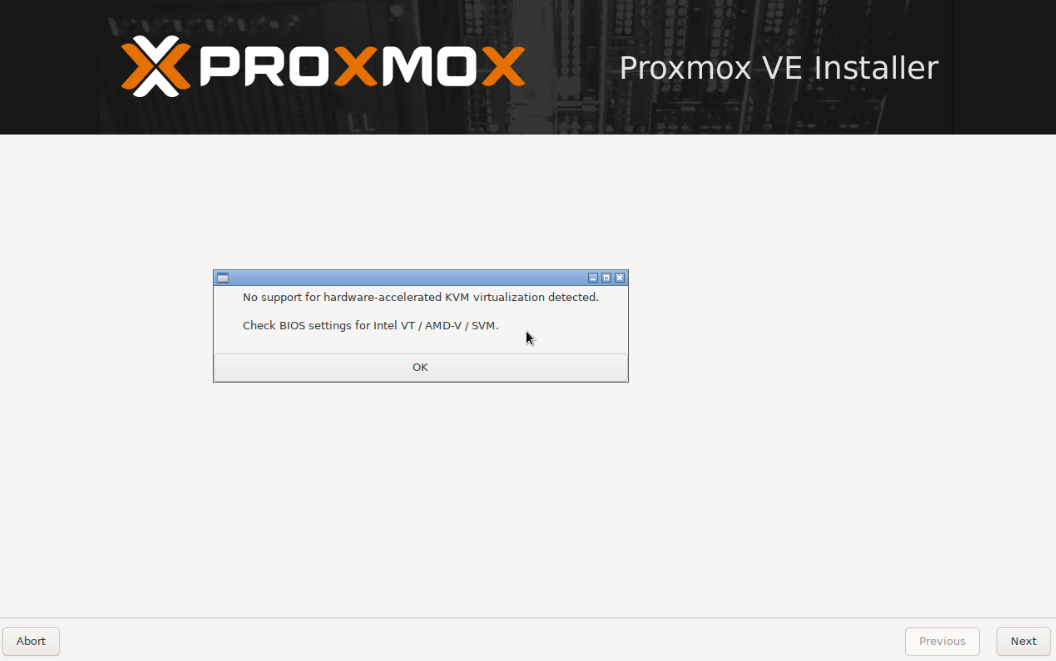
Before we begin, ensure your server or computer has Hardware Virtualization (VT-x / AMD-V) enabled in the BIOS/UEFI. If it is disabled, Proxmox will install, but KVM hardware acceleration will fail to start.
Step 1: Booting the Installer
After downloading the Proxmox VE ISO from their official site and creating a bootable USB (using a tool like Rufus or BalenaEtcher), boot your server from the drive.
At the initial boot menu, select Install Proxmox VE (graphical).
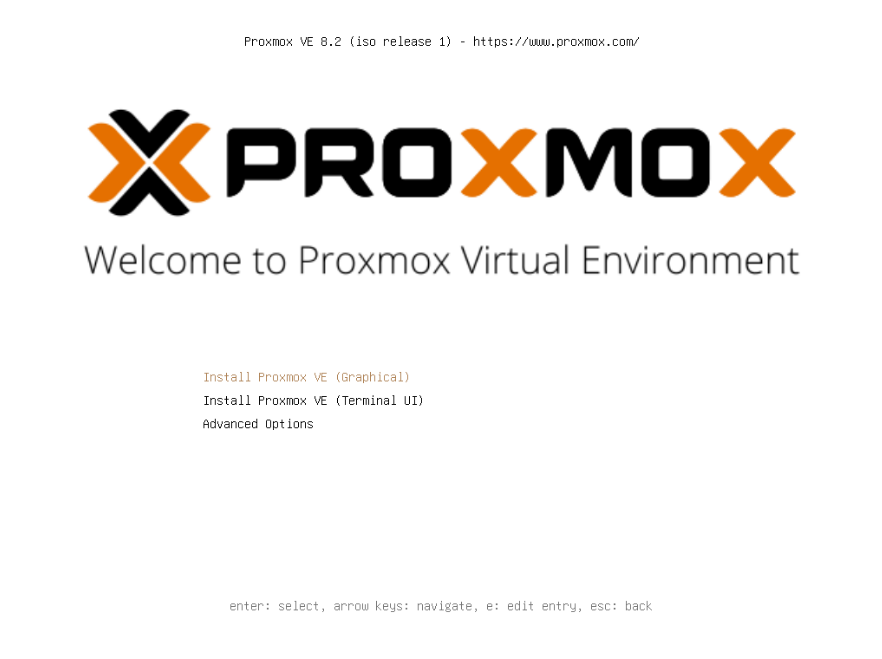
Resolution or GPU Drivers failing? If your server head (monitor) throws an error, hangs on a black screen, or glitches out, reboot and select Terminal UI (TUI) instead. The procedure is geometrically the same, but bypasses graphical drivers. It’s fast, direct, and often required on specialized server hardware.
Step 2: EULA & Target Disk Selection
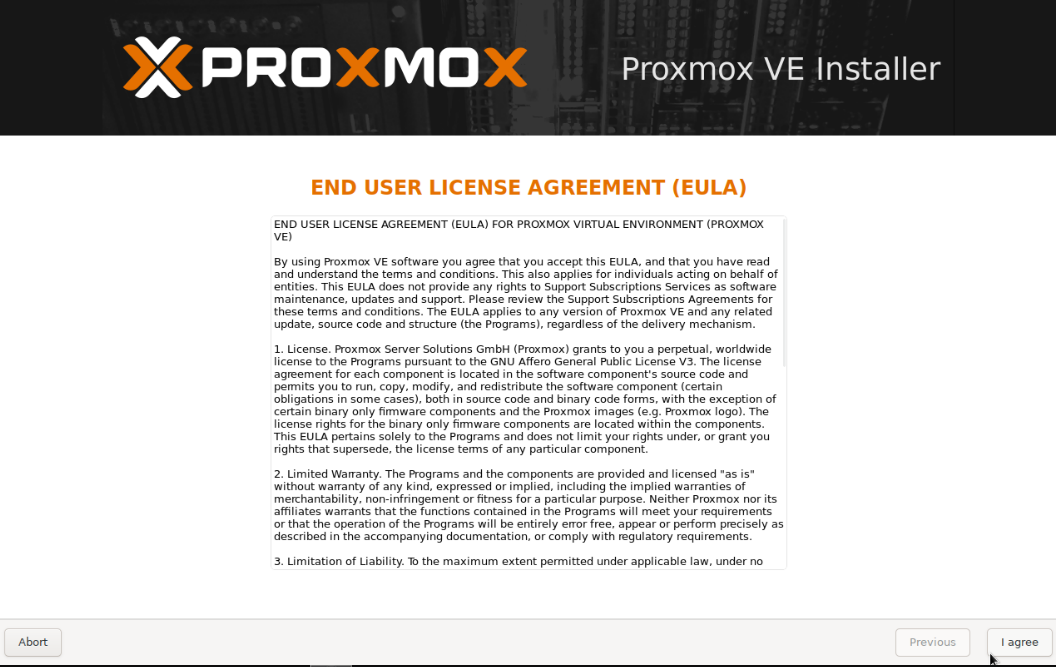
Accept the End User License Agreement (EULA) to proceed.
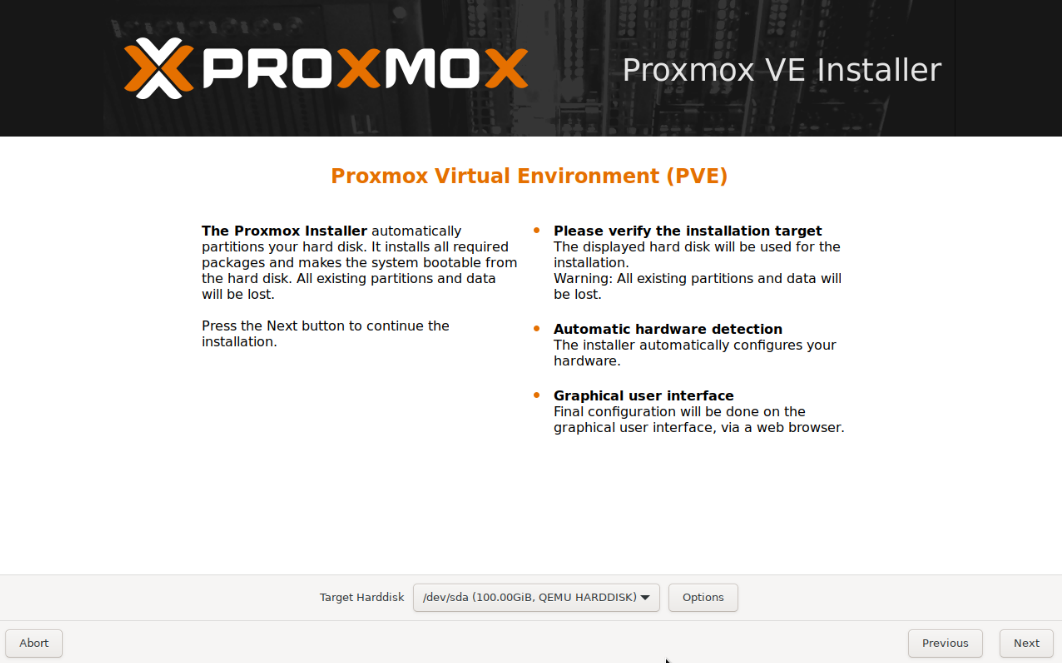
Next, you will be prompted to select the Target Harddisk.
The installation process will permanently erase all data on the selected disk. Ensure you have targeted your intended OS drive (e.g., your NVMe or SSD boot drive), not your larger storage pools.
Step 3: Deep Dive - Filesystem & Partitioning
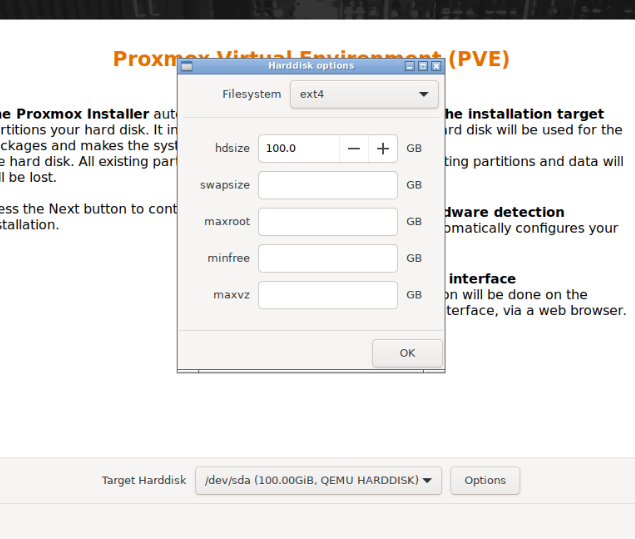
If you simply click “Next”, Proxmox defaults to an ext4 filesystem using LVM logic. While fine for a quick test, clicking the Options button reveals critical partitioning levers that dictate how your root system behaves.
Choosing the Filesystem (ext4 vs ZFS)
- ext4 (Hardware RAID): Choose this if your server has a dedicated Hardware RAID Controller card (e.g., Dell PERC, HP Smart Array) managing the disks underneath. ext4 is rock-solid and expects the hardware to handle redundancy.
- ZFS (Software RAID): Choose this if you are passing identical disks natively to the motherboard (HBA / IT Mode). ZFS has self-healing mechanisms, bit-rot protection, and built-in snapshots, but requires direct access to the drives and uses more RAM.
Understanding LVM Partitioning (If using ext4/xfs)
If you stick with ext4, Proxmox uses LVM (Logical Volume Manager) to chop up your drive. Here is what those confusing numbers mean:
- hdsize: The total physical size of the disk you are letting Proxmox use.
- swapsize: A dedicated space on the disk used as “virtual RAM” if your physical memory maxes out. Proxmox defaults to this dynamically based on RAM size, but caps it at 8GB. (It is usually best left at default).
- maxroot: The absolute maximum size for your actual
/(root) OS partition where Debian, Proxmox files, and ISOs are stored. Recommendation: Cap this around 32GB to 64GB. The OS doesn’t need gigabytes of space. - maxvz: The space allocated for your
"local-lvm"storage. This is where your VM virtual disks and LXC containers will live. If you leavemaxrootunchecked, it might eat into this space. Ensuremaxvzgets the lion’s share of your SSD. - minfree: Unallocated space left empty on the LVM volume group. It acts as an emergency buffer (default is 16GB).
By constraining maxroot, you guarantee more blazing-fast NVMe storage is dedicated directly to your VMs (maxvz).
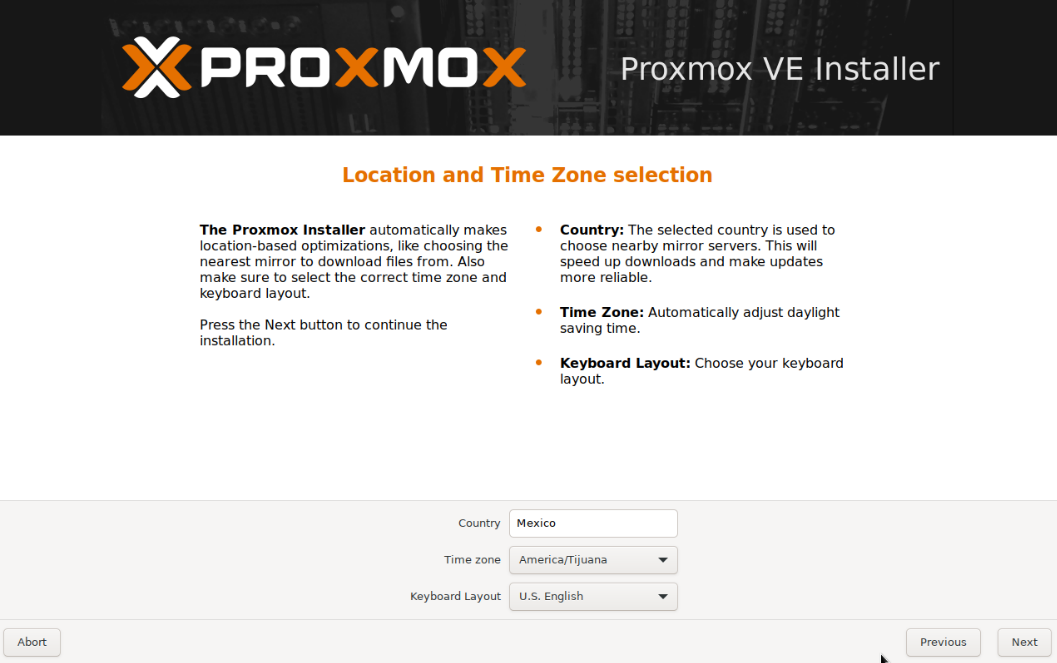
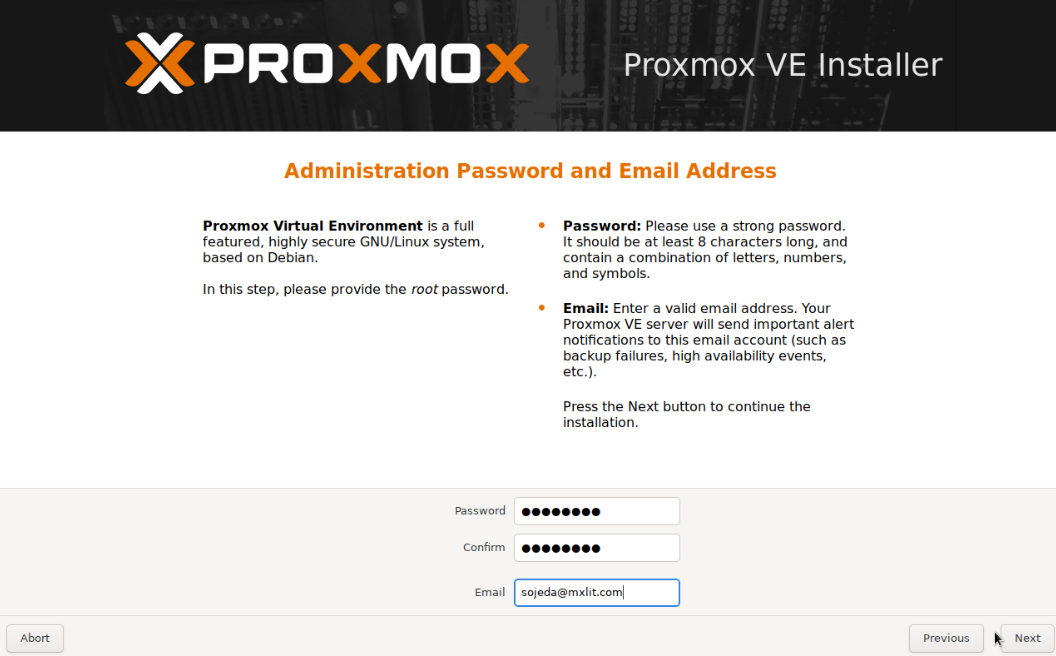
Step 4: Localization & Authentication
Select your Country, Time zone, and Keyboard layout. Accurate time is critical for cluster synchronization and SSL certificates later on.
Next, type in a highly secure password for the root user and provide a valid administrator email. This email will receive critical system alerts (like disk failures or failed backup logs).
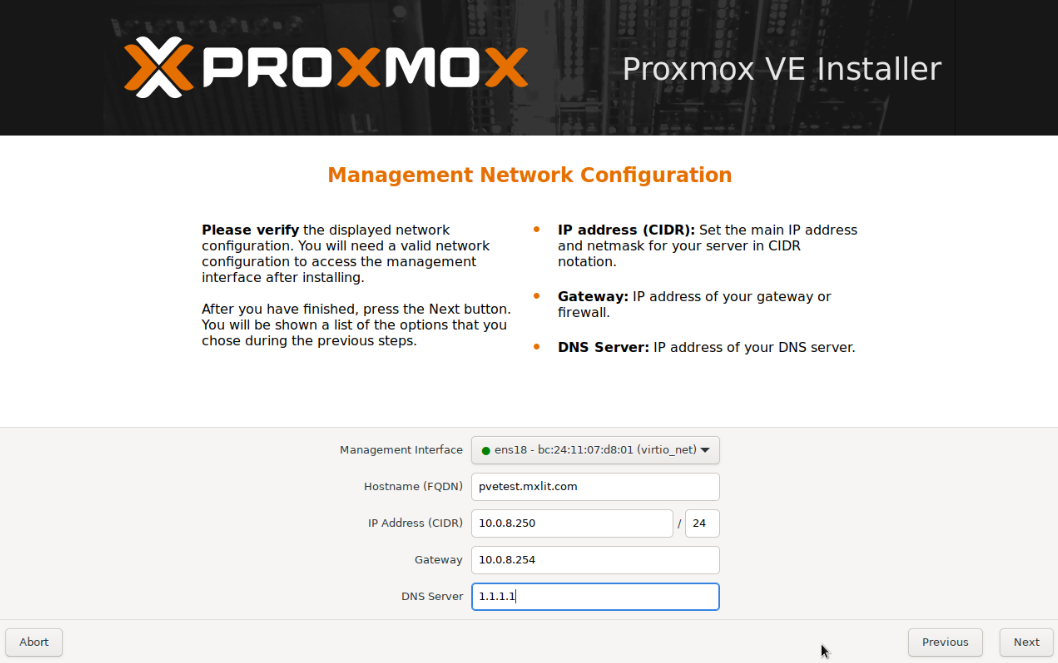
Step 5: Network Configuration
Proxmox requires a static identity. Do not rely on dynamic DHCP for a hypervisor.
- Management Interface: Select the physical NIC (Network Interface Card) you want to use.
- Hostname (FQDN): It must be a Fully Qualified Domain Name (e.g.,
pve-node01.mxlit.local). - IP Address & Gateway: Assign a static IP from your management VLAN. Make sure you have created the A-Record in your DNS server (or pfSense) beforehand.
Step 6: Installation & First Boot
Review the summary window. If the IP address and disk targets are correct, click Install.
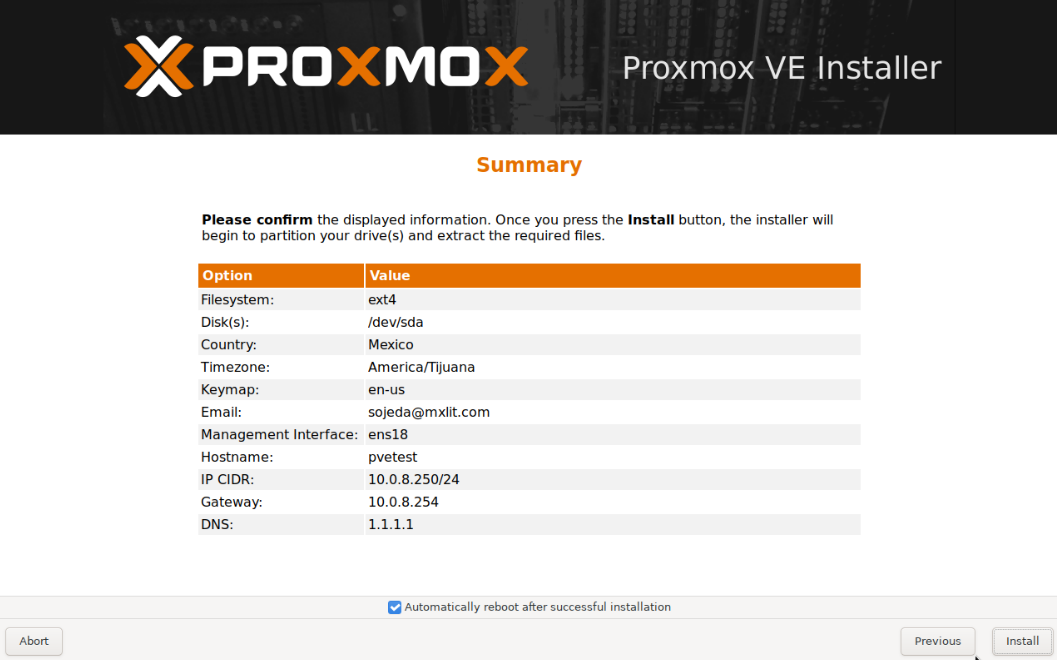
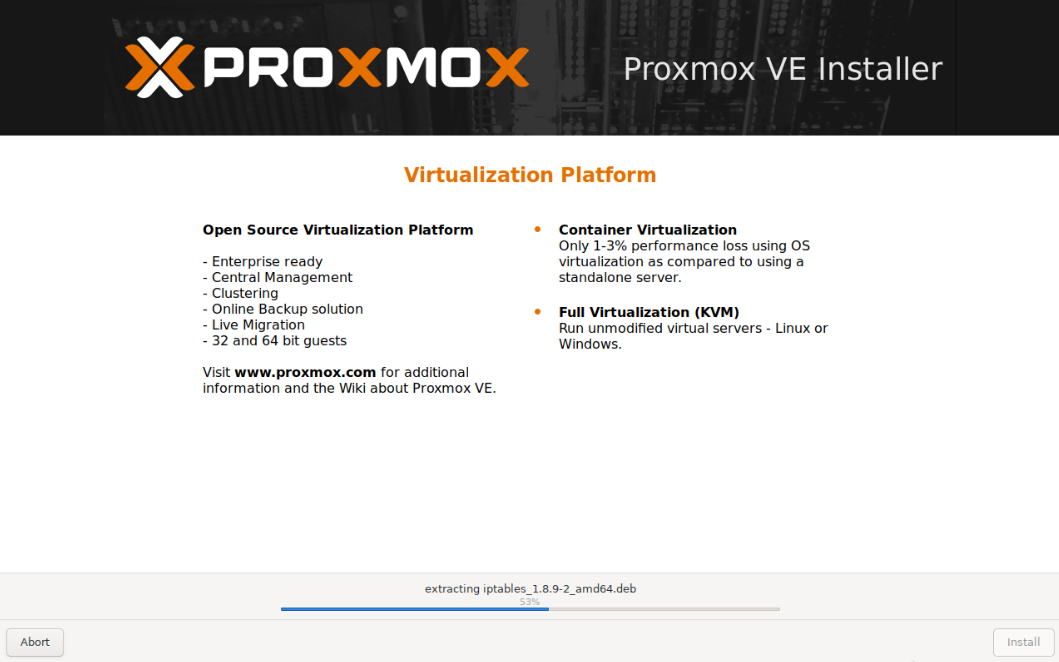
The installer will format the drives, unpack the Debian base, and configure the Proxmox packages. Once finished, the server will reboot automatically.
Step 7: Accessing the Web GUI
Once the physical server finishes booting, you will be greeted by the classic Linux terminal login prompt. It will instruct you to navigate to your newly assigned IP address on port 8006.
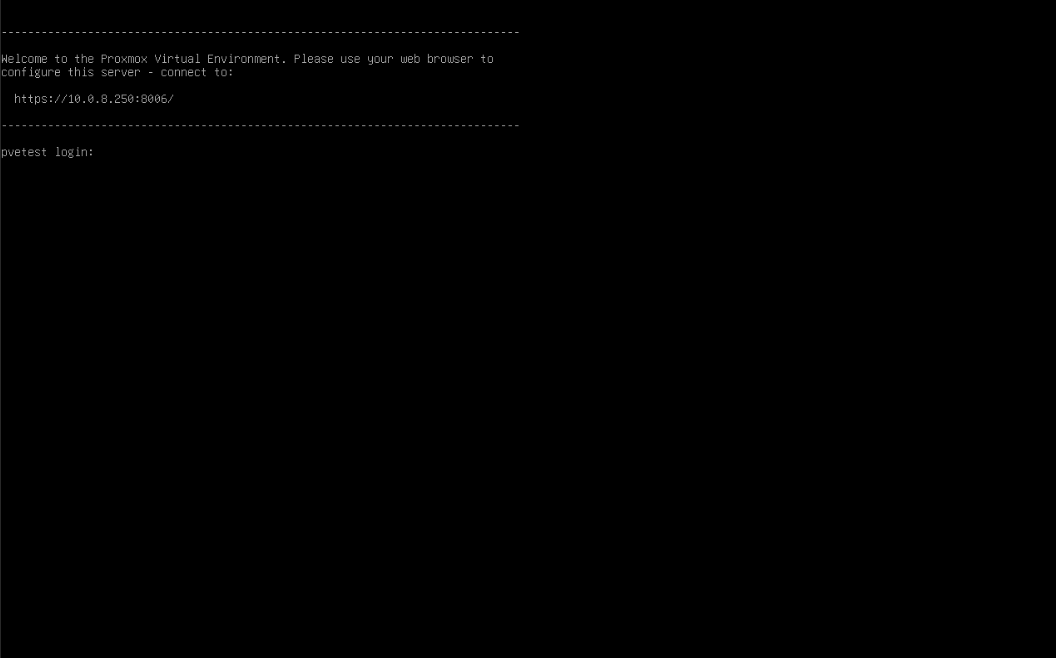
Open a web browser on your admin machine and navigate to: https://<YOUR-IP>:8006
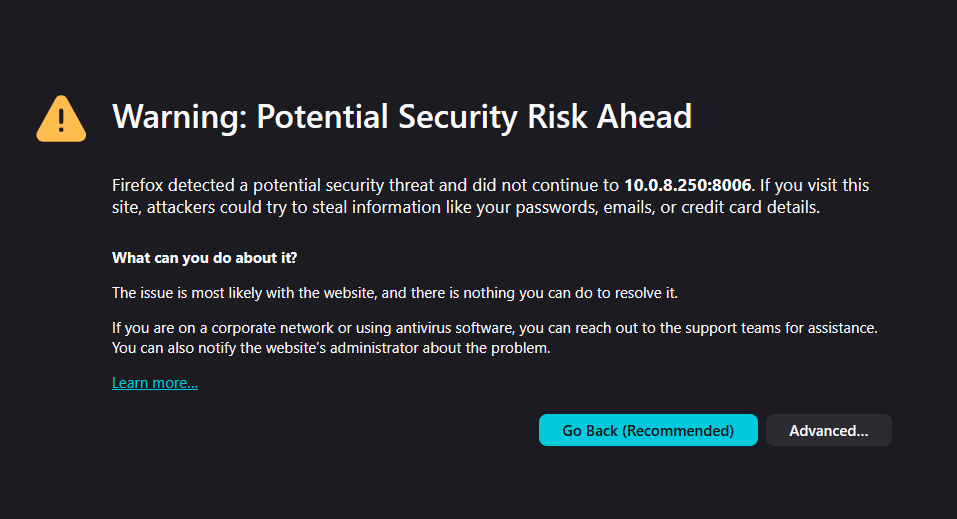
SSL Certificate Warning: Proxmox generates a self-signed certificate upon installation. Your browser will aggressively warn you that the connection is not private. This is perfectly normal. Click “Advanced” and proceed to the site. (We will cover installing proper Let’s Encrypt certificates in a future KB).
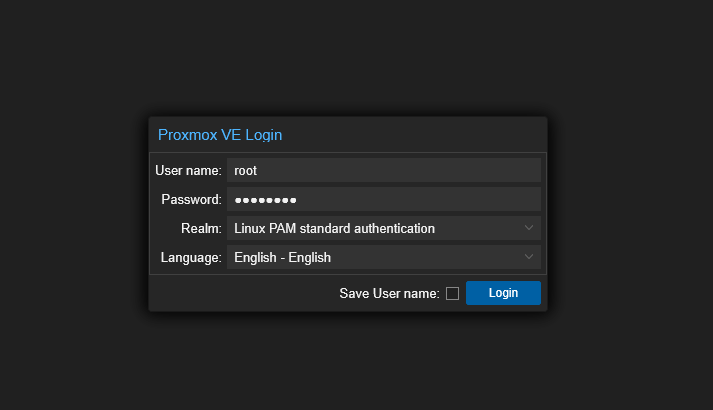
Log in using the username root and the password you defined in Step 4. Ensure the Realm remains set to Linux PAM standard authentication.
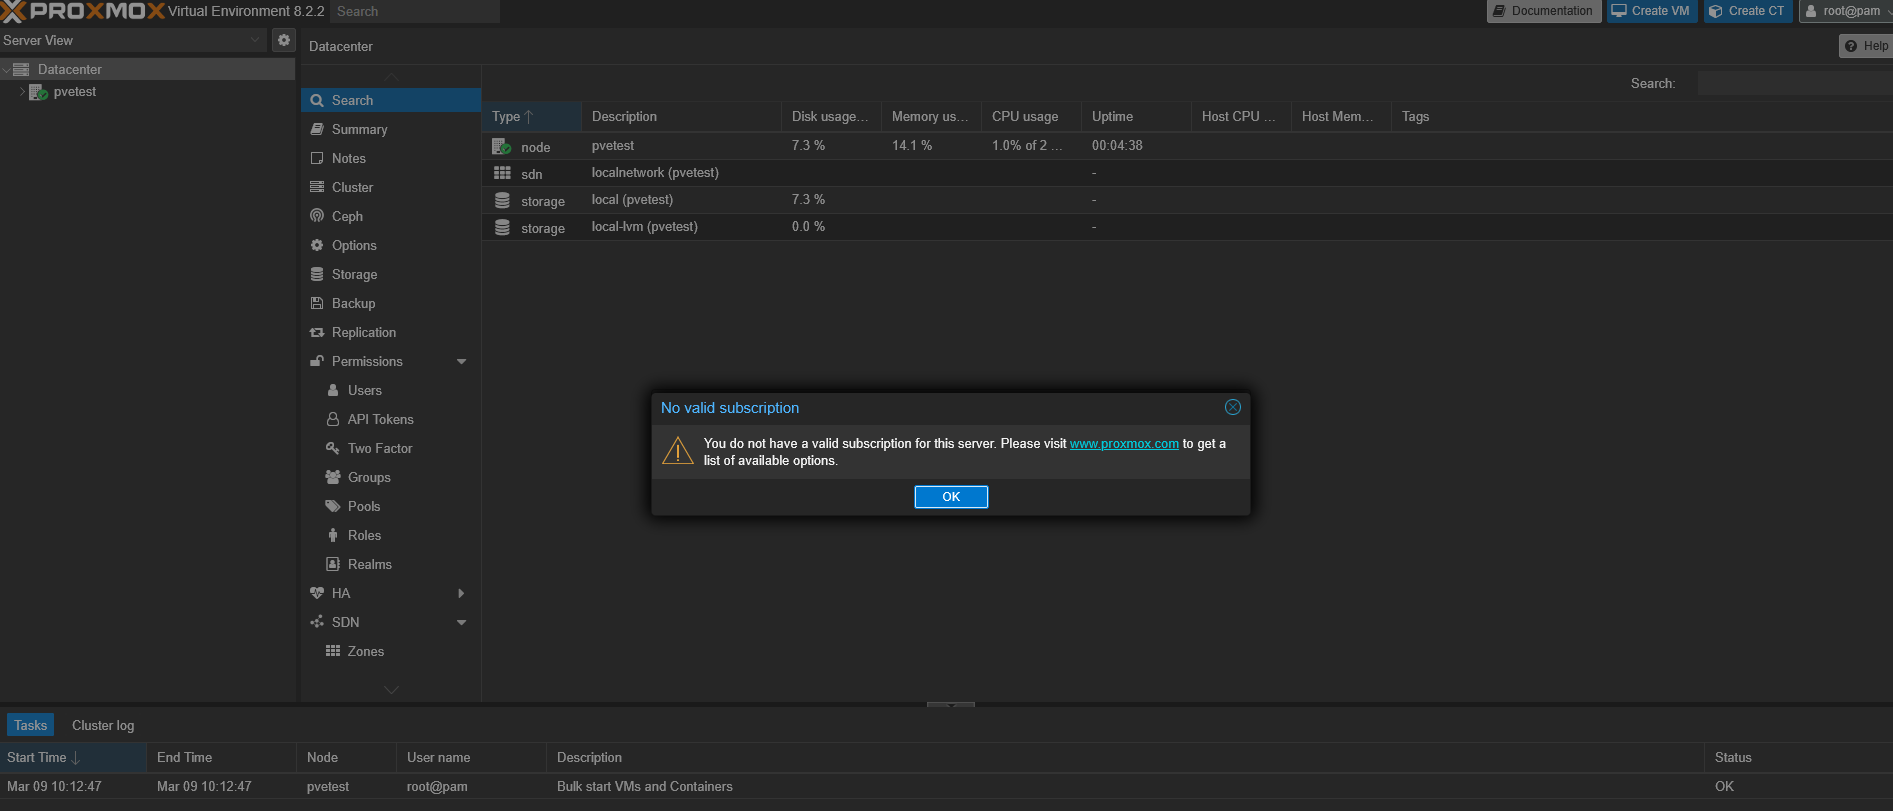
The “No Valid Subscription” Prompt
Immediately upon logging in, you will be greeted with a “No Valid Subscription” dialog box.
Don’t panic! Proxmox VE is 100% free and open-source without feature restrictions. This prompt merely reminds you that you don’t have access to the Enterprise Repository for hyper-stable, vetted corporate patches, nor do you have priority ticketing support. You can simply click OK and use the community repositories for updates.
Conclusion
You now have a fully operational, bare-metal Type-1 hypervisor running. From here, the world is your oyster. In the upcoming KBs in this series, we will tackle uploading ISOs, architecting storage pools, and deploying our very first Virtual Machines.
Happy virtualizing!