
After completing the bare-metal installation of Proxmox VE, you will quickly notice a few initial hurdles: the persistent “No Valid Subscription” validation nag, the inability to download updates because the “Enterprise” repository is enabled by default, and a few unoptimized cluster settings.
To fix all of this simultaneously, we will use a legendary community tool that has saved thousands of hours for homelabbers and system administrators alike: Proxmox VE Helper-Scripts.
In Memoriam: tteck
Before we dive in, it is crucial to acknowledge the original creator of these scripts, known in the community as tteck (Tommy). He dedicated countless hours to building and maintaining this monumental library, making Proxmox accessible to everyone from beginners to enterprise architects. Sadly, Tommy recently passed away. His work remains a cornerstone of the Proxmox community, and this guide serves as a small tribute to his immense contribution.
You can find the official repository here: Proxmox VE Helper-Scripts
Step 1: Locating the Post-Install Script
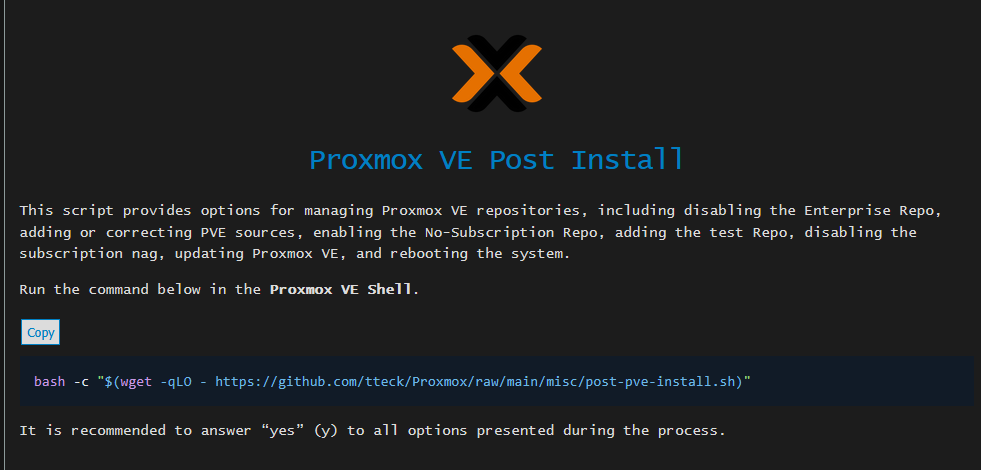
Navigate to the Helper-Scripts website. The script we are interested in is the Proxmox VE Post Install script, usually found under the Proxmox VE Tools section.
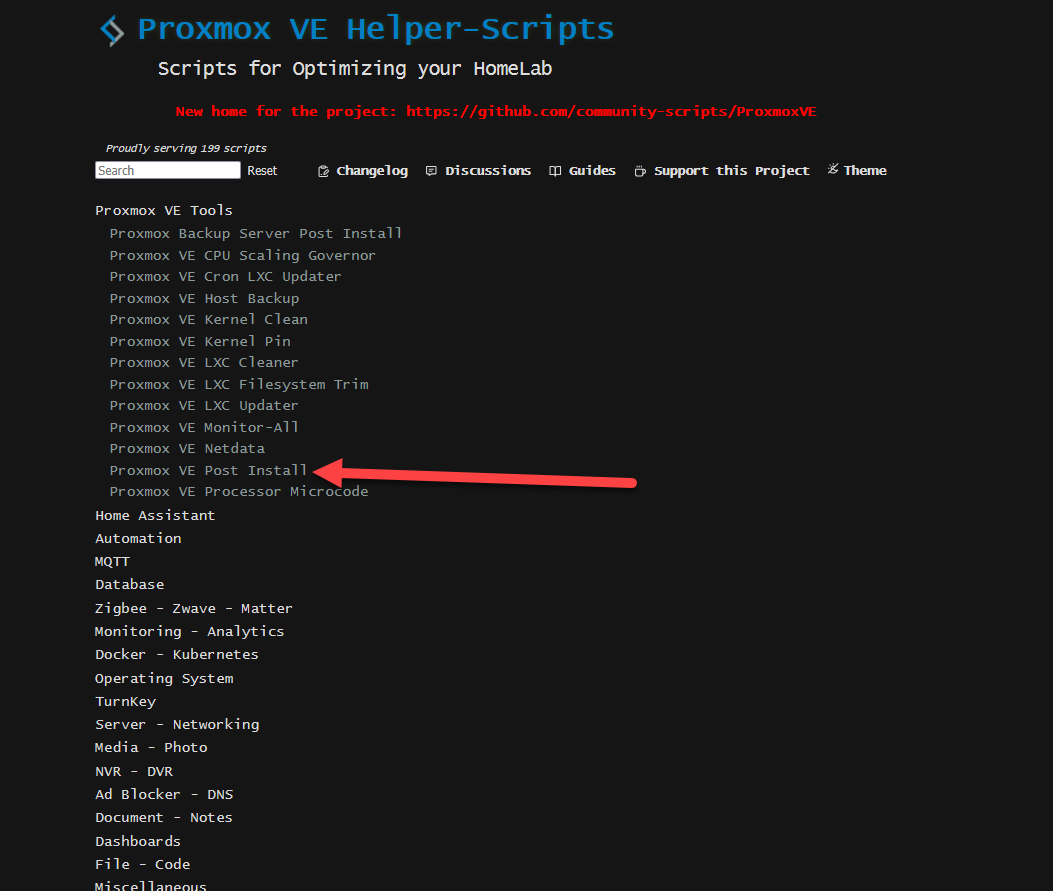
Click on the script block to reveal the bash one-liner. Copy the link provided.
This script has been audited and used by the community for a long time, but it is always good practice to review what you execute. Because this script runs as root on your hypervisor, you should always exercise caution when blindly pasting code into your console.
Compatibility Note: This script works perfectly with Proxmox VE 8. However, because it is no longer actively maintained due to the author’s passing, there is no guarantee it will function on future major releases (e.g., Proxmox VE 9+).
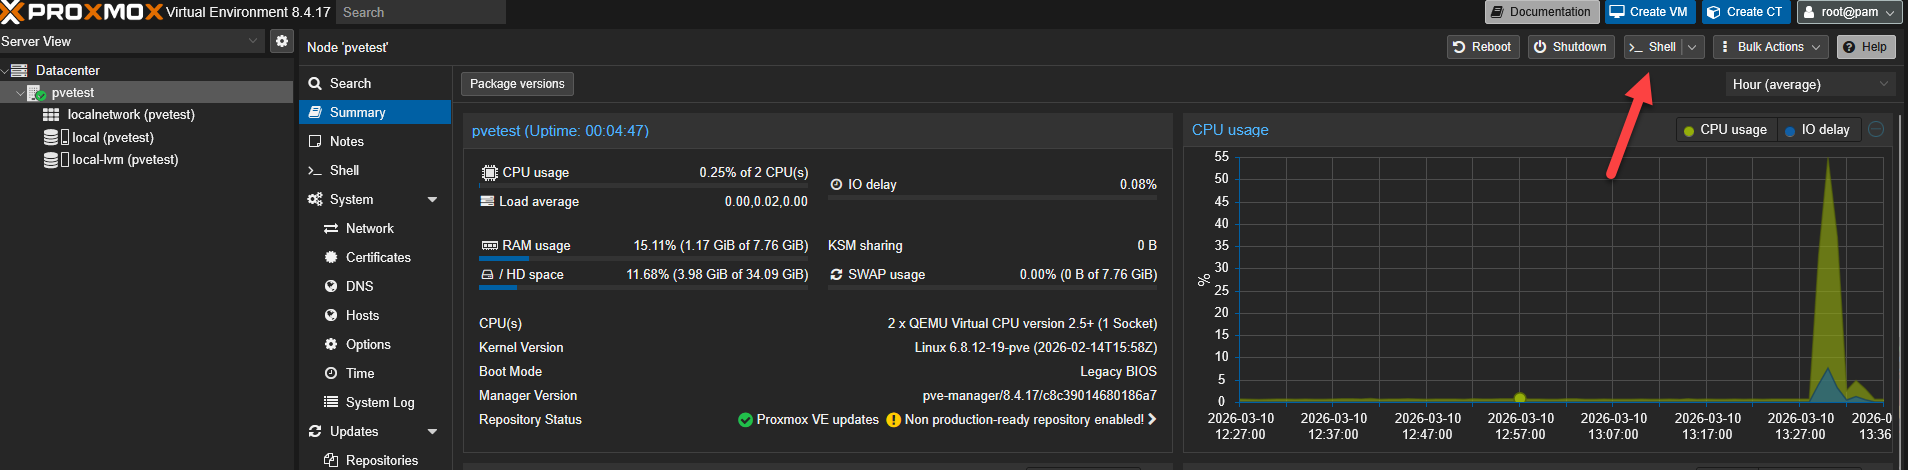
Step 2: Executing the Script in the Shell
Go to your Proxmox VE web interface. Select your node on the left panel and click on >_Shell.
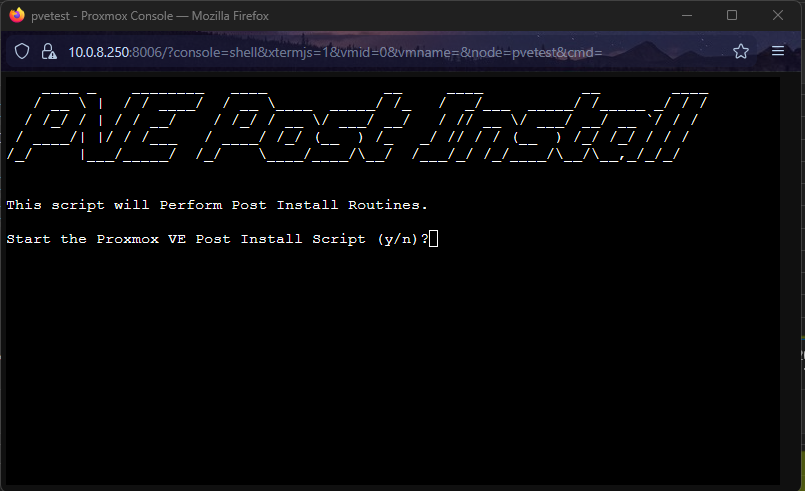
Paste the script you copied into the terminal and press Enter.
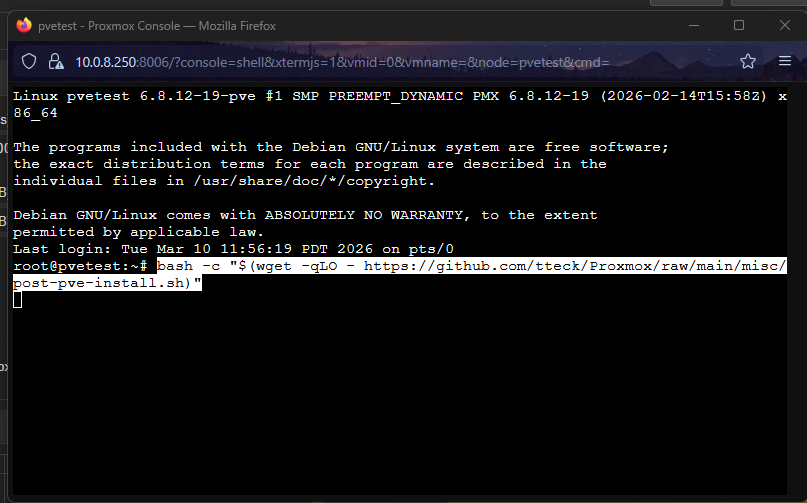
The script will launch an interactive wizard. It will first ask if you want to proceed with the Post-Install routine. Type y and press Enter.
Step 3: Configuring Repositories
The script will sequentially ask you several “Yes/No” questions. Here is how to navigate the most critical ones:
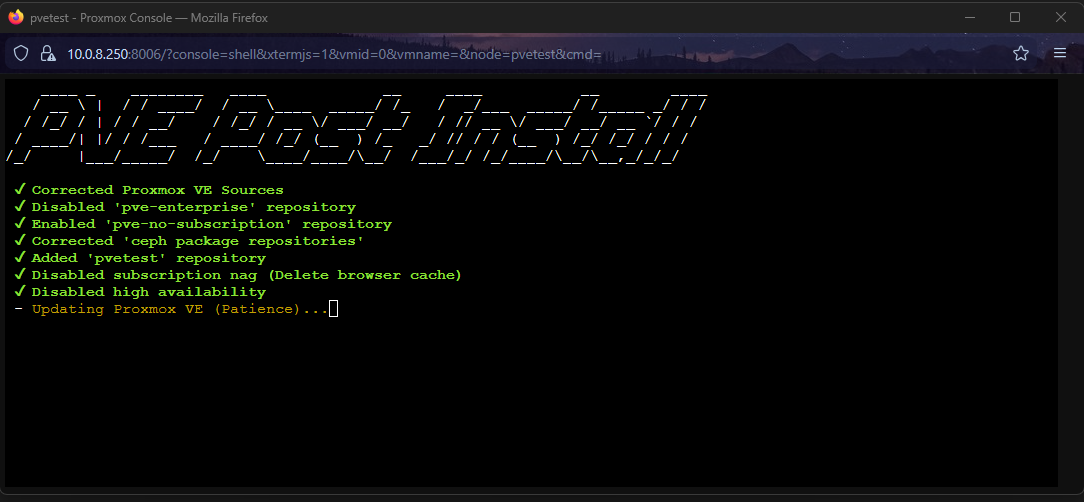
1. Enterprise Repositories: It will ask if you want to disable the Enterprise repository. Say Yes. (Since you do not have a paid subscription key, leaving this enabled will cause apt update to throw errors).
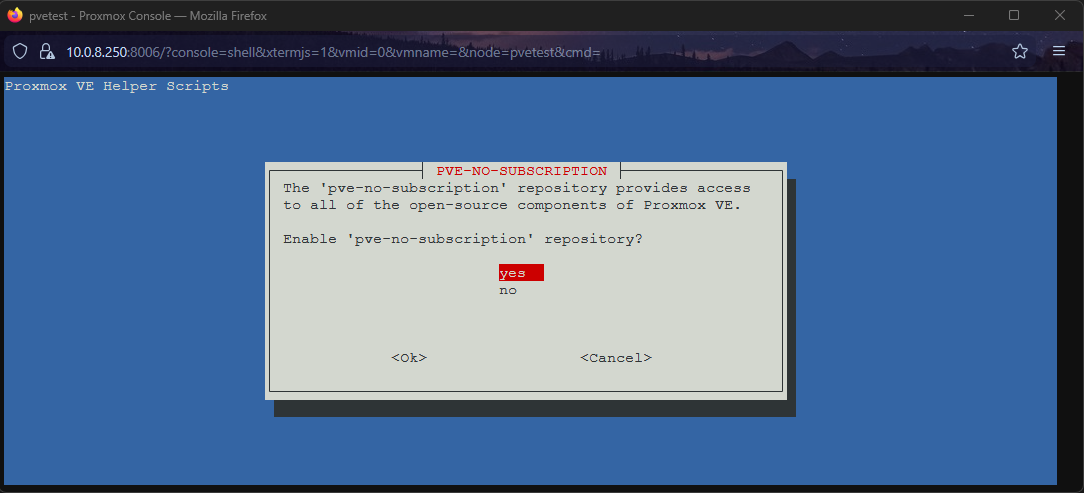
2. No-Subscription Repositories: It will then ask if you want to enable the pve-no-subscription repository. Say Yes. This gives you access to the community-tested updates.
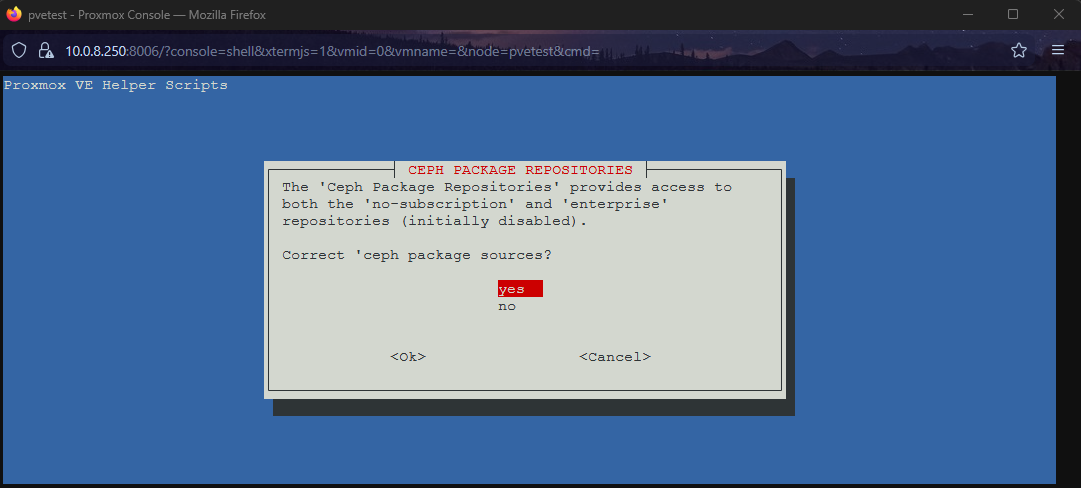
3. Ceph Package Repositories: It will ask to correct the Ceph package repositories. Answer Yes to ensure you fetch Ceph updates from the no-subscription branch as well.
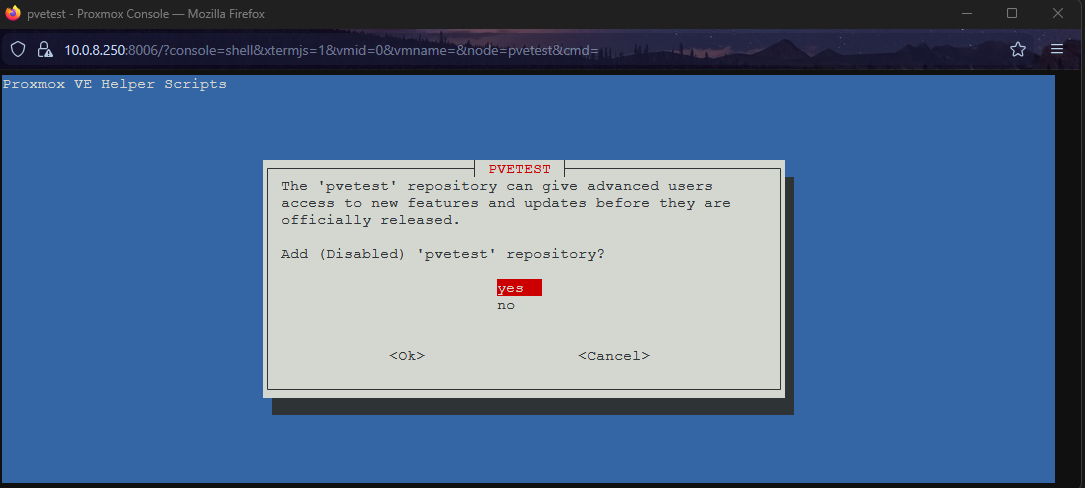
4. Test Repositories: It will ask if you want to add the disabled pvetest repository. Answer No. You generally do not want unstable test packages in a production or stable lab environment.
Step 4: Disabling the Nag & HA Configuration
Next, the script tackles the most notorious Proxmox feature: the login nag.
It will ask: “Disable the ‘No Valid Subscription’ nag?”. Answer Yes.
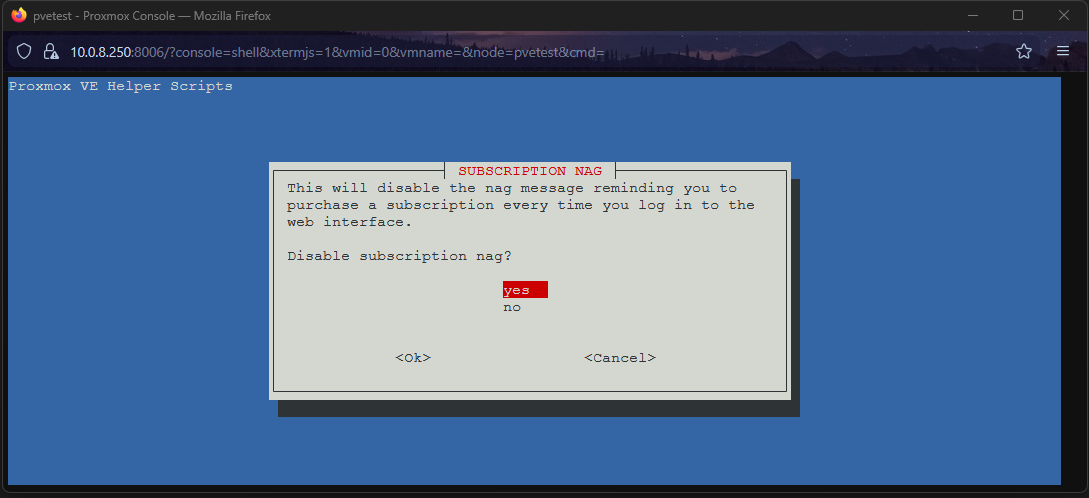
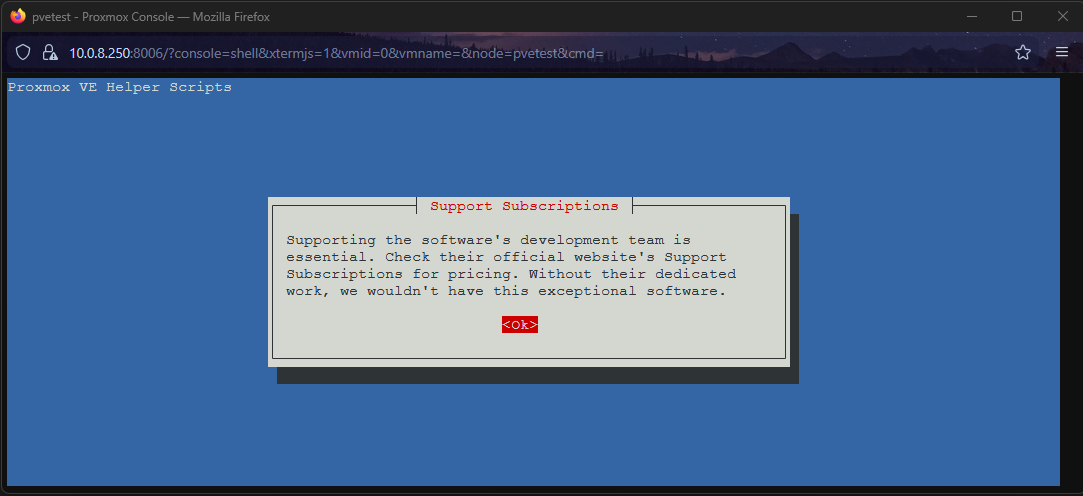
An informative message will appear reminding you that while the community repos are great, purchasing a subscription directly supports the Proxmox developers. Click OK to acknowledge it.
The High Availability (HA) Question
The script will ask: “Disable High Availability (HA)?”. This requires an architectural decision:
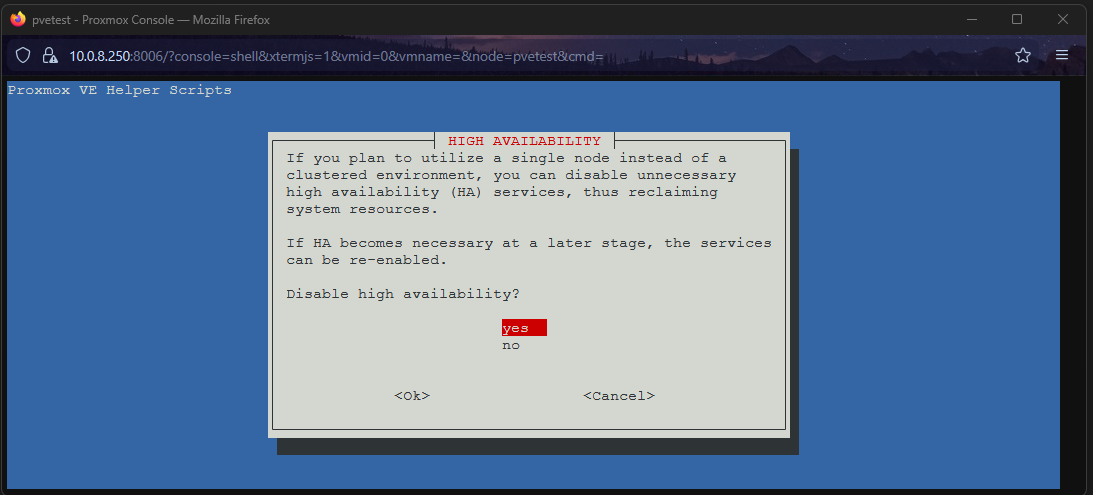
- Answer YES (Disable it): If you only have a single Proxmox node and do not plan to add more servers, or if you do not have shared networked storage (like a NAS/SAN). High Availability requires a minimum of 3 nodes (quorum) and shared storage to migrate VMs automatically. If you don’t have this, the localized HA services just consume unnecessary RAM and CPU cycles. Disable them.
- Answer NO (Leave it enabled): If you are building a multi-node cluster (3+ servers) and plan to use Ceph, NFS, or Fiber Channel to migrate highly critical VMs automatically if a physical server catches on fire.
Step 5: Update the System
Finally, the script will ask if you want to “Update Proxmox VE?”. Answer Yes.
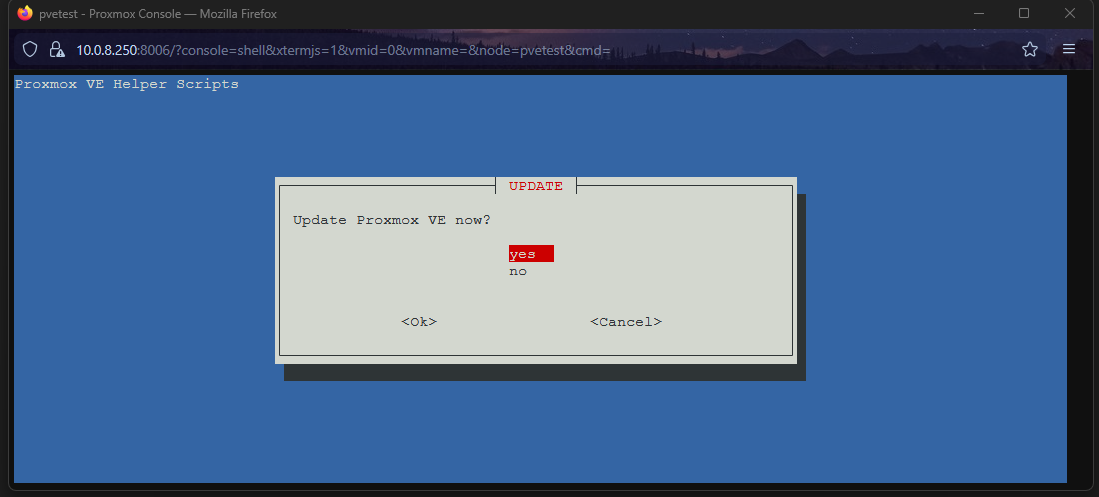
It will run apt update and apt dist-upgrade automatically, fetching the latest patches from the community repositories you just configured.
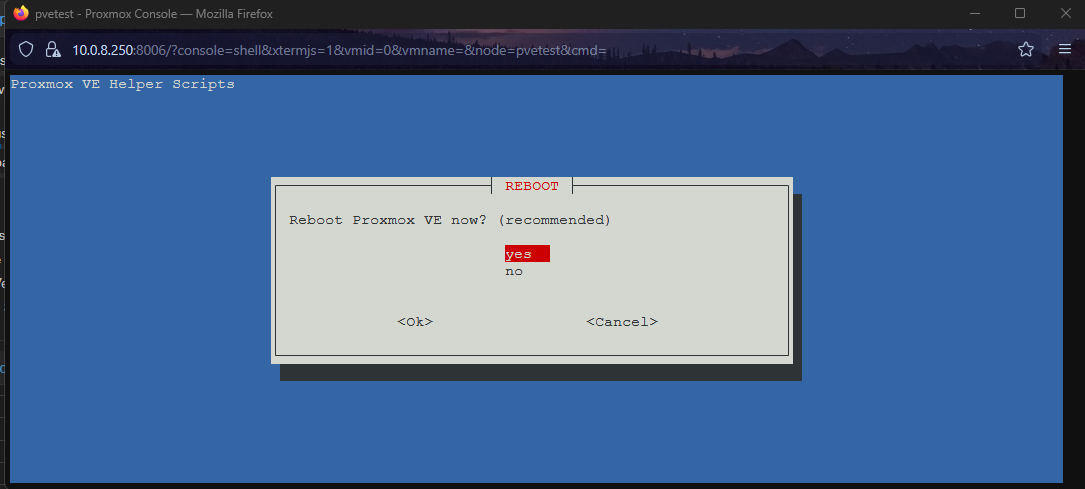
If the script detects that a new Linux Kernel was installed during the update process, it will prompt you to reboot. Answer Yes to apply the updates and restart the hypervisor.
Conclusion
Once the server comes back online, log back into the web interface. You will immediately notice that the annoying subscription popup is gone!
If you navigate to your node, click on Updates, and click Refresh, your system will successfully query the Debian servers without throwing any repository URL errors, showing that no updates are pending.
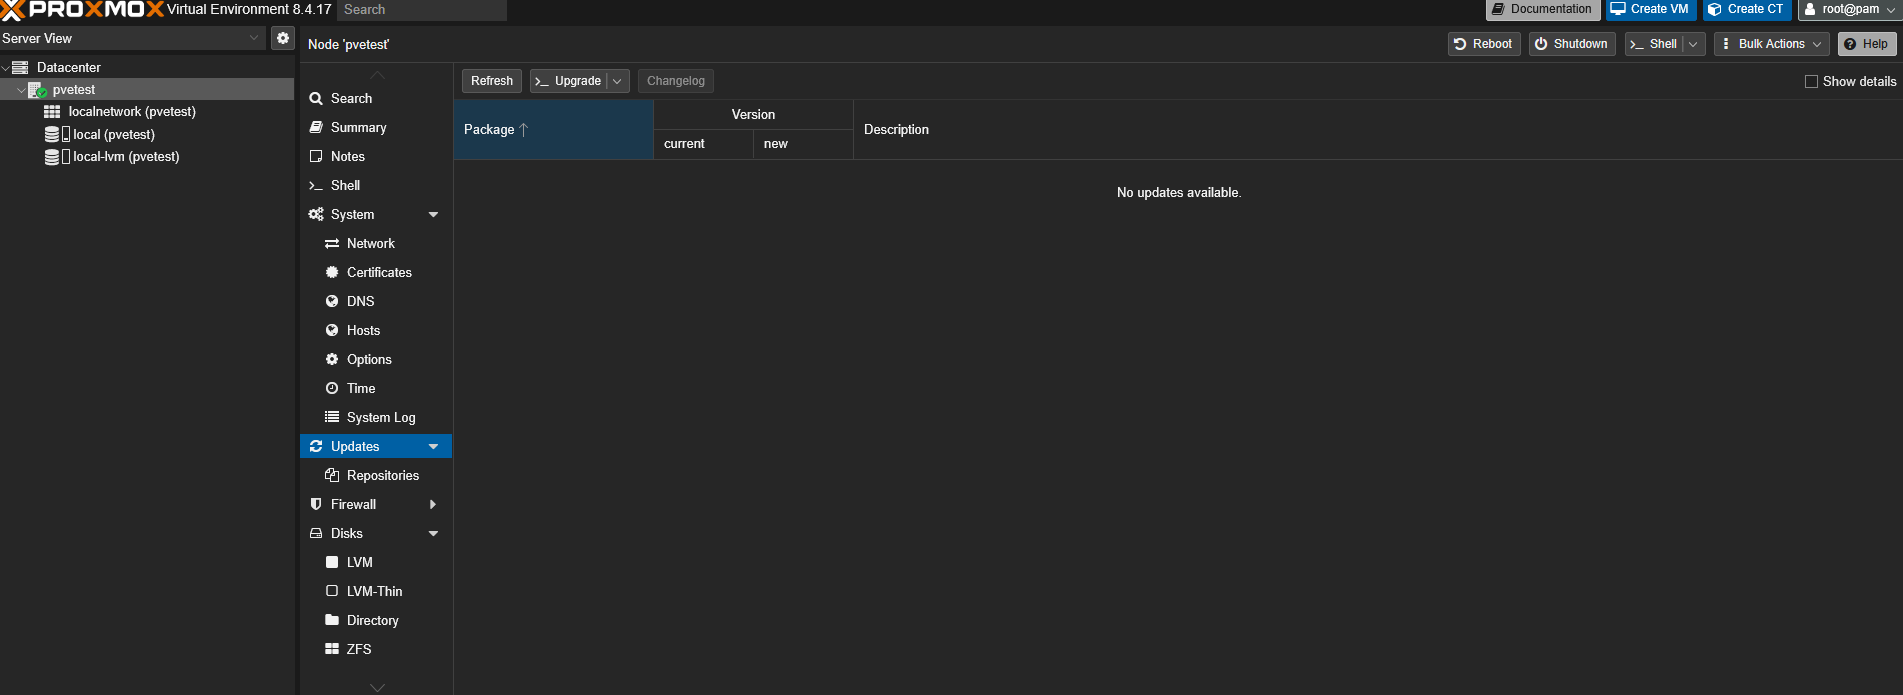
Your Proxmox VE hypervisor is now clean, optimized, and natively up to date. Remember to keep your node updated periodically; you can now perform safe upgrades directly from this Updates window by simply clicking the >_Upgrade button.