By default, Proxmox VE generates a self-signed SSL certificate during installation. While this encrypts the traffic between your browser and the server, it causes modern browsers to throw aggressive “Your connection is not private” warnings.
Why should we apply a valid SSL Certificate? In an enterprise or advanced homelab environment, ignoring certificate warnings is a dangerous habit. It trains administrators to click “Proceed Anyway”, which leaves them vulnerable to genuine Man-in-the-Middle (MitM) attacks. Furthermore, integrating Proxmox with external APIs, backup servers, or automation tools (like Terraform) often fails outright if the endpoint does not possess a mathematically verifiable, globally trusted SSL certificate.
In this guide, we will use the built-in ACME (Automated Certificate Management Environment) client in Proxmox to automatically issue and renew a free, trusted Let’s Encrypt certificate using the DNS Challenge method.
Step 1: Registering an ACME Account
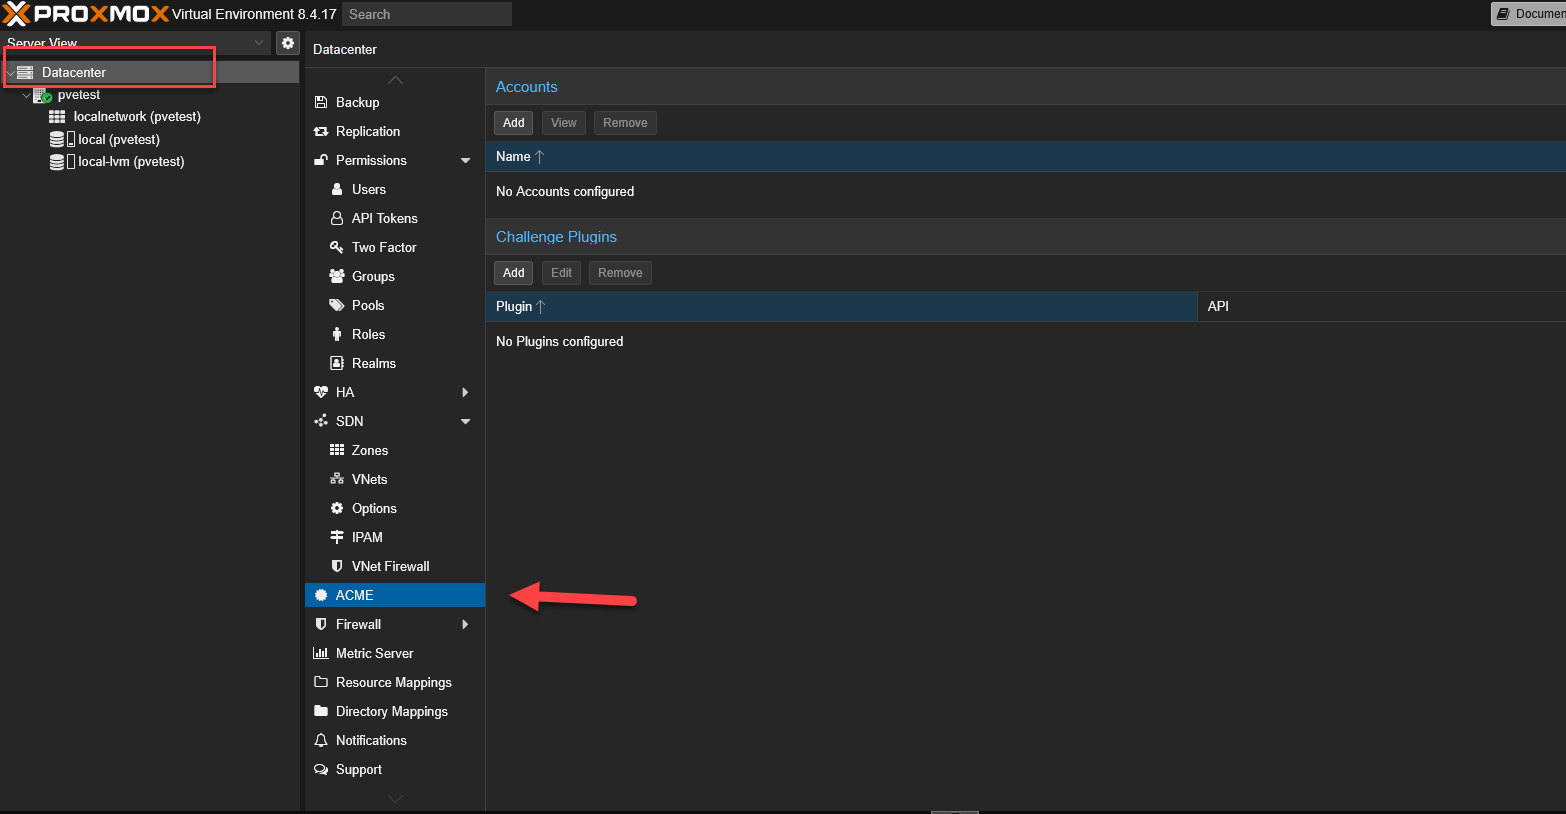
ACME settings are configured at the global Datacenter level, not on individual nodes.
Select your Datacenter on the left panel, navigate to ACME, and click on the Add button under the Accounts section.
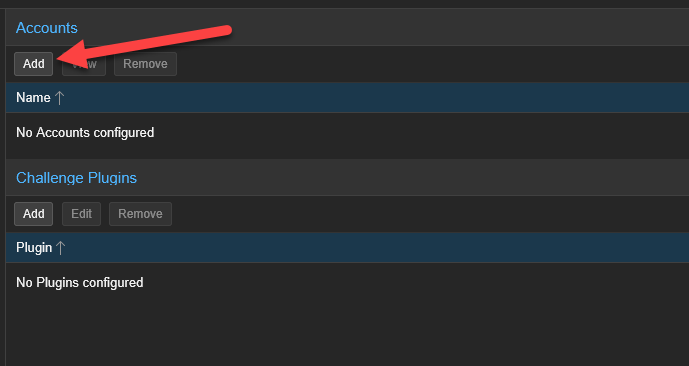
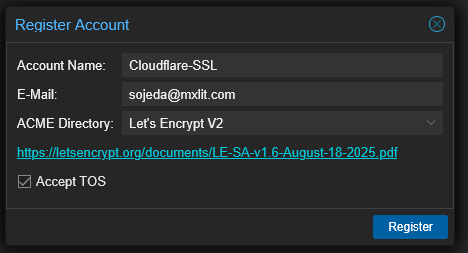
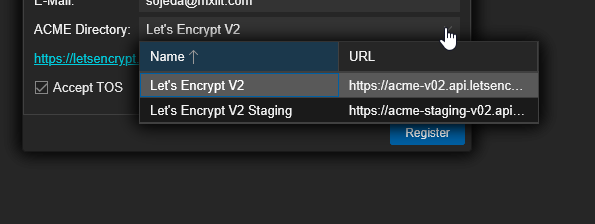
You will be prompted to register an account with a Certificate Authority (CA):
- Account Name: Enter a recognizable name without spaces (e.g.,
Cloudflare-SSL). - E-Mail: Enter a valid email address. Let’s Encrypt will strictly use this to send you critical expiration warnings if your auto-renewal ever fails.
- ACME Directory: Select Let’s Encrypt V2.
- Check the box to accept the Terms of Service.
- Click Register.
Understanding “Staging” vs “Production” Directories
Notice the Let's Encrypt V2 Staging option in the dropdown? Let’s Encrypt enforces strict rate limits (e.g., only 5 duplicate certificates per week) on their production servers. If you are experimenting with automated scripts and fail repeatedly, you will be temporarily banned. The Staging environment has massively raised limits, allowing you to test your configuration safely. It issues fake certificates that your browser won’t trust, but proves your automation works. Once successful, you switch to the Production directory for the real trusted certificate.
If the registration task box says OK, you can close the window.
Step 2: Configuring the DNS Challenge Plugin
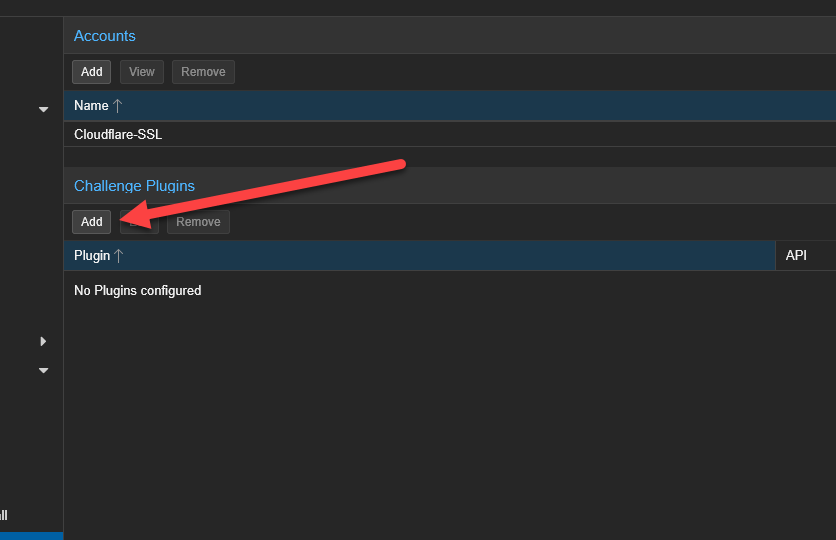
Next, we must configure how Proxmox will prove to Let’s Encrypt that you actually own the domain you are requesting a certificate for. Scroll down to the Challenge Plugins section and click Add.
In the Add Plugin window:
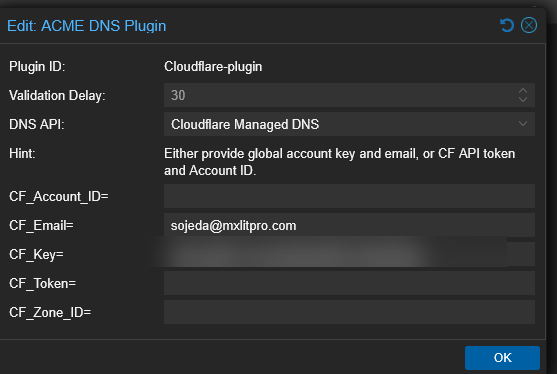
- Plugin ID: Give it a memorable name (e.g.,
Cloudflare-plugin). - DNS API: Select your DNS provider from the massive list (we are using Cloudflare).
- API Data: Enter your specific API Token/Secret keys required to authenticate with your provider.
What is the Validation Delay?
Validation Delay: When Proxmox asks your DNS provider to create the special ACME TXT record, it takes time for that new record to propagate across global internet DNS servers. If Let’s Encrypt checks for the record before it propagates, the validation fails. The Validation Delay (in seconds) tells Proxmox “Wait X seconds before telling Let’s Encrypt to verify the record.” A safe default is 30 seconds, but slow providers might need 120.
Click Add when your API details are populated.
Step 3: Assigning the Certificate to the Node
Now that the Datacenter has an ACME account and a DNS plugin, we must apply them to the specific hypervisor node.
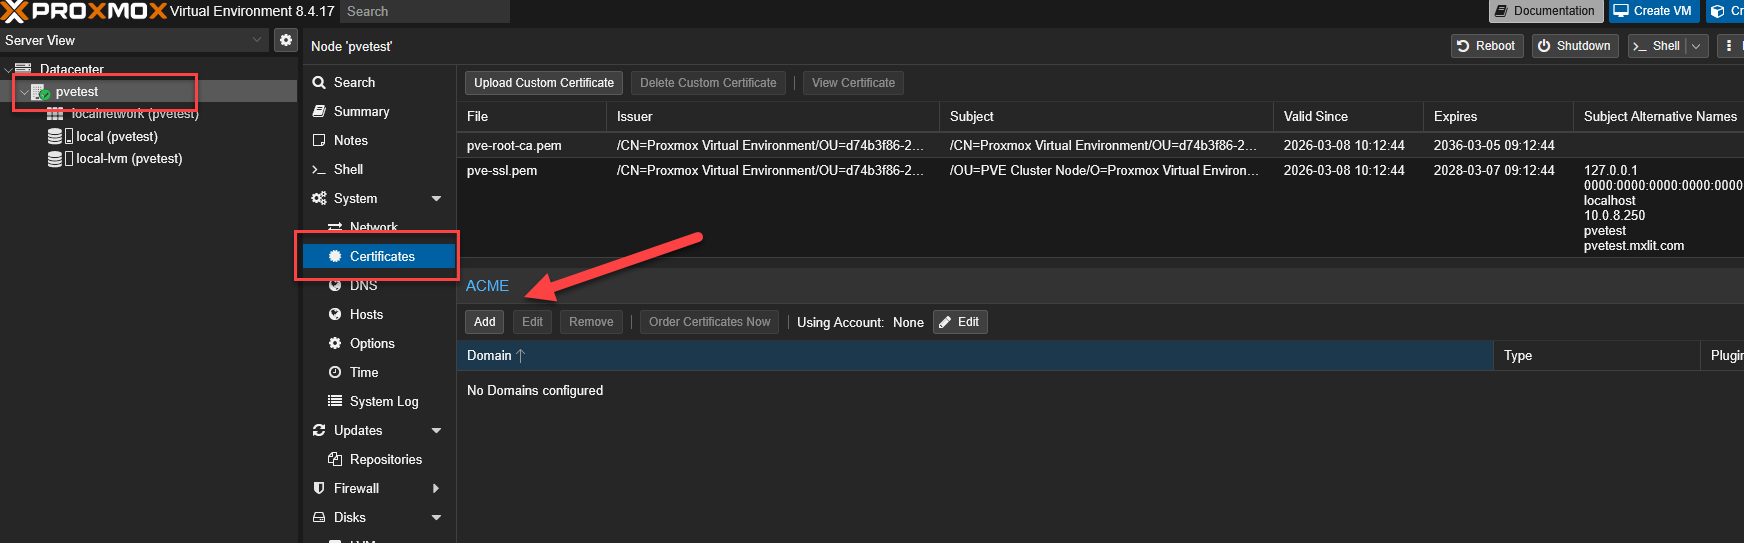
Select your physical Node on the left panel, go to Certificates, and click Add under the ACME section.

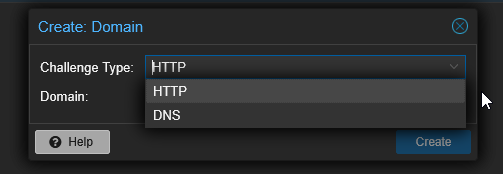
By default, the Challenge Type is set to HTTP. Change this to DNS.
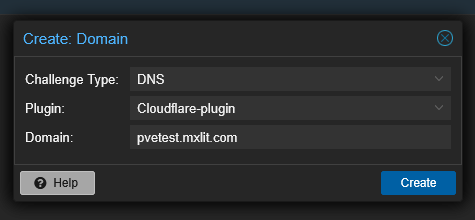
Select the DNS Plugin you just created (Cloudflare-plugin) and enter the exact fully qualified Domain name of your Proxmox server (e.g., pve.yourdomain.com). Click Create.
Important: How DNS Validation Works (And why you need a real domain)
To get a globally trusted SSL certificate, you must formally own a real, registered domain name (like .com, .net, etc.).
The DNS Challenge: When you request the certificate, Let’s Encrypt generates a cryptic text string. Using the API Token you provided, Proxmox automatically logs into your Cloudflare account and creates a temporary TXT DNS record containing that string. Let’s Encrypt then queries the global internet for your domain’s TXT records. If it finds the matching string, it mathematically proves you possess administrative control over the domain. Let’s Encrypt then issues the certificate, and Proxmox deletes the temporary TXT record automatically. This entire process happens over the internet without needing to open port 80/443 on your firewall!
Step 4: Applying and Ordering the Certificate
We are almost there. We need to tell the node which ACME account to use.
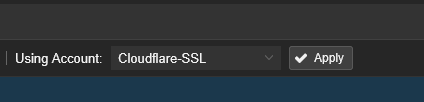
Still inside the Node’s Certificates page, under the ACME Account section, click Edit.

Select the Let’s Encrypt account you registered in Step 1 and click Apply.
Finally, click the majestic Order Certificates Now button.

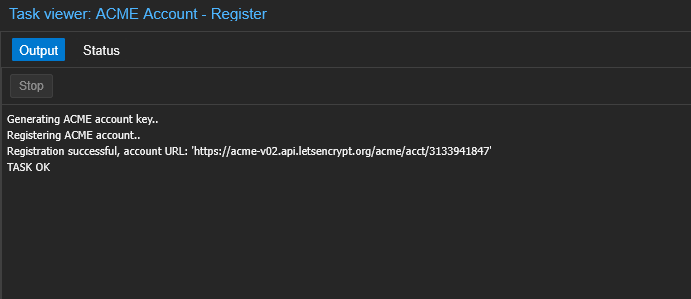
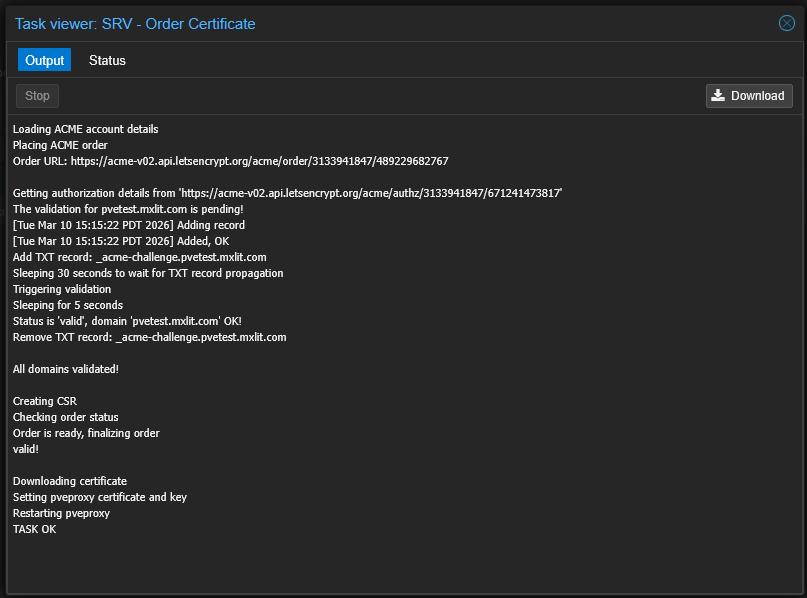
A task viewer will appear. You will see Proxmox communicating with Let’s Encrypt, the Validation Delay counting down, and finally, the successful download of the full certificate chain and private key.
If the task says TASK OK, you succeeded.
Conclusion
Your browser session to the Proxmox web GUI will likely drop or refresh immediately as the background pveproxy service restarts to apply the new cryptographic keys.
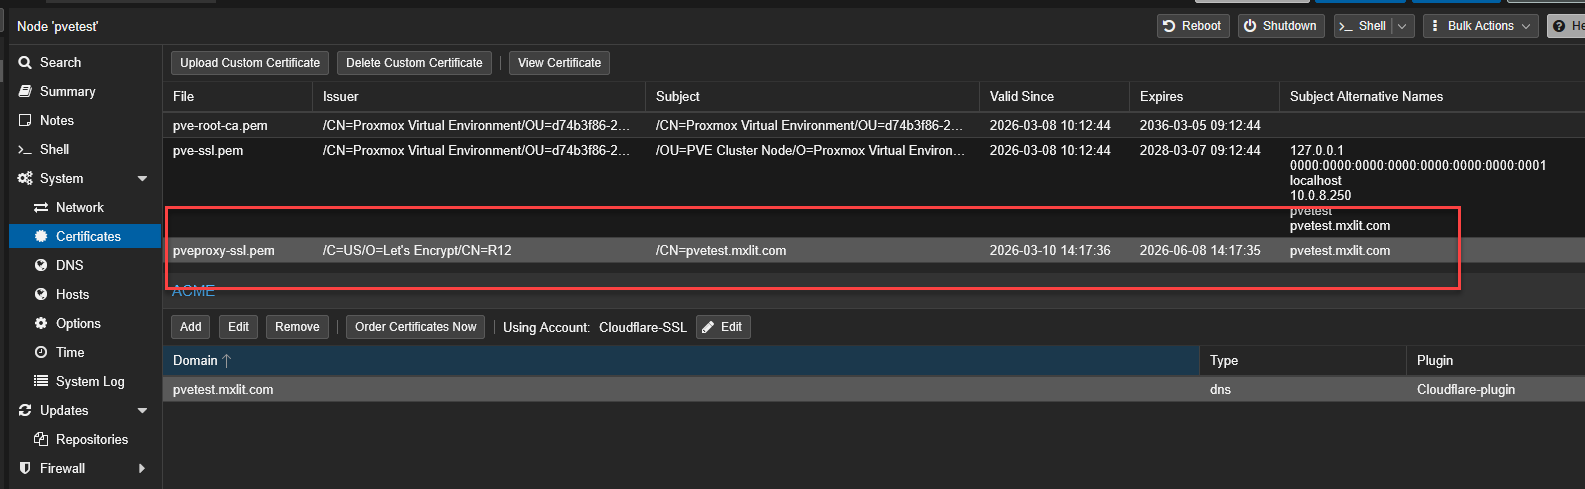
When you reconnect, you will be greeted by the beautiful, reassuring padlock icon in your browser’s address bar. If you check the Certificates menu again, you will see your shiny new Let’s Encrypt certificate listed with its expiration date.
The best part? Because we configured the Proxmox ACME client, this certificate will automatically renew itself every 60 days without any human intervention. You have permanently solved the Proxmox SSL warning.