Integrating Proxmox Virtual Environment (VE) with Microsoft Active Directory allows you to centralize user management and apply your organization’s existing security policies to your virtualization clusters. By connecting Proxmox to AD via LDAP, administrators and operators can log in using their standard domain credentials, eliminating the need to manage separate local accounts on each Proxmox node.
1. Add the Active Directory Realm
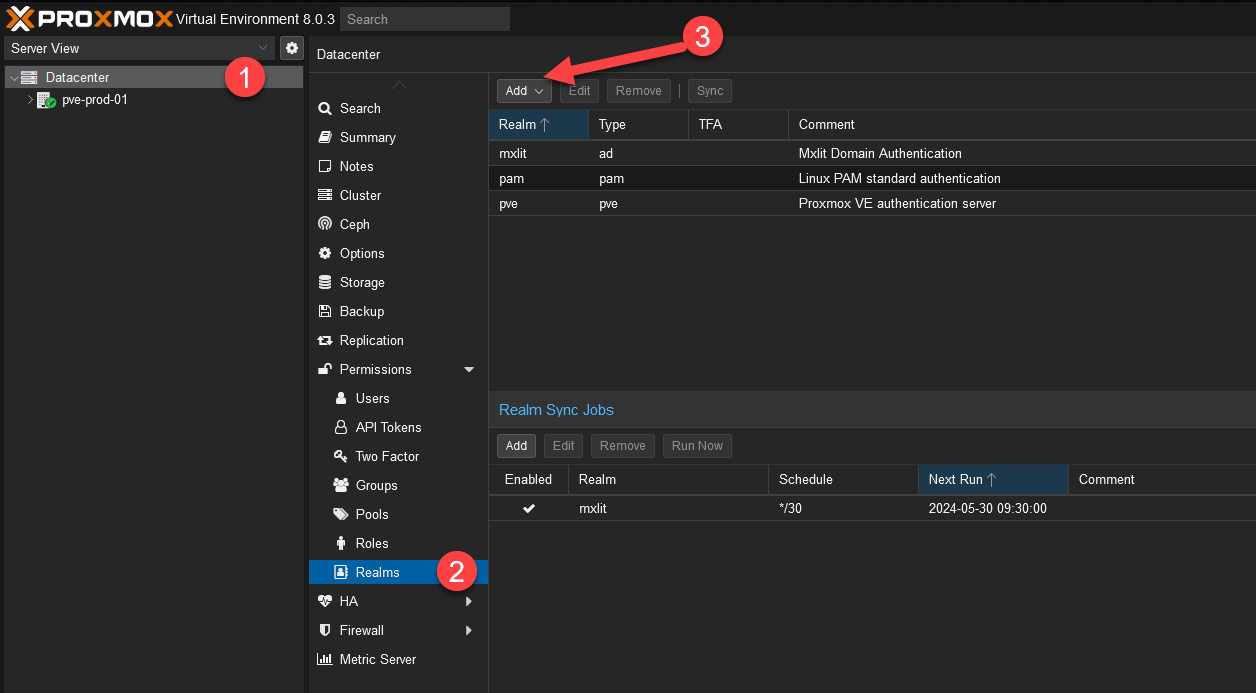
Navigate to your Proxmox VE web interface. At the top of the left-hand cluster menu, click on Datacenter, then select Realms.
Click on the Add button to begin adding a new authentication server.
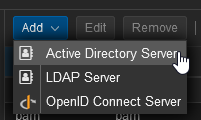
Select Active Directory Server from the dropdown menu.
2. Configure the AD Server Settings
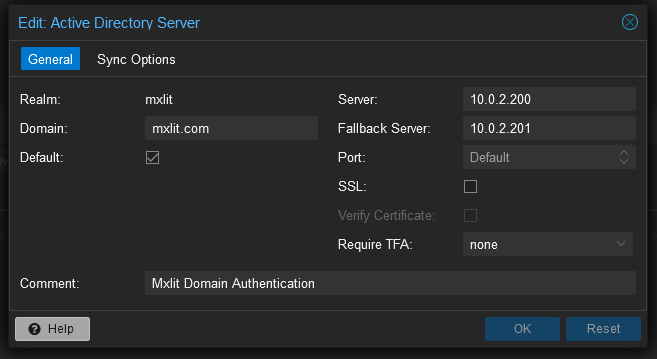
A configuration window will appear. Fill in your environment’s details:
- Realm: A short identifier for this connection (e.g.,
MXLIT-AD). - Domain: Your Active Directory domain name (e.g.,
mxlit.com). - Server: Leave the others as default or add your primary domain controller IP/Hostname.
3. Configure Sync Options and Filters
Switch to the Sync Options tab. This is where you configure how Proxmox will read users and groups from your Active Directory.
- Bind User: This must be the full
DistinguishedNameof the user account Proxmox will use to query the AD. - Bind Password: The password for the bind user.
To prevent importing every single user in your massive directory, you should apply a User Filter. For example, to only import users who belong to a specific Proxmox_Admins security group, add the following LDAP filter:
(&(objectclass=user)(samaccountname=*)(MemberOf=CN=Proxmox_Admins,OU=Security Groups,OU=Restricted,OU=MXLIT_Groups,DC=MXLIT,DC=COM))
If you need to import users from multiple different groups (e.g., Admins and Operators), you can use an OR (|) statement:
(|(MemberOf=CN=Proxmox_Admins,OU=Security Groups,OU=Restricted,OU=MXLIT_Groups,DC=MXLIT,DC=COM)(MemberOf=CN=Proxmox_Operators,OU=Security Groups,OU=Restricted,OU=MXLIT_Groups,DC=MXLIT,DC=COM))
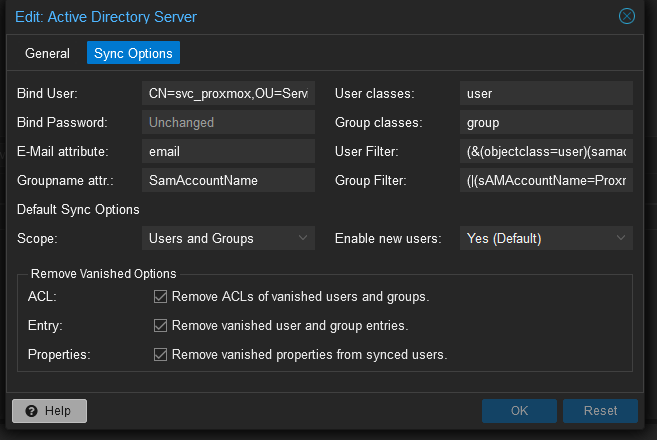
Similarly, to filter the groups being imported, use the Group Filter. For instance, to only import groups that start with “Proxmox”:
(|(sAMAccountName=Proxmox*))
Make sure the Scope is set to Users and Groups and ensure the three bottom options (Enable new users, etc.) are checked so changes in Active Directory naturally reflect inside Proxmox.
4. Setup Automatic Realm Syncing
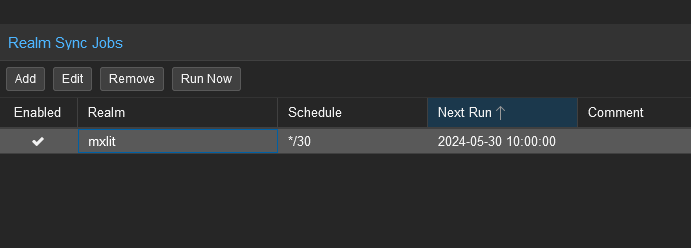
To ensure that Proxmox periodically checks Active Directory for new users, disabled accounts, or group changes, you need to create a Sync Job.
Go to the Realm Sync Jobs tab and click Add.
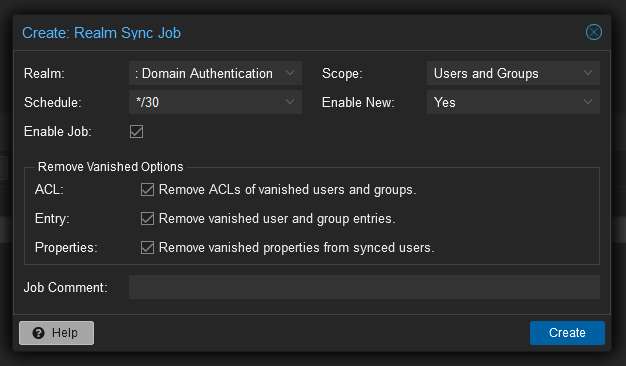
- Realm: Select the Active Directory realm you just created.
- Scope: Select
Users and Groups. - Schedule: Define how often the sync should run (e.g., every 15 minutes, hourly).
Check the bottom three options to continuously purge deleted AD users, remove vanished properties, and enable new accounts automatically.
Important Note on LDAPS and Windows Server 2025
The steps above configure standard, unencrypted LDAP authentication. While this is functional for internal networks on older domain functional levels, it is highly recommended to use LDAPS (LDAP over SSL) to secure credential transmissions.
Windows Server 2025 Requirement: If your domain controllers are running Windows Server 2025, please note that Microsoft disables standard, unencrypted LDAP by default. To authenticate against WS 2025, you must configure LDAPS. This requires additional, more complex steps involving importing your Domain Controller’s CA certificate into the Proxmox trust store, which we will cover in a separate, dedicated guide.
Conclusion
By configuring Active Directory authentication with specific LDAP filters, you ensure that only authorized IT staff are synced into your Proxmox VE environment. This dramatically simplifies onboarding, offboarding, and auditing, while keeping your virtualization platform tightly integrated with your corporate identity management tools.