
When you install Proxmox VE on a single drive—for instance, a 1TB SSD—the installer automatically partitions the space into local (root file system, typically for ISOs and backups) and local-lvm (block storage for VM disks). However, for many Homelab enthusiasts and small-scale deployments, this division is often unnecessary and can lead to wasted space on one partition while the other is full.
This guide explains how to safely remove the local-lvm partition and expand your primary local (root) filesystem to claim 100% of your disk’s usable space.
Why Do This? (Pros and Cons)
Before running these commands, consider if this is right for your environment.
Pros (Why it’s great for Homelabs):
- Unified Storage: You get a single, massive pool (
local) for everything: ISOs, templates, VM disks (as qcow2 files), and backups. You don’t have to guess how much space to allocate to VMs vs ISOs. - Simplicity: Easier to manage backups and move files around using the standard Linux filesystem (Ext4/XFS) instead of dealing with Logical Volumes for every virtual disk.
- Maximum Utilization: Perfect for hypervisors with limited storage (e.g., Mini PCs or Intel NUCs with a single 1TB/2TB drive).
Cons (Why enterprise avoids it):
- Performance Hit: VM disks stored as raw block devices (
local-lvm) have slightly lower overhead and better I/O performance than generic file-based disks (qcow2onlocal). - No Native Snapshots (Ext4): If your root filesystem is Ext4, you cannot take live snapshots of VMs without pausing them. (ZFS users do not suffer from this issue).
If the pros outweigh the cons for your use case, proceed with the following steps.
1. Delete the local-lvm Volume
WARNING: This process will destroy all data currently stored on the
local-lvmpartition. Ensure you have backed up any existing Virtual Machines or Containers before proceeding.
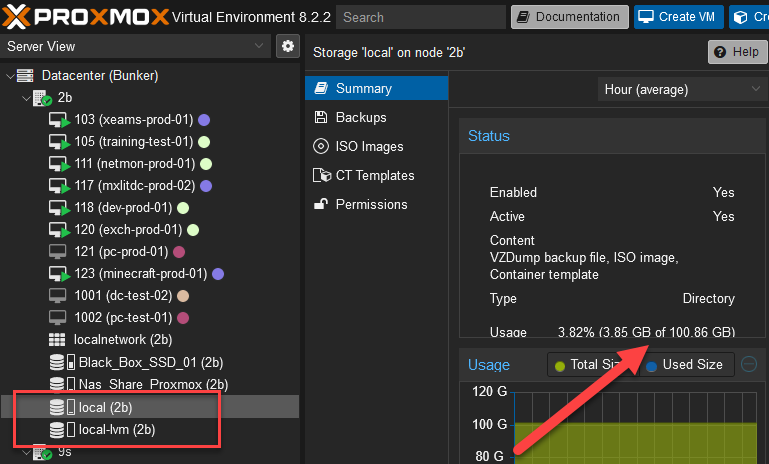
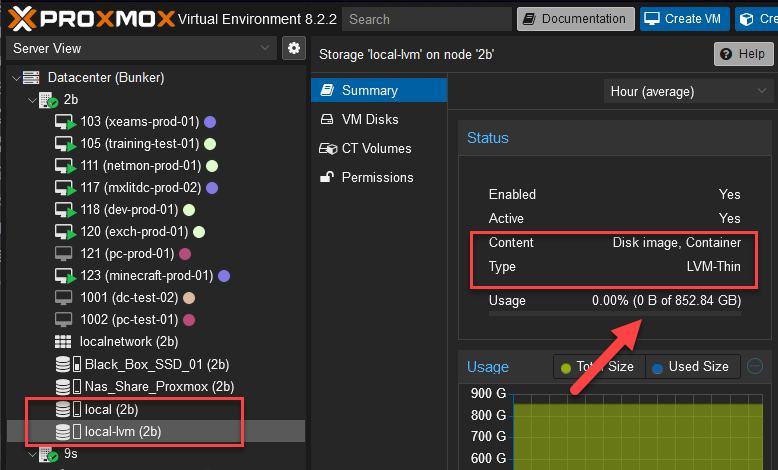
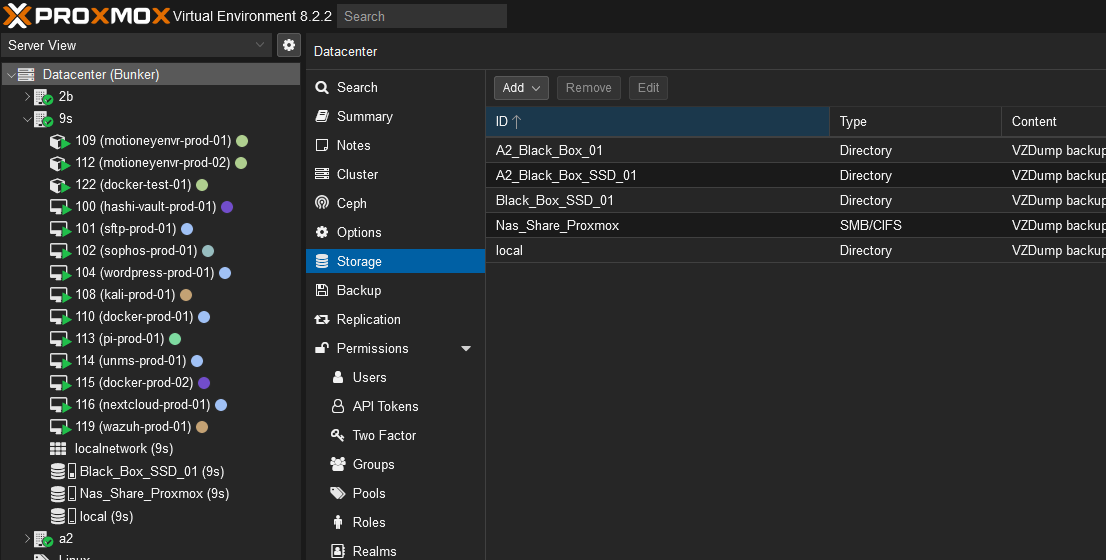
First, log into your Proxmox web interface to verify your current storage layout. You will see both local and local-lvm consuming space.
Open the Shell for your Proxmox node. As a best practice, verify the volume you are about to remove.
Run the following command to completely remove the data logical volume (which corresponds to local-lvm):
lvremove /dev/pve/data
You will be asked to confirm. Type y and press Enter.

The system will report that the logical volume was successfully removed.

2. Resize the Root Logical Volume
With the data volume removed, that space is now officially “free” within the LVM group. Let’s assign 100% of that free space to your root volume.
Run the this command:
lvresize -l +100%FREE /dev/pve/root

3. Expand the Ext4 Filesystem
While the logical container (/dev/pve/root) has been expanded, the actual filesystem inside it still thinks it’s the old size. We must instruct the filesystem to resize itself to fill the new container.
Run the following command (assuming you are using the default Ext4 filesystem):
resize2fs /dev/mapper/pve-root

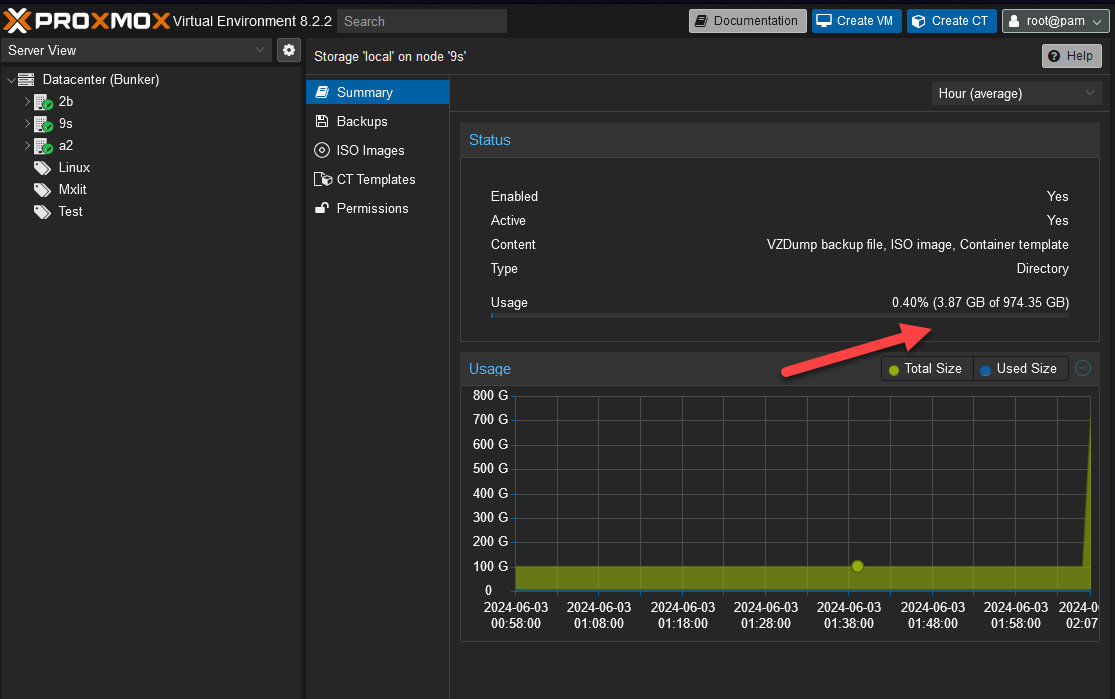
4. Verify the New Capacity
If you reopen your Proxmox storage summary in the web interface, or run a simple df -h in the terminal, you will see that your local storage has expanded exponentially, utilizing the entirety of your drive!
Conclusion
By successfully removing the local-lvm partition and resizing your root filesystem, you have reclaimed 100% of your disk’s usable capacity into a single, highly flexible storage pool. While enterprise environments might prefer the slight I/O edge of raw block devices, standardizing on a unified Ext4 or XFS partition simplifies management exponentially for homelabs and small servers.
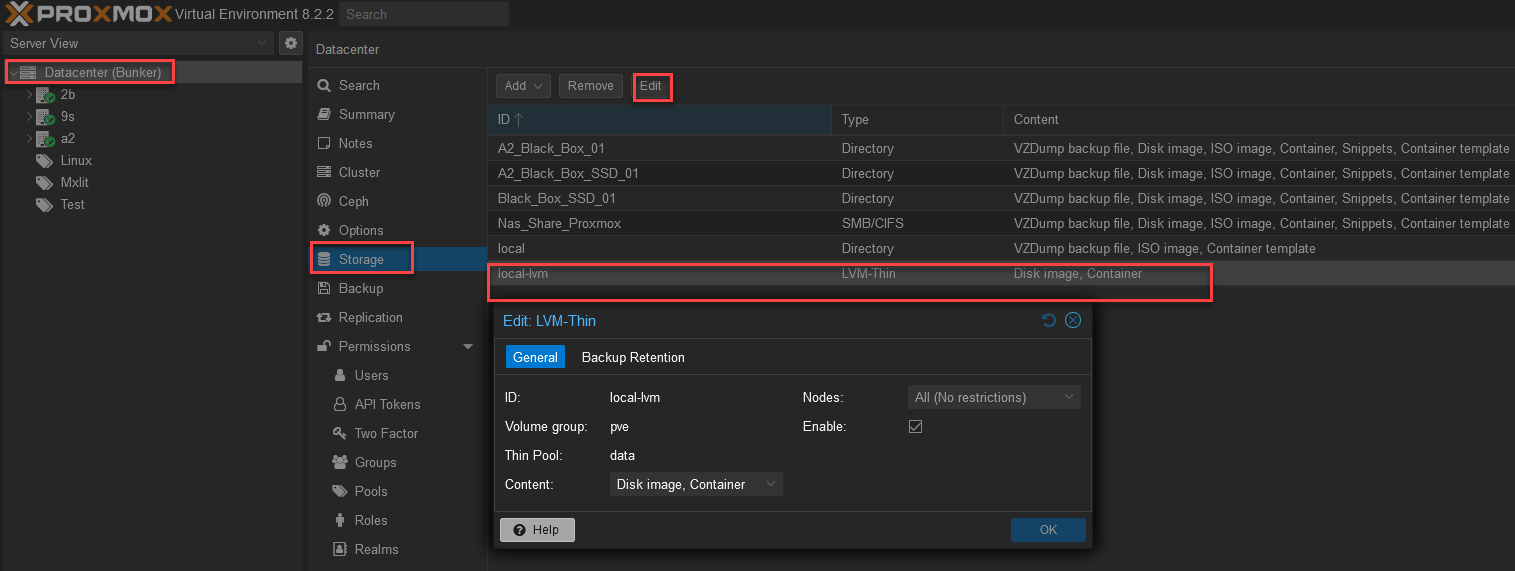
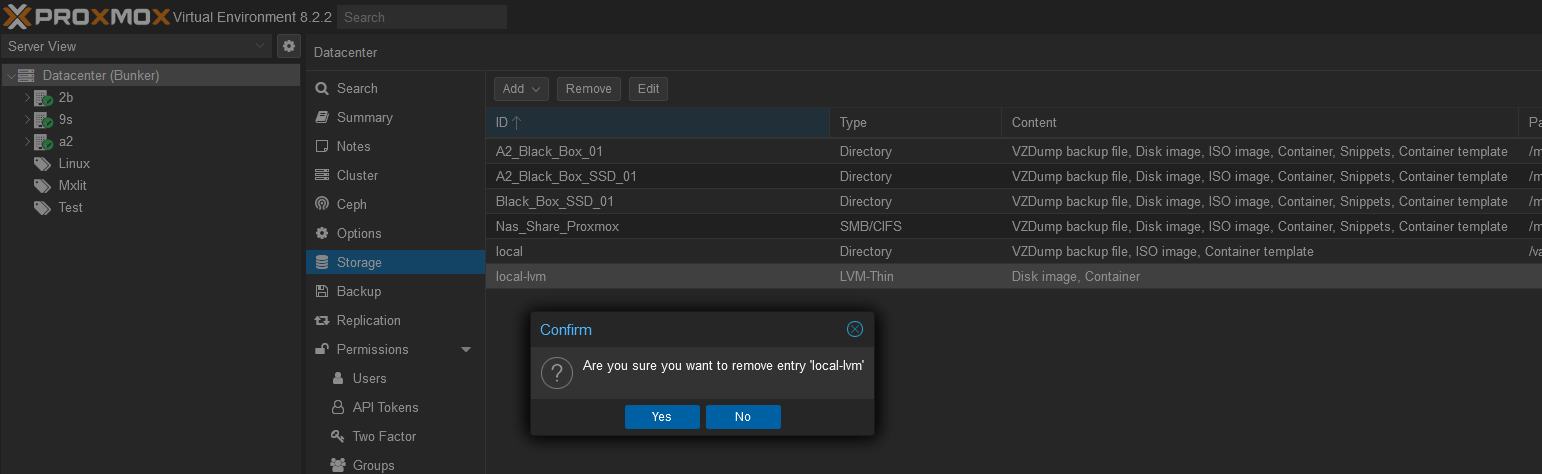
Final Step: Don’t forget to navigate to Datacenter > Storage and delete the
local-lvmentry from the GUI so Proxmox stops trying to find it. Also, edit yourlocalstorage to allow storing “Disk image” and “Container” content so you can deploy VMs immediately!