The Domain Name System (DNS) is the Internet’s address book, but by original design, it is not secure. When a user types a domain into their browser, the query travels in plain text and blindly trusts the response it receives. This is where DNSSEC (Domain Name System Security Extensions) comes in.
DNSSEC does not encrypt DNS queries, but rather digitally signs them. It works through a public-key cryptography system that guarantees DNS resolvers (such as those from Google, Cloudflare, or your ISP) that the IP address they are being directed to is legitimate and has not been altered along the way.
Why is it required?
Imagine an attacker manages to intercept the DNS request of a user trying to visit your website. Without DNSSEC, the attacker can inject a fake response (an attack known as DNS Spoofing or Cache Poisoning) and redirect all that traffic to a malicious server that is an exact clone of your page.
By implementing DNSSEC, you protect the integrity of your domain. You tell the world: “Any DNS record that is not cryptographically signed by me is false and should be blocked”. It is an essential security layer in modern network architectures, as it ensures that your legitimate traffic (and your Zero Trust tunnels) cannot be hijacked.
Pros, Cons, and Precautions
Pros:
- Integrity and Authenticity: Ensures visitors always reach your correct server.
- Protection against Spoofing: Mitigates DNS cache poisoning attacks.
- Maximum Automation: On platforms like Cloudflare, Key Rollover and record publication are managed without human intervention.
Cons and Precautions:
- Zero Tolerance for Errors (in manual configurations): If you have to transfer DS records manually to another provider and make a typo, global resolvers will reject your domain entirely and your site will go offline.
- Caution in Migrations: If you decide to move your DNS away from Cloudflare in the future, you must disable DNSSEC before making the change, or you will temporarily lock yourself out.
Step-by-Step in Cloudflare
Thanks to modern automation, if you use Cloudflare as your primary provider, activating DNSSEC has been reduced to a one-click process in most cases.
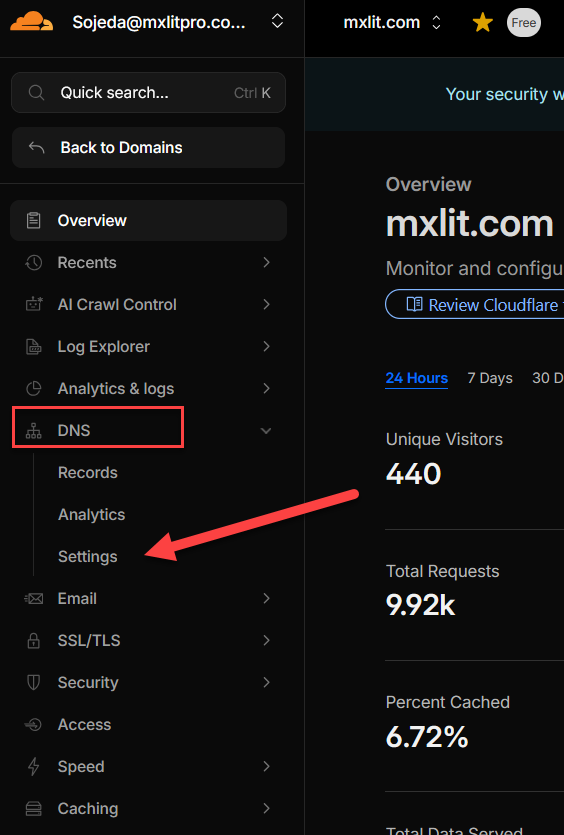
Step 1: Dashboard Navigation
- Log in to your Cloudflare dashboard and select your domain.
- In the left sidebar menu, expand the DNS section and click Settings.
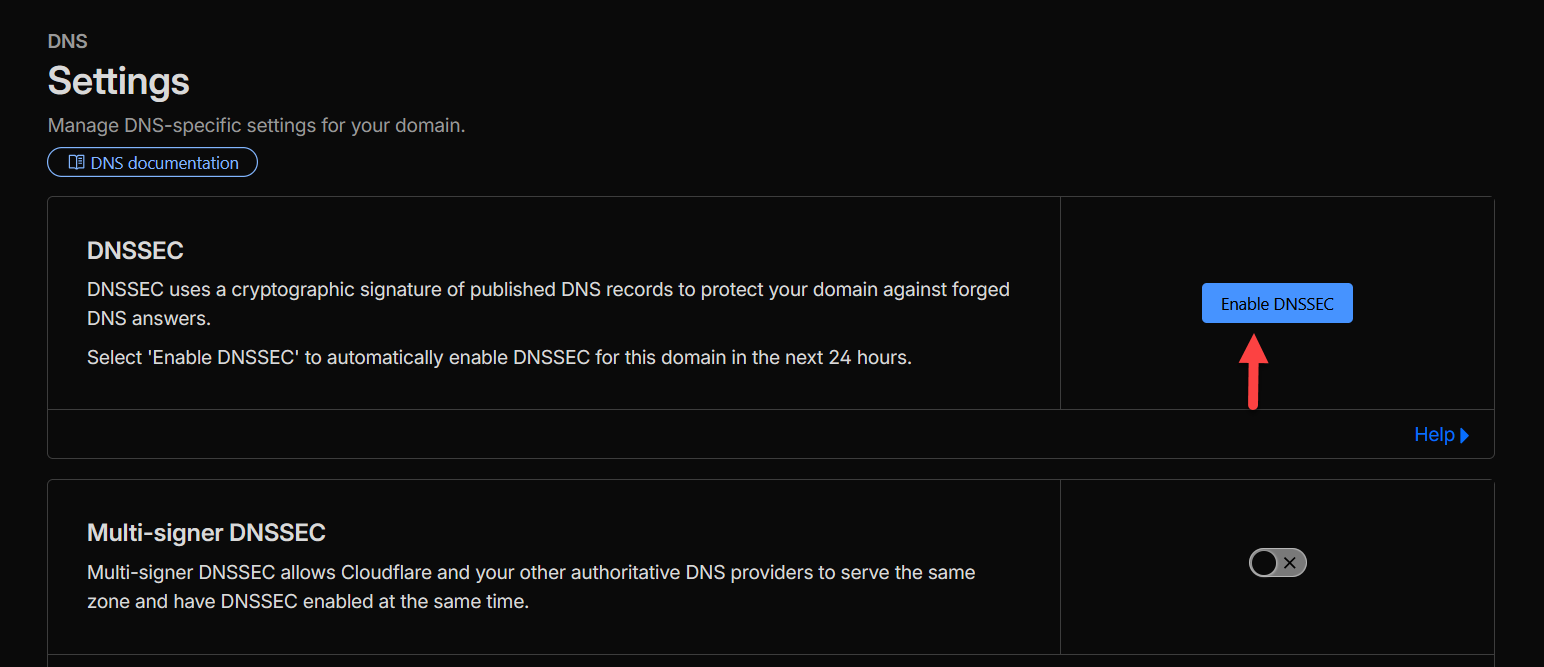
Step 2: Enable DNSSEC
- On the main settings screen, you will see the top card labeled DNSSEC.
- Click the blue Enable DNSSEC button.
Step 3: Automatic vs. Manual Process
Upon clicking, Cloudflare will begin generating the cryptographic signatures for your zone.
- If your domain is registered directly with Cloudflare (or with a registrar that supports automated updates): You don’t have to do anything else. Cloudflare will automatically publish the DS record for you within the next 24 hours.
- Note for domains on other registrars: If you purchased your domain from an external third-party provider (such as Namecheap, GoDaddy, etc.) that does not support automatic provisioning, Cloudflare will display a series of values (Key Tag, Algorithm, Digest Type, and Digest). You will have to log in to your external registrar’s panel, look for the “DNSSEC” or “Custom DNS” section, and paste exactly those values there to complete the chain of trust.
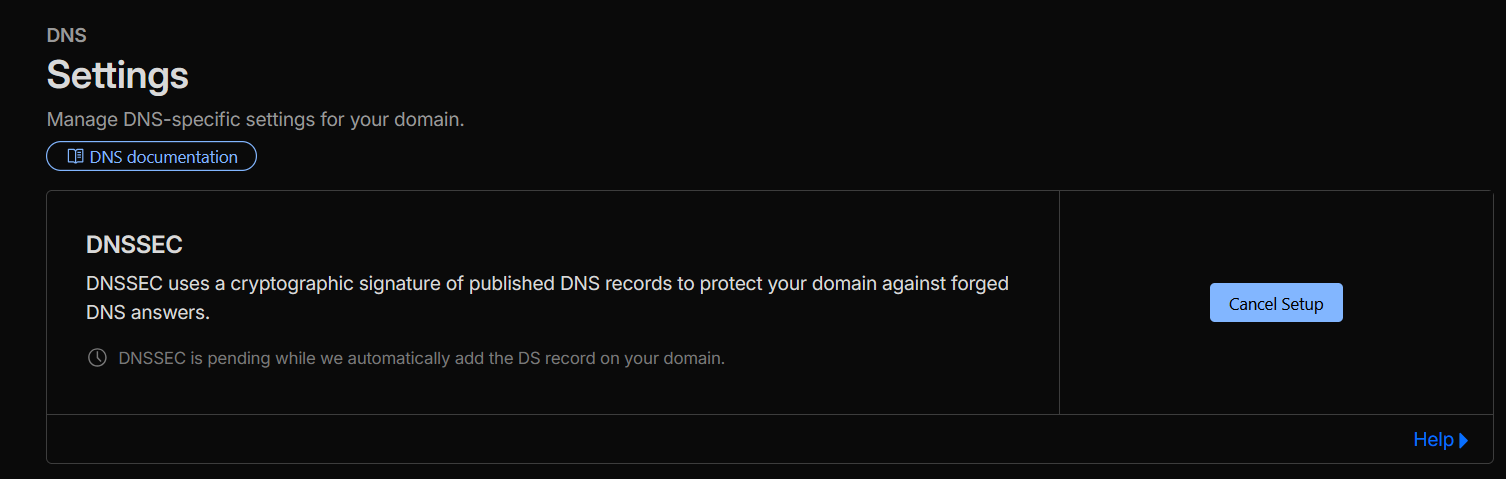
Step 4: Verification and Propagation
On the same configuration screen in Cloudflare, you can monitor the activation status. Initially, you will see it as “Pending”. Once the global network verifies that the DS record is published and the signatures match, the status will change to a successful Success or Active.

Conclusion
Enabling DNSSEC in Cloudflare is one of those quick security wins that offer a massive level of protection with minimal effort. Gone are the days when managing DNS cryptography was a task exclusive to advanced network administrators; today, shielding your infrastructure’s address book takes literally a couple of clicks.