
Deploying a virtual Dell EMC Isilon (OneFS) cluster in your lab environment with Proxmox is an excellent way to test enterprise features like SyncIQ, SmartPools, or SmartConnect. However, this simulator has a critical “Achilles’ heel” when running on general-purpose hypervisors: susceptibility to file system corruption during sudden power outages.
Here I explain exactly why this happens and how to fix it by adjusting storage policies in Proxmox.
The Problem: Absence of Physical NVRAM
In a production environment, physical Isilon nodes rely heavily on a battery-backed NVRAM (Non-Volatile RAM) card. This memory acts as an ultra-fast and secure journal. Every write transaction enters the NVRAM first; if there is a power outage, the battery ensures the data is written to disk once power returns.
The problem in the virtual environment: The OneFS simulator does not have physical NVRAM hardware, so it emulates this behavior by reserving a partition directly on the virtual disks (your .qcow2 files).
By default, hypervisors like Proxmox use the host’s RAM (your server) to cache writes and improve performance. If you shut down the virtual machine abruptly (using the Stop function or if you suffer a power outage), the data that was in the Proxmox cache is never physically written to your SSD.
Upon restart, OneFS detects that its “virtual NVRAM” is corrupt, throws a critical GEOM panic error, and the node remains completely inoperable.
Deep Dive: The Distributed Journal
It’s important to understand that OneFS uses a distributed journal. In a multi-node cluster, write logs are mirrored across multiple nodes’ NVRAM. In a virtual lab, if several nodes crash simultaneously and their host-level write caches haven’t flushed to disk, the “Distributed Journal” across the cluster becomes inconsistent. This is why a single “Hard Stop” can sometimes brick an entire virtual cluster, not just one node.
The Solution: Forcing Synchronous Writes (Write Through)
To protect the integrity of the cluster and emulate the immediate persistence of a real NVRAM, we must force Proxmox to eliminate host-level storage caching for those specific disks.
The solution is to change the cache policy of the virtual disks to Write through (or Direct sync). This mode forces the hypervisor to write every block of data directly to the underlying physical storage disk before sending the “success” confirmation to the OneFS virtual machine.
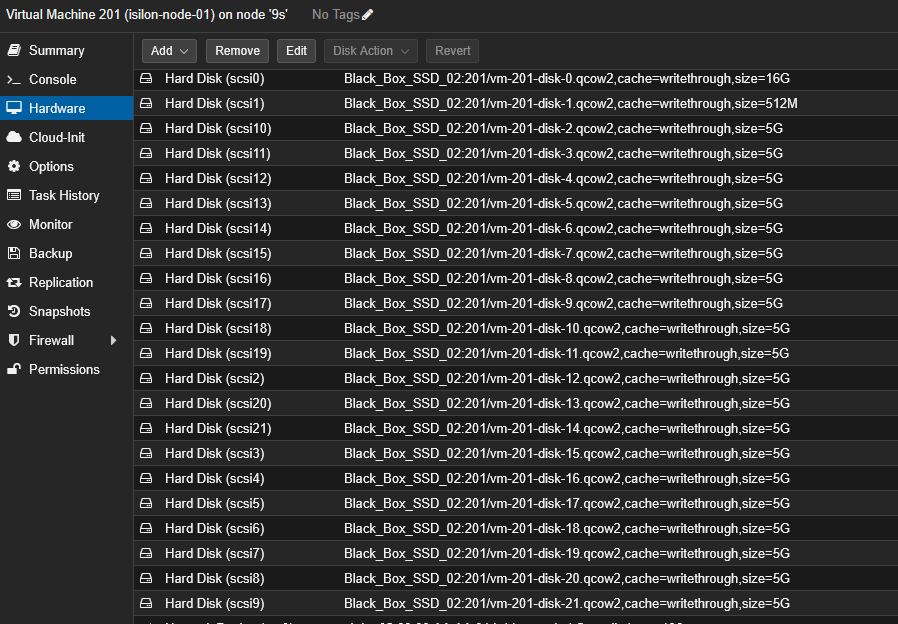
How to Apply it via Proxmox Web Interface (GUI)
If you have few disks, you can do it manually before powering on the node:
- Select your OneFS virtual machine and go to the Hardware tab.
- Double-click on each of the hard disks (
scsi0,scsi1, etc.). - In the configuration window, locate the Cache dropdown menu.
- Change it from Default (No cache) to Write through.
- Save the changes. (Remember the VM must be completely shut down for the hypervisor to apply the change).
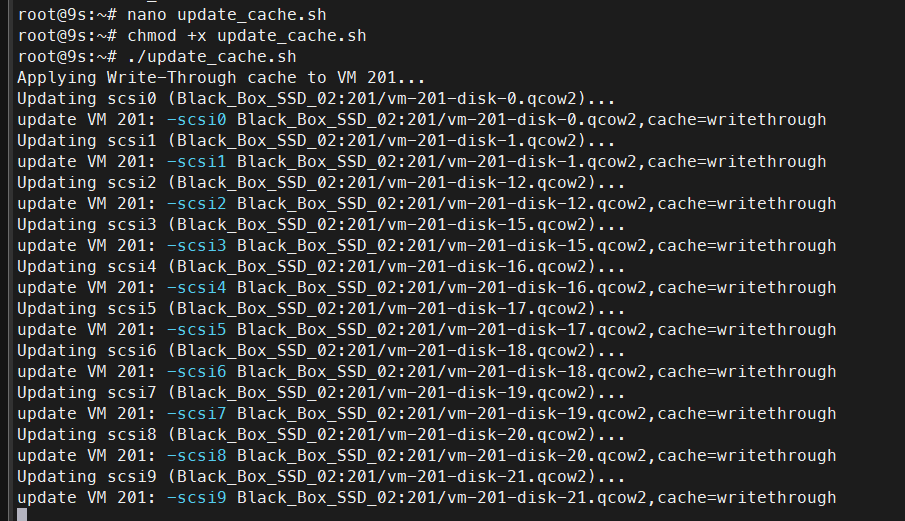
How to Apply it Massively via Console (CLI)
Since a full Isilon virtual node uses 22 virtual disks, doing it one by one is not efficient. You can use the following script directly in your Proxmox node’s shell to update all disks at once.
#!/bin/bash

# Define the target VM ID for the OneFS node
VMID=201

echo "Applying Write-Through cache to all disks on VM $VMID..."

# Loop through all 22 possible SCSI devices
for i in {0..21}; do
    # Extract the current volume path from the VM configuration
    VOL=$(qm config $VMID | grep "^scsi${i}:" | awk '{print $2}' | cut -d',' -f1)

    # If the volume exists, overwrite its configuration to enforce writethrough cache
    if [ ! -z "$VOL" ]; then
        echo "Updating scsi${i} ($VOL) to use Write-Through cache..."
        qm set $VMID --scsi${i} "${VOL},cache=writethrough"
    fi
done

echo "Cache update process completed successfully!"
The Acid Test: Validating Node Resilience
The best way to trust your infrastructure is by breaking it on purpose in a controlled environment. To verify that the cache setting is working correctly and protecting your cluster, we will perform an abrupt shutdown (Hard Stop).
Step 1: The Safety Net (Snapshot) Before pulling the virtual plug, we are going to protect ourselves by taking a snapshot of the virtual machine in Proxmox.
- Go to your Isilon VM > Snapshots > Take Snapshot.
- Name it something like “Pre-Hard-Stop”. This ensures that if for any reason the underlying hardware fails (e.g., if your SSD’s internal DRAM doesn’t flush in time), you can restore the node to its clean state in seconds.
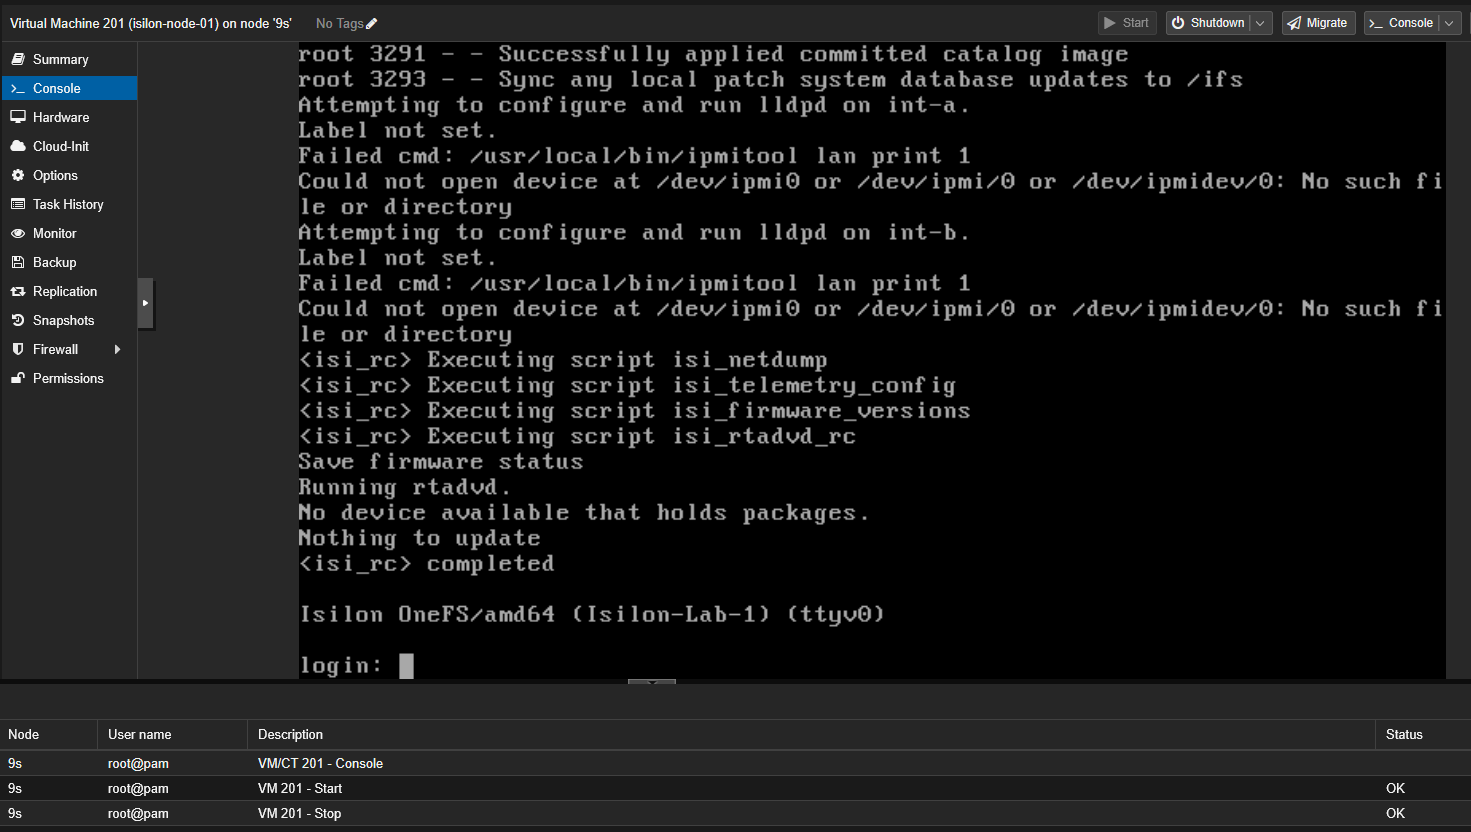
Step 2: The Power Cut Ensure the Isilon node has fully booted and shows the login: prompt in the console.
- In the Proxmox web interface, select the virtual machine and press the Stop button ruthlessly (do not use Shutdown). This will kill the VM process immediately, simulating a total power loss on the server.
Step 3: Restart and Validation
- Power the VM back on (Start) and open the VNC console immediately.
- Pay close attention to the FreeBSD boot sequence. If the system passes the
Executing GEOM bootdisk startup...phase without throwing the criticalGEOM start failederror, and continues loading until it gives you thelogin:prompt again, congratulations!
Conclusion and Best Practices
Implementing Write through cache will act as an excellent emergency parachute against GEOM corruptions if your virtualization server suffers an unexpected reboot.
However, the golden rule remains: the official and safe way to shut down your cluster in the lab will always be by connecting via SSH to any node and running the secure shutdown command:
isi cluster shutdown
This will give OneFS time to flush its processes, stop SMB/NFS services, and save its own state before sending the shutdown signal to the hypervisor. Without physical NVRAM, your data is only as safe as your last clean shutdown or your storage’s commit latency.
.