
Integrating additional nodes into an Isilon cluster is one of the most rewarding processes in the OneFS architecture. Once the first node is operational, expanding capacity and performance is nearly automatic.
In this guide, we detail the steps to join Node 2 (and subsequent nodes) to our lab cluster in Proxmox.
Prerequisites (Quick Checklist)
Before pressing the start button, ensure that the virtual machine (e.g., VM 202) strictly complies with the defined architecture:
Disks: 22 SCSI disks injected, with the cache policy set to
Write throughto protect the “virtual NVRAM”.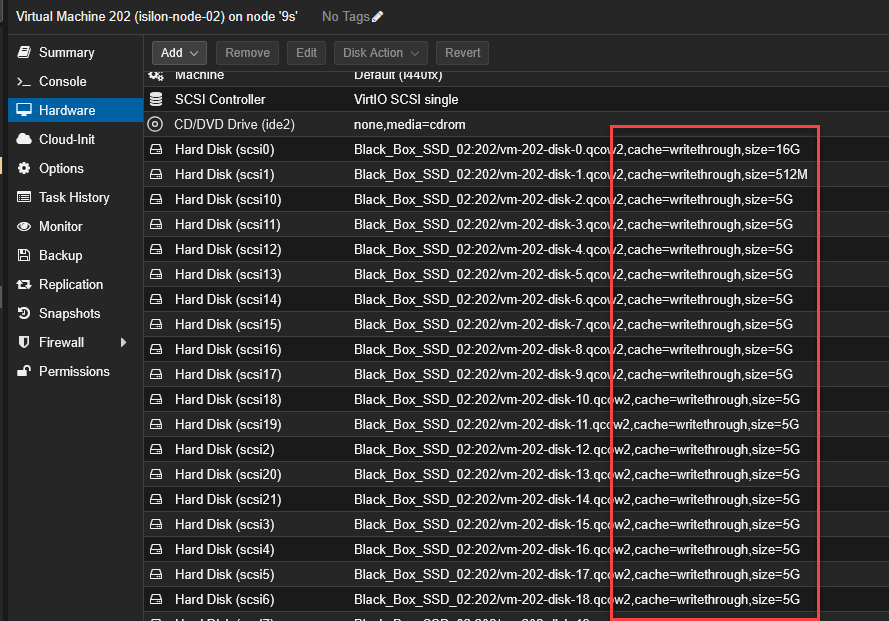
Boot Order: The boot order has
scsi0enabled and set as the first option.
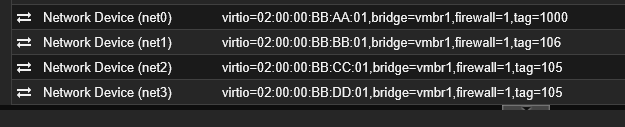
Networking: Four assigned interfaces (Management, SMB, and Backend), respecting the MAC addresses and VLAN tags (100, 106, 105, 105) corresponding to Node 2.
Step 1: Power On and System Initialization
- In Proxmox, select the Node 2 VM and click Start.
- Open the console (VNC) immediately. You will see the FreeBSD boot sequence detecting the SCSI topology.
- Wait until the Configuration Wizard main menu appears.
Step 2: Joining the Existing Cluster
Secondary node integration is extremely fast thanks to the Backend network.
When prompted to format the drives, type
yes.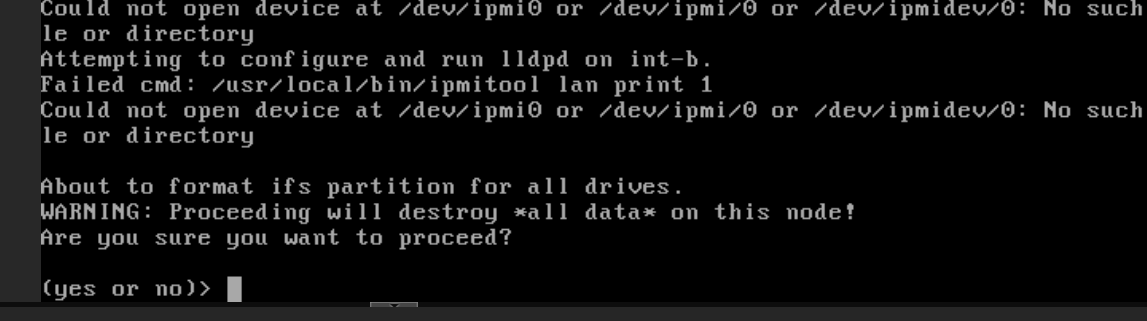
In the wizard menu, select option
2(Join an existing cluster).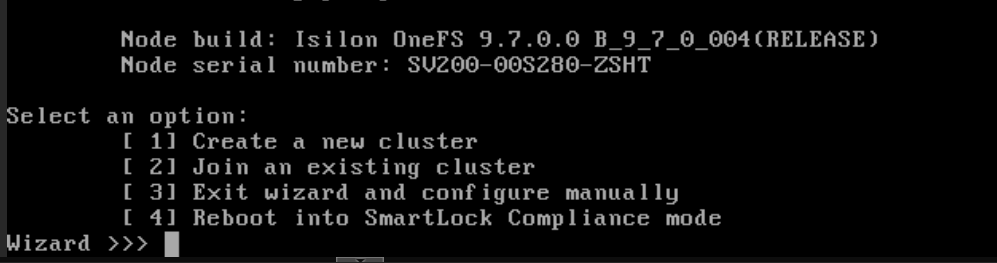
The system will search through the Backend interface (VLAN 1000). Within seconds, it will detect your active cluster (e.g.,
Isilon-Lab).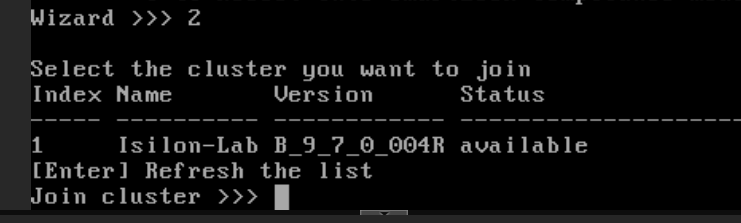
Type
1to confirm joining the detected cluster.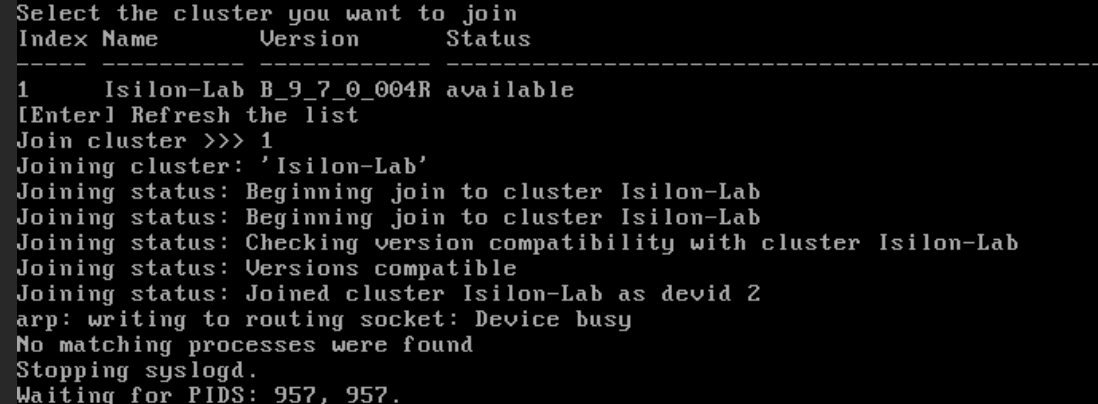
Step 3: Automatic Synchronization
Upon confirmation, Node 2 yields its administration to the logical cluster:
- It will format the remaining data disks to add them to the global storage pool.
- It will sync the journal, network configurations, and credentials from Node 1.
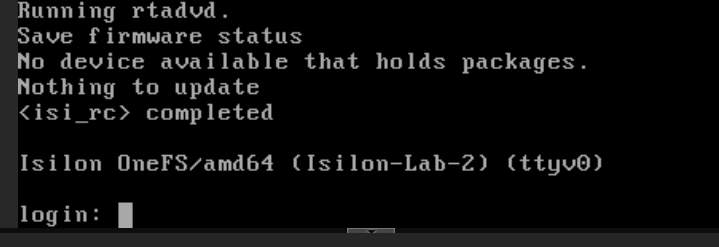
- You will know it has finished successfully when the prompt appears:
Isilon-Lab-2 login:.
Step 4: Verification
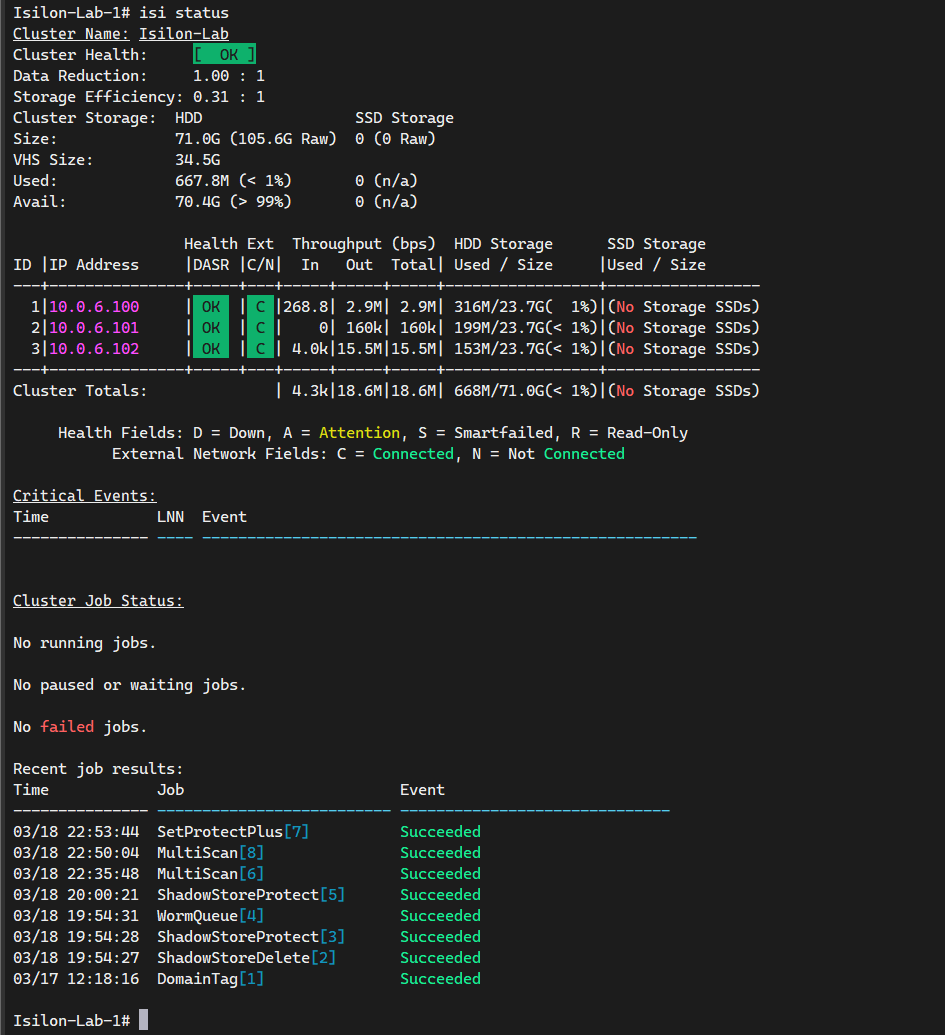
From the Node 1 console (or via SSH), run:
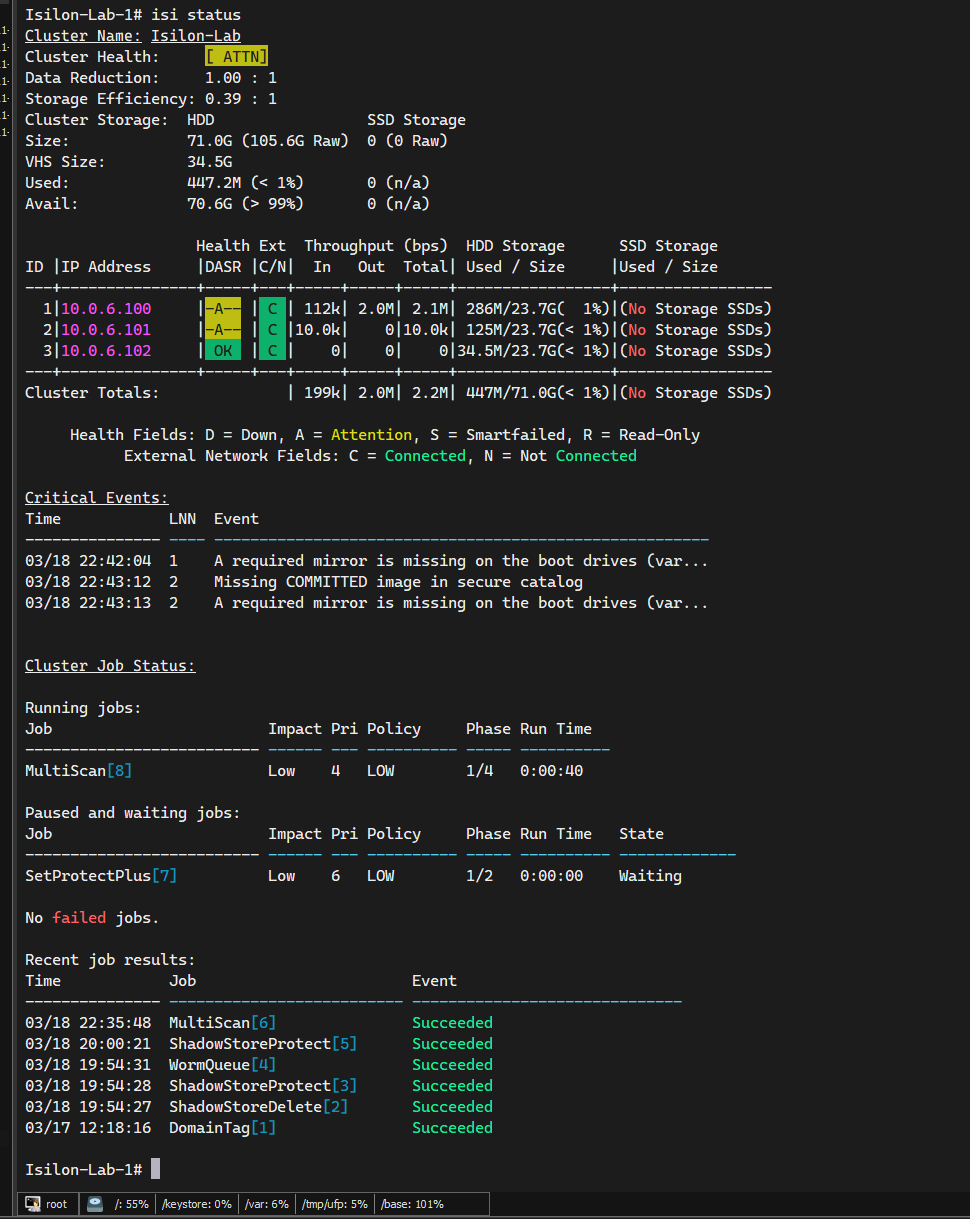
isi status
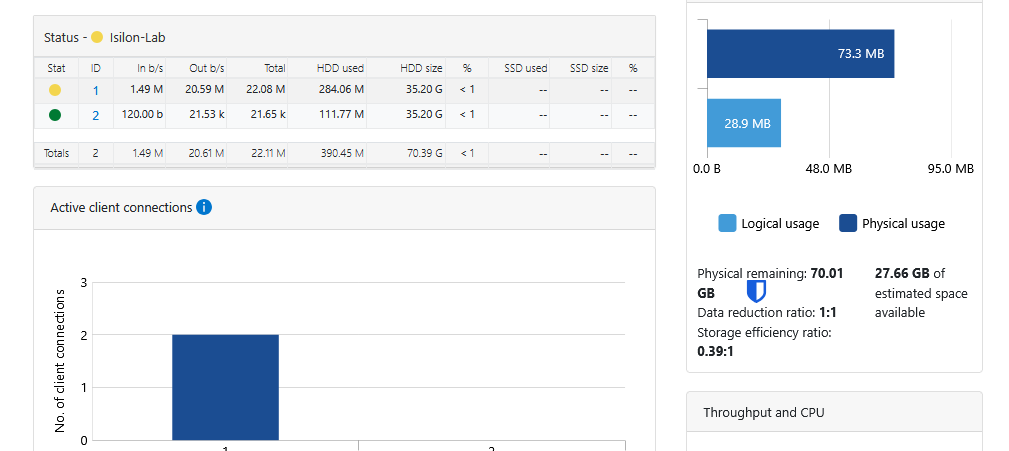
You should see two active nodes in [ OK ] or Healthy status.

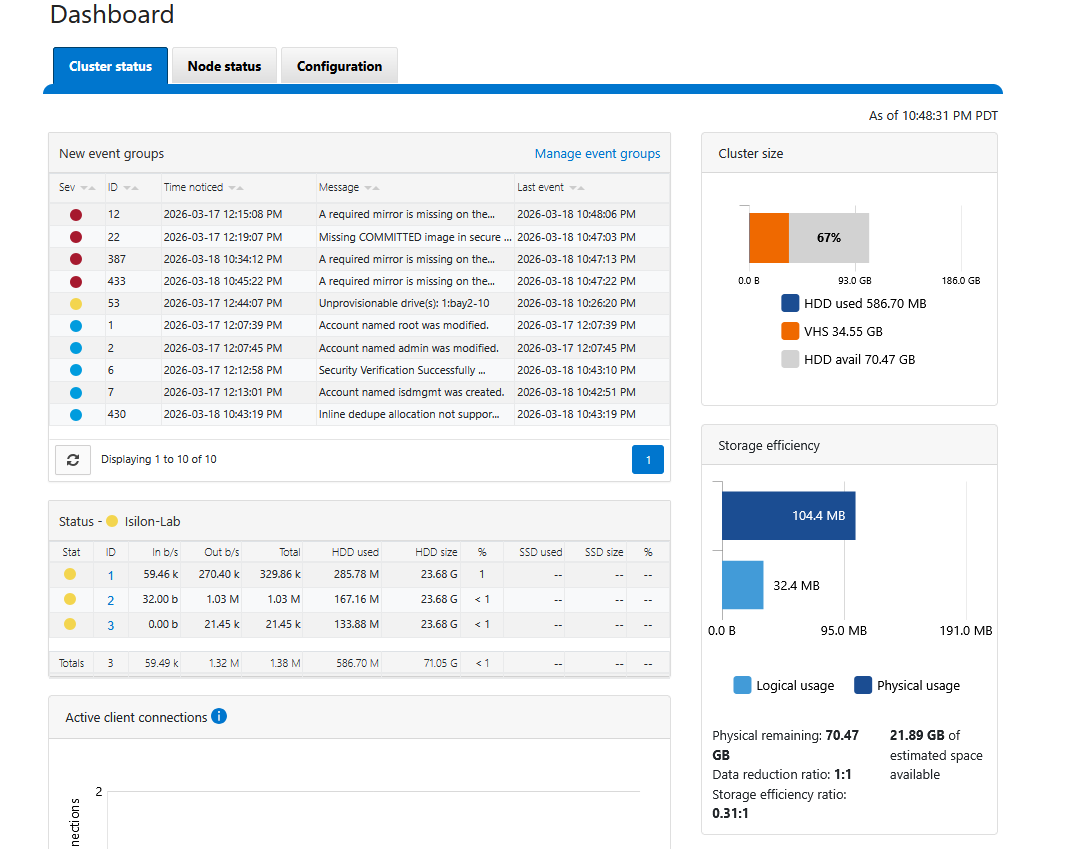
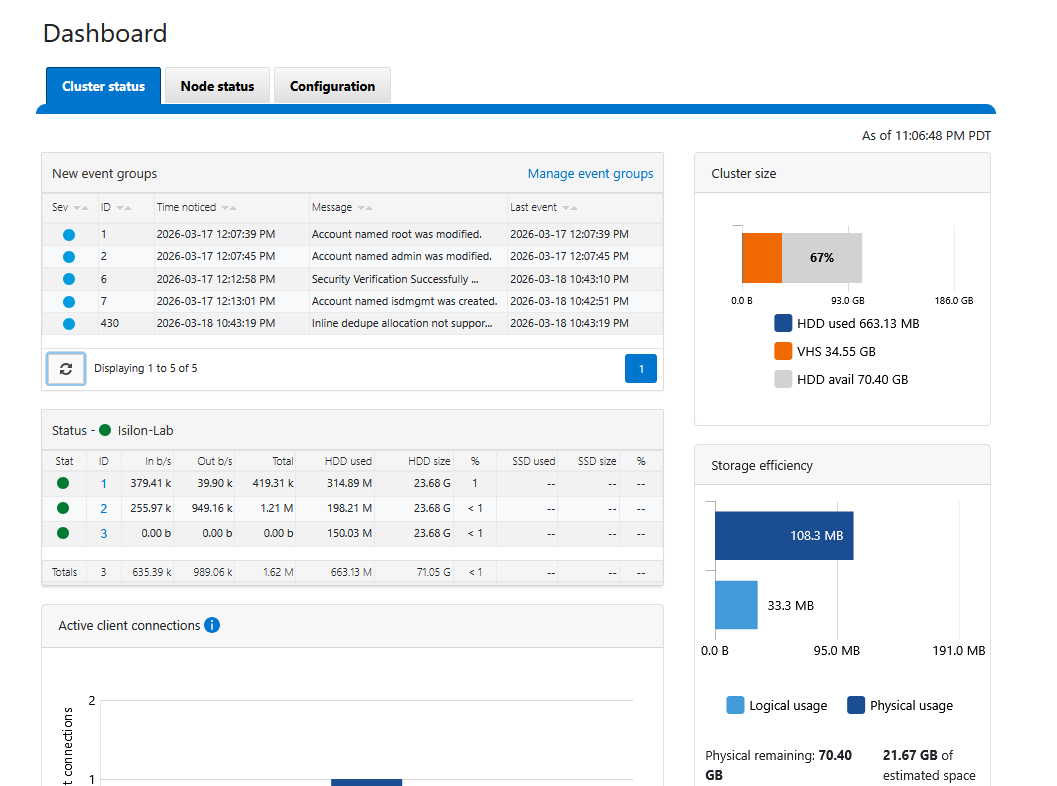
You can also enter the WebUI using the IPs of either node (port 8080), and you will see the consolidated cluster in the Dashboard.
The Job Engine in Action: MultiScan
Once you have added Node 2 (and eventually Node 3), you will notice immediate activity in the Job Engine. It is normal to see the MultiScan job in a Running state.
This process is fundamental: the “brain” of OneFS has detected the new disks and the new node, and has automatically begun rebalancing the distributed file system (/ifs). OneFS is redistributing existing data and extending parity protection (Erasure Coding) across all available hardware in real-time. This is the true power of Scale-Out storage occurring before your eyes.
Analyzing the “Attention” (ATTN) State
It is normal for the simulator to show [ ATTN ] with a yellow “A”. These are false positives of the virtual environment:
- Mirror missing on boot drives: The simulator lacks the physical mirrored system disks that OneFS expects.
- Missing COMMITTED image: Harmless warning related to digital signatures of physical Dell hardware firmware that does not exist in the VM.
Both events are merely cosmetic and will not degrade your lab’s performance.
Events Cleanup: Reaching a “Healthy” State
To clear these false positives and ensure your dashboard reflects a truly healthy [ OK ] state, you can manually resolve the events through the WebUI:
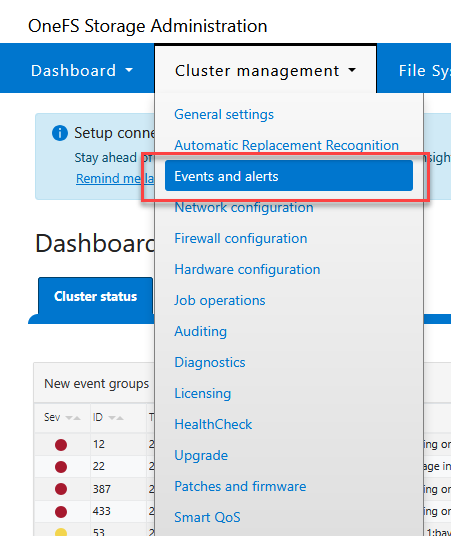
Log in to the WebUI (
https://<node-ip>:8080).Navigate to Cluster Management > Events.
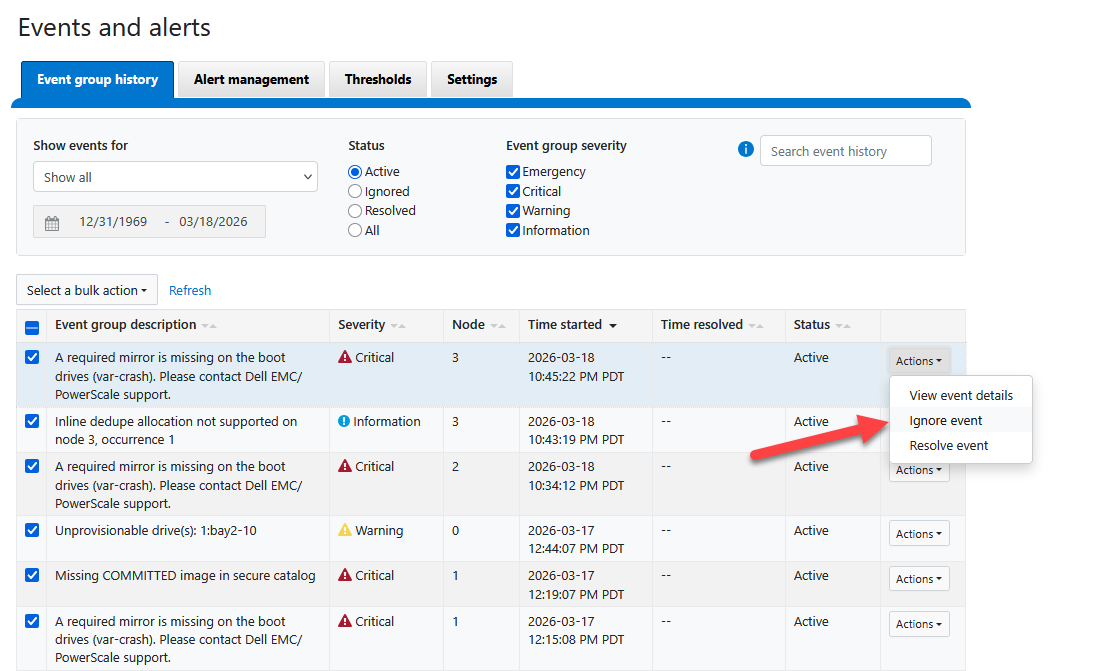
Select the active events related to boot mirrors and firmware catalogs.
Mark these events as “Resolved” or “Ignored”.
Once resolved, the OneFS health monitor will update its status. If you check the dashboard now, you should see the cluster in a perfectly healthy green state.
Conclusion and Best Practices
Expanding an Isilon cluster is a trivial process from an administrator’s perspective, yet incredibly complex behind the scenes. By joining Node 2, we have doubled not only the storage capacity but also the aggregate bandwidth and system resilience.
Key Takeaways for the Administrator:
- Job Engine Monitoring: Always verify that the
MultiScanorAutoBalancejob completes successfully before making major network changes or adding more nodes. - Strict Quorum: Remember that in small clusters, the health of each node is critical for maintaining write quorum.
- Next Steps: With the node quorum established, the next logical step is to configure SmartConnect zones to transparently balance client traffic across all cluster nodes.
This linear expansion architecture ensures that your storage environment grows at the pace of your data needs without downtime or complex migrations.
.