Managing an enterprise-grade storage cluster through a static IP address while dealing with the annoying “Site not secure” browser warning is not an acceptable practice in a production environment. Beyond the visual nuisance, it bypasses critical identity verification and can lead to man-in-the-middle vulnerabilities during administrative sessions.
In this guide, we will elevate your Dell EMC Isilon cluster’s management security. We will configure a load-balanced FQDN for our management network using SmartConnect and subsequently issue and install a valid SSL certificate using an internal Windows Server Certificate Authority (CA).
Part 1: Configuring an FQDN for Management (SmartConnect)
To ensure our SSL certificate is valid and trusted, it must be tied to a Fully Qualified Domain Name (FQDN) rather than a dynamic or static IP. We will delegate DNS management of this name to our cluster.
Configure the Service IP (SIP): In the Isilon WebUI, navigate to Cluster Management > Network Configuration. Edit your management subnet (e.g.,
Management).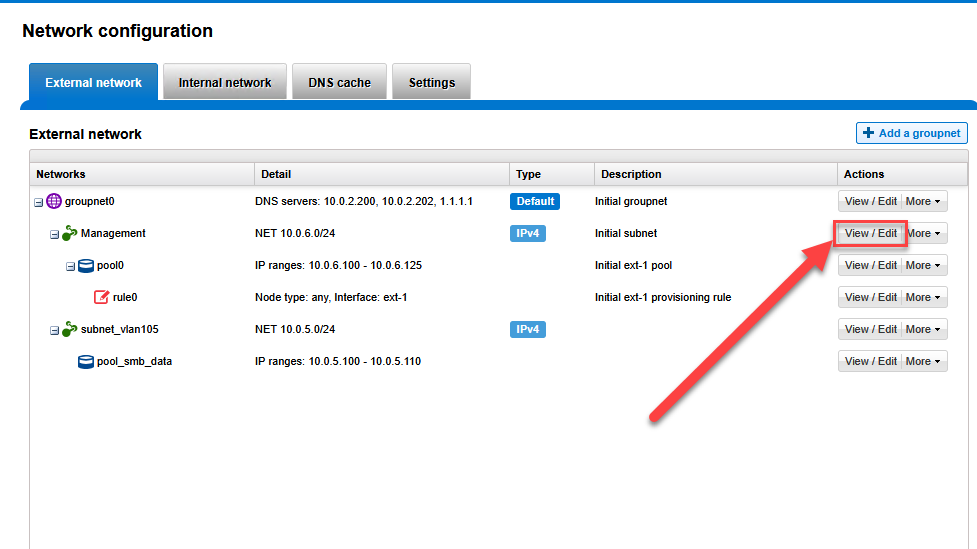 In the SmartConnect service IPs field, assign an unused IP from that range (e.g.,
 10.0.6.250).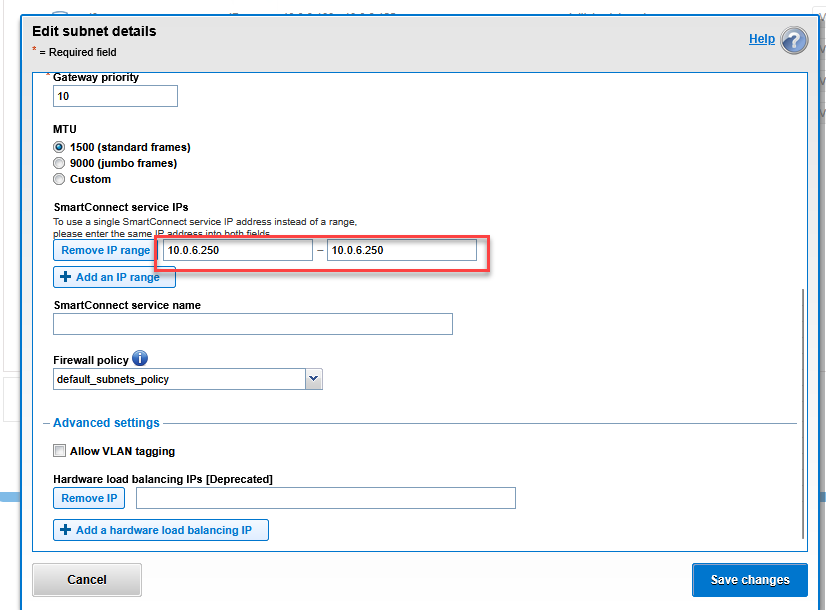
Assign the Zone Name: Edit the Management Pool associated with that subnet.
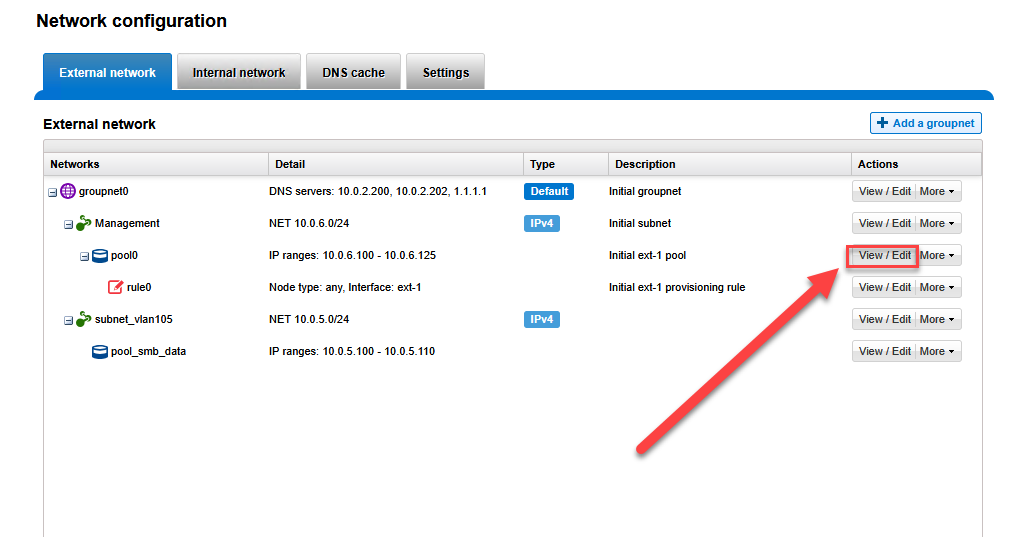 In the Zone name field, enter your desired administrative FQDN (e.g.,
 isilonmgmt.mxlit.com) and select the correct SmartConnect service subnet.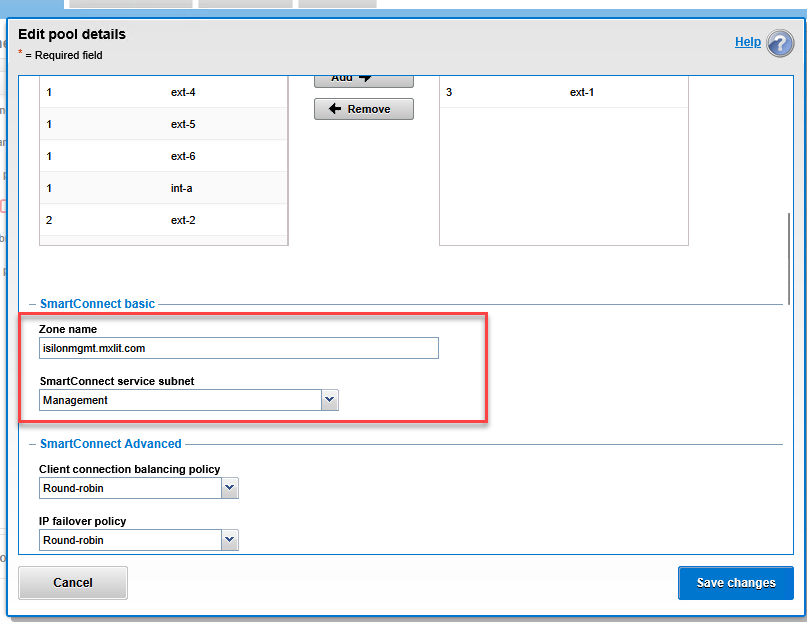
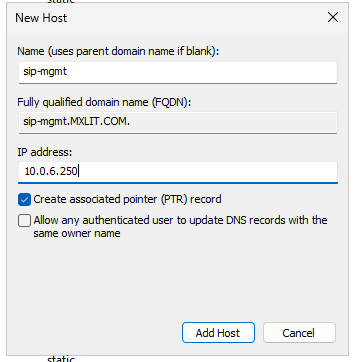
DNS Delegation in Windows Server: In your DNS server, create a new Host (A) record pointing to your SIP (
sip-mgmt->10.0.6.250).
Right-click your domain and create a New Delegation for the isilonmgmt subdomain, pointing it to the previously created A record.
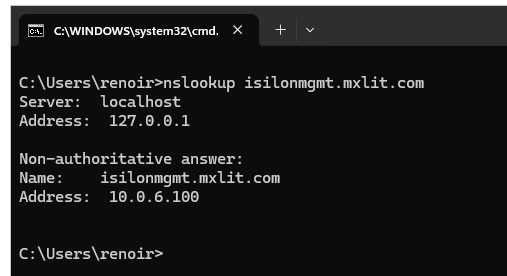
Once DNS replication is complete, running nslookup isilonmgmt.mxlit.com should return the dynamic IP of one of the cluster nodes.
Part 2: Generating the Certificate Signing Request (CSR)
To maintain maximum security, we will generate the private key and the CSR directly on the Isilon cluster. Connect via SSH to any node and execute the following commands:
# 1. Navigate to a data path to safely store the generated files
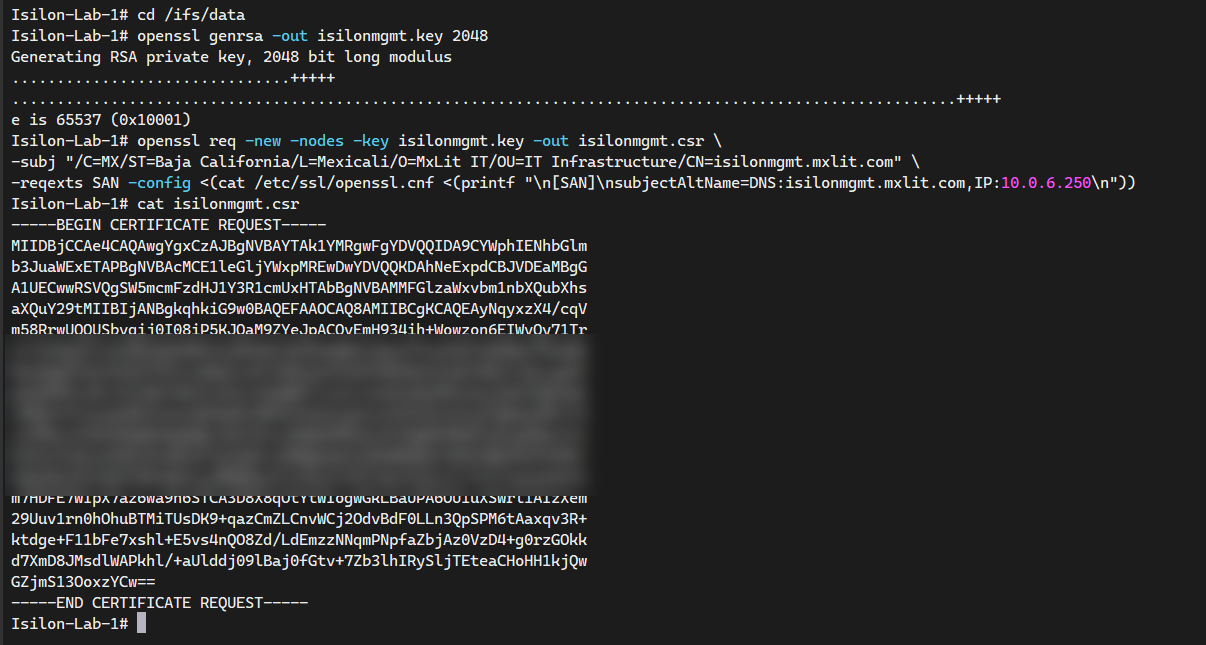
cd /ifs/data
# 2. Generate the private key (RSA 2048 bits)
openssl genrsa -out isilonmgmt.key 2048
# 3. Generate the CSR with organization details and inject SANs (FQDN and IP)
openssl req -new -nodes -key isilonmgmt.key -out isilonmgmt.csr \
-subj "/C=MX/ST=Baja California/L=Mexicali/O=MxLit IT/OU=IT Infrastructure/CN=isilonmgmt.mxlit.com" \
-reqexts SAN -config <(cat /etc/ssl/openssl.cnf <(printf "\n[SAN]\nsubjectAltName=DNS:isilonmgmt.mxlit.com,IP:10.0.6.250\n"))
# 4. Output the CSR to the console for copying
cat isilonmgmt.csr
Copy the entire block starting with -----BEGIN CERTIFICATE REQUEST-----.
Part 3: Signing the Certificate with Active Directory Certificate Services (AD CS)
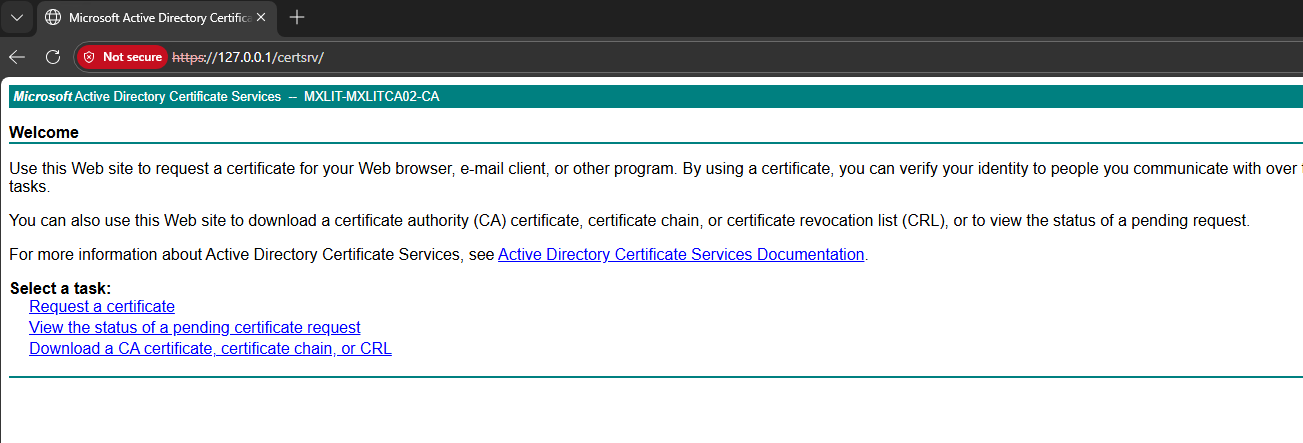
Method A: Web Enrollment Portal
The Web Enrollment portal is a versatile tool for signing requests from third-party appliances.
- Access
https://<your-ca-server>/certsrvfrom your browser.
- Select Request a certificate > advanced certificate request.
- Paste the CSR text into the Base-64-encoded certificate request field.
- Set the Certificate Template to Web Server.
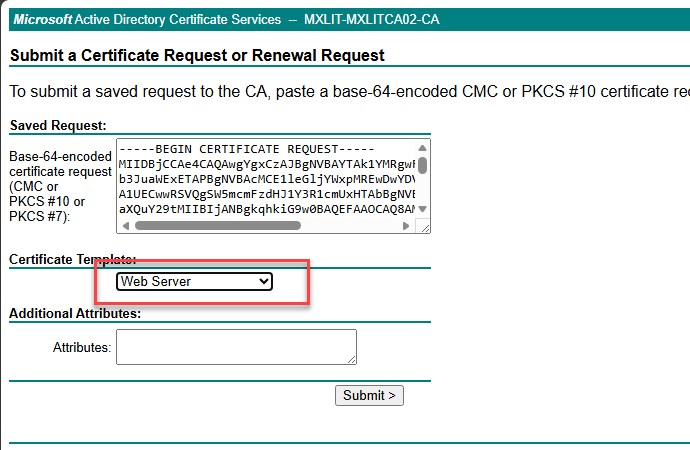
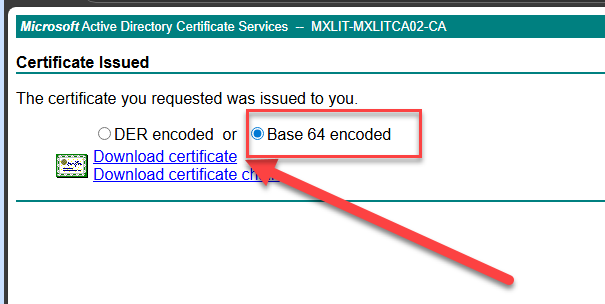
- Click Submit, select Base 64 encoded on the result screen, and Download certificate.
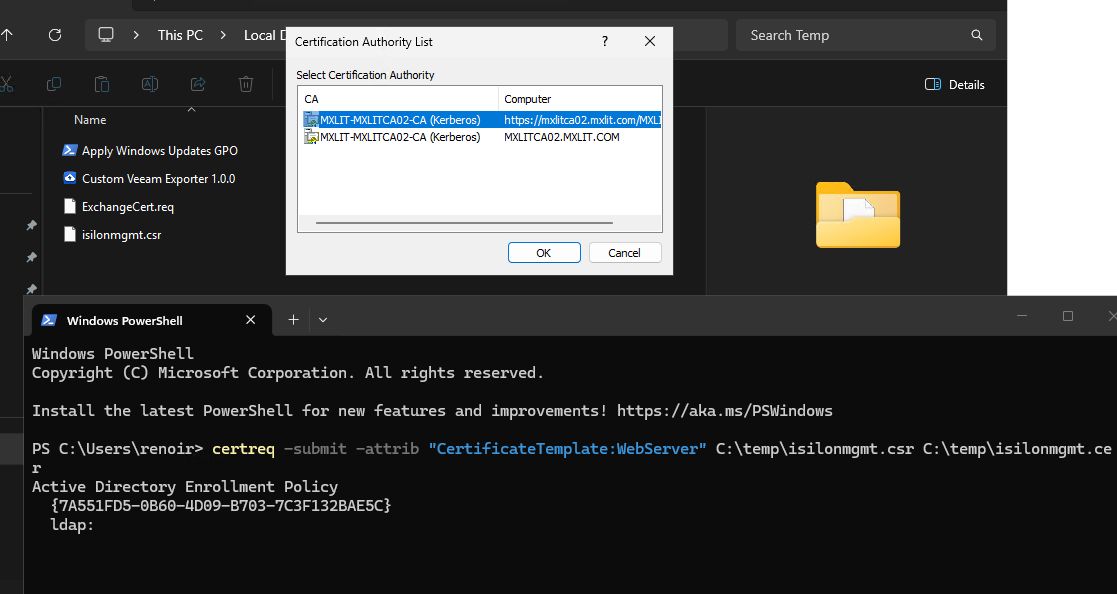
Method B: PowerShell (Certreq)
Alternatively, you can sign the certificate via the command line on your CA server:
# 1. Submit the CSR to your CA using the WebServer template
# A small GUI window will appear to select your internal CA
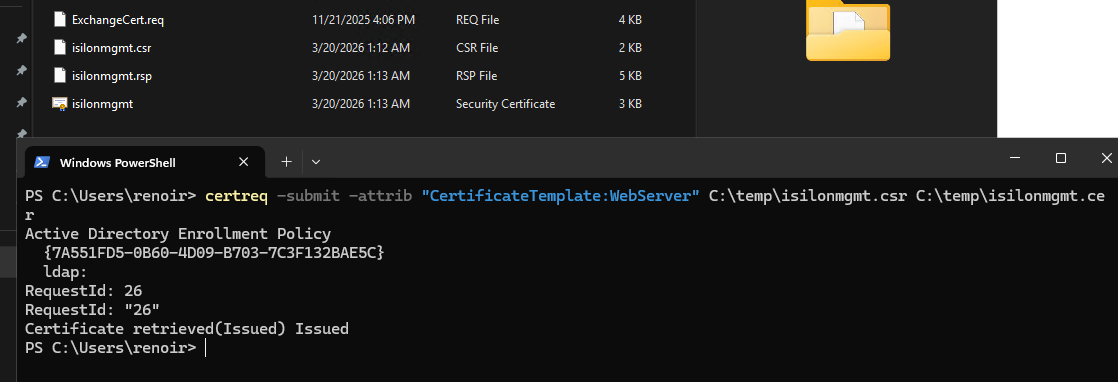
certreq -submit -attrib "CertificateTemplate:WebServer" C:\temp\isilonmgmt.csr C:\temp\isilonmgmt.cer
# 2. Verify the generated certificate
Test-Path C:\temp\isilonmgmt.cer
Part 4: Importing and Activating the Certificate in Isilon
Finally, we must import the signed certificate into OneFS and configure the web server (Apache) to use it.
Copy the content of your isilonmgmt.cer file into a temporary file on the Isilon cluster (e.g., /ifs/data/isilonmgmt.cer) and run:
# Import the signed certificate into the OneFS certificate store
isi certificate server import /ifs/data/isilonmgmt.cer --name=isilonmgmt-ssl

# Set the newly imported certificate as the default for HTTPS
isi certificate settings modify --default-https-certificate=isilonmgmt-ssl


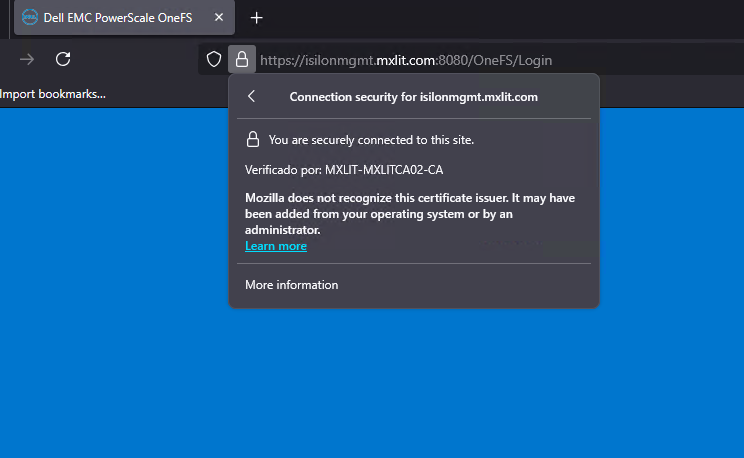
Verification
Open your browser and navigate to https://isilonmgmt.mxlit.com:8080. Your management console should now be secured with a valid SSL padlock, trusted by your internal infrastructure.

By implementing SmartConnect for management and securing the WebUI with trusted SSL certificates, you have transformed a basic storage cluster into a hardened enterprise asset. This ensures that every administrative action is encrypted, verified, and aligned with modern cybersecurity standards. Proper certificate management is not just about aesthetics; it is the cornerstone of a secure and professional IT infrastructure.
End of transmission.