Our Isilon cluster is now a trusted member of Active Directory, and users are encapsulated within their own dedicated Access Zone. However, up to this point, the storage remains an opaque block. It is time to open the doors and present that storage to the network.
In this article, we will create our first network-accessible resource (SMB Share) and address one of the greatest debates in storage administration: the correct management of permissions.
The Golden Rule: Share Permissions vs. NTFS ACLs
In NAS storage administration, there are two distinct security layers:
- Share Permissions: The primary gateway to the shared resource.
- NTFS ACLs: Granular permissions at the file system level.
There is an unbreakable rule in SMB: The effective permission is always the most restrictive between both layers.
If you configure the Share to “Read Only” for everyone but grant “Full Control” to a specific user on a subfolder, that user will not be able to write. The primary gate (the Share) will block them.
For this reason, the industry standard architecture (and the one we will implement) is:
- Open the Share Layer completely: Assign
Everyone: Full Controlat the Share level. - Rule with an Iron Fist on NTFS: Protect the root folder to prevent users from using it as a junk bin and delegate granular permissions at the subfolder level.
Step 1: Create the Physical Directory and SMB Share
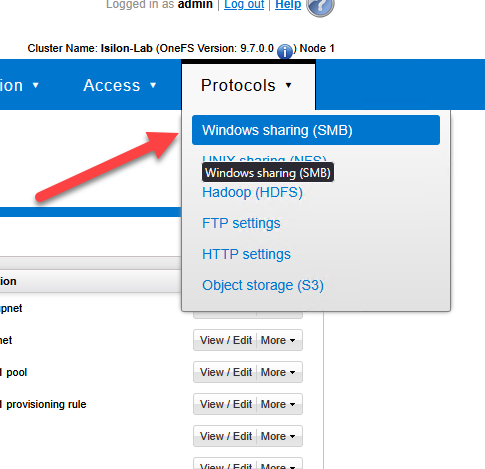
Navigate to Protocols > Windows Sharing (SMB) > SMB Shares.
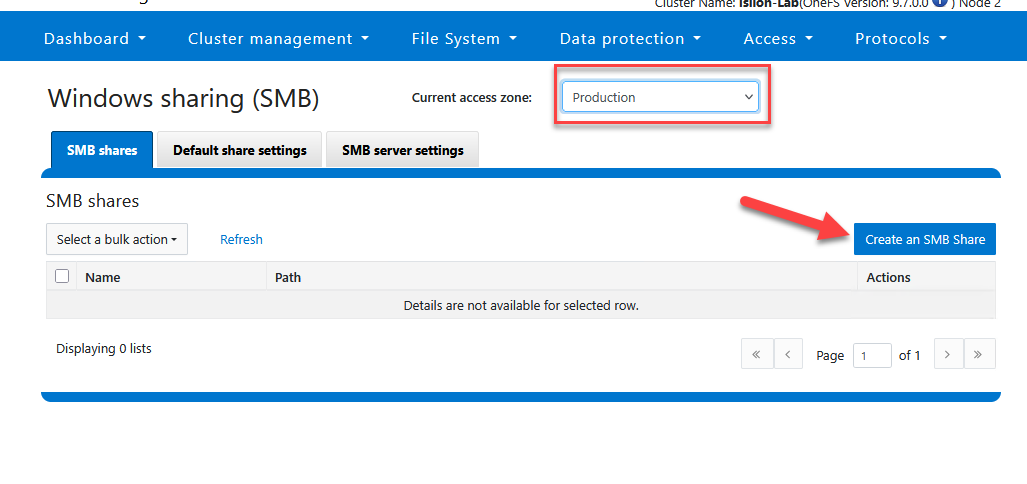
Select your zone (
Production).Click Create an SMB Share.
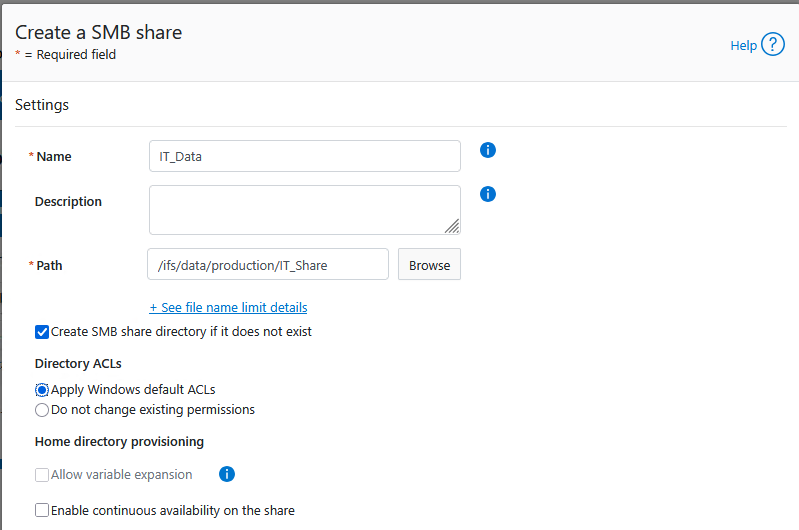
Directory to be shared:
/ifs/data/production/IT_Share.THE CRITICAL STEP: Check the box “Apply Windows default ACLs”. This injects native Windows groups, allowing you to take control without errors.
Also check the box for Create SMB share directory if it does not exist.
- Share Name:
IT_Data
- In the Permissions section, ensure that the groups
Isilon_adminsandDomain Usershave Full Control. - Save the changes.

Step 2: Protect the Root from Windows
Now that the gate is open, we must protect the hallway (the root of the Share).
- From the workstation of a member of
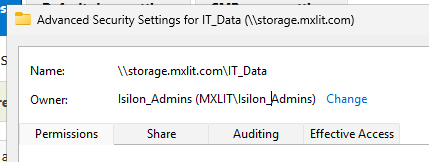
MXLIT\isilon_admins, navigate to\\storage.mxlit.com\IT_Data. - Taking Ownership: At the top of the window, locate the “Owner” field. Click Change. Search for your administrative group (
MXLIT\Isilon_Admins), accept it, and ensure you check the box “Replace owner on subcontainers and objects” before applying. This ensures that your AD team always holds supreme authority over the folder, preventing future lockouts.
Configure the base permissions that all new folders will inherit:
MXLIT\isilon_admins: Full ControlEveryone(orDomain Users): Read-Only (Read & execute).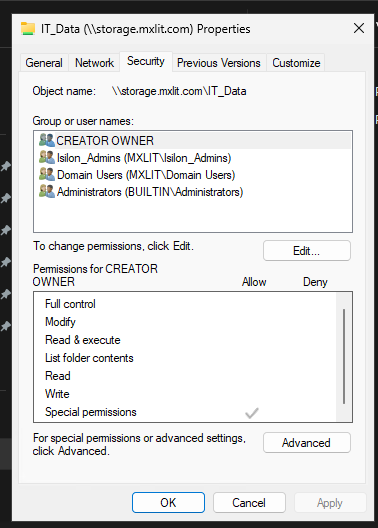
Apply the changes.
Users can now enter the Share, but they cannot create files at the root. The server remains clean and organized.
Step 3: Granular Permission Design (Breaking Inheritance)
How do we allow a user or group to write to a specific folder?
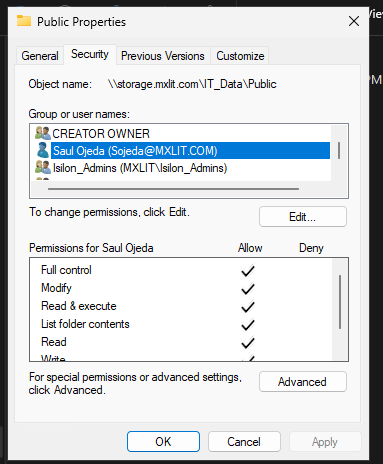
- As an administrator, create a new subfolder (e.g.,
Public). - Right-click on it > Properties > Security > Advanced.
- Click Disable inheritance and select “Convert inherited permissions into explicit permissions.”
- Now that the permissions are isolated, remove unwanted groups.
- Click Add, select the user or group (e.g.,
Sojeda), and grant them Modify or Full Control permissions.
Conclusion
Successfully configuring data presentation and permission management is the cornerstone of a functional and secure NAS environment. By adhering to the “Open Share, Tight NTFS” model, you ensure that your Isilon cluster remains easy to manage while enforcing strict security boundaries. This approach not only prevents common permission conflicts but also simplifies auditing and long-term storage maintenance.
End of transmission.