
As users consume storage, it is common to find redundant data (documents copied multiple times, identical ISOs, or duplicated backups). To mitigate this waste of capacity, Isilon offers SmartDedupe.
Unlike other storage systems that perform inline deduplication, Isilon utilizes post-process deduplication. This means data is written to disk immediately with maximum performance, and subsequently, a background job (Job Engine) scans the file system for identical 8KB blocks to consolidate them and free up space.
Design Considerations: Where to Enable SmartDedupe?
Best Practice: SmartDedupe should never be enabled at the global level (/ifs). It must be configured granularly on a per-directory basis.
The deduplication job consumes IOPS and CPU cycles. Scanning data that is already compressed or encrypted (such as multimedia files, databases, or .zip backups) will result in 0% space savings and significant cluster performance degradation.
Ideal Workloads: User home directories, office document repositories, and Virtual Machine (VM) or ISO storage.
Step 1: Configure Deduplication Paths
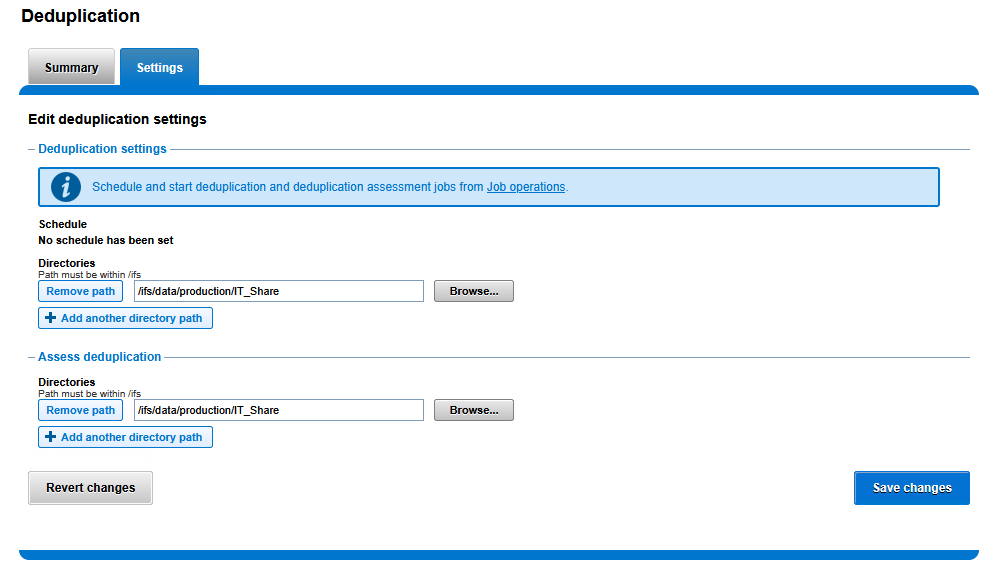
Before evaluating or executing deduplication, you must remove the default global configuration and assign only specific directories.
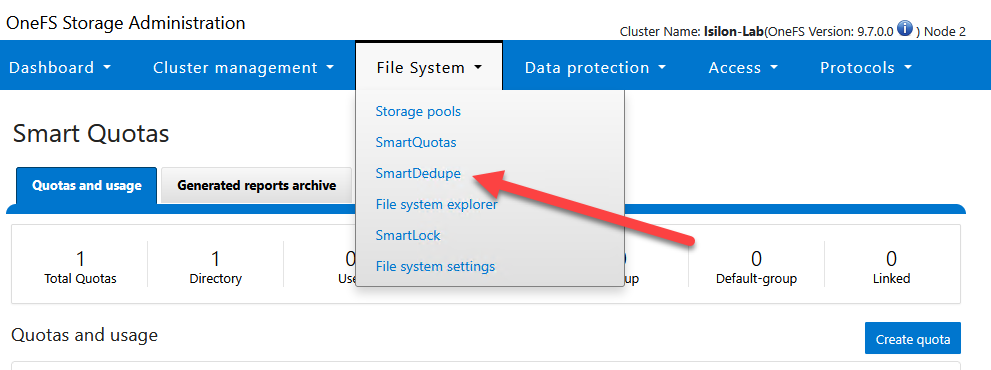
Via WebUI:
- Navigate to File System > SmartDedupe and select the Settings tab.
In the Deduplication settings section:
- Click the Remove path button next to
/ifs. - Click Add another directory path.
- Type or navigate to the desired path:
/ifs/data/production/IT_Share.
- Click the Remove path button next to
In the Assess deduplication section:
- Repeat the process: remove
/ifsand add/ifs/data/production/IT_Share.
- Repeat the process: remove
Click Save changes at the bottom.
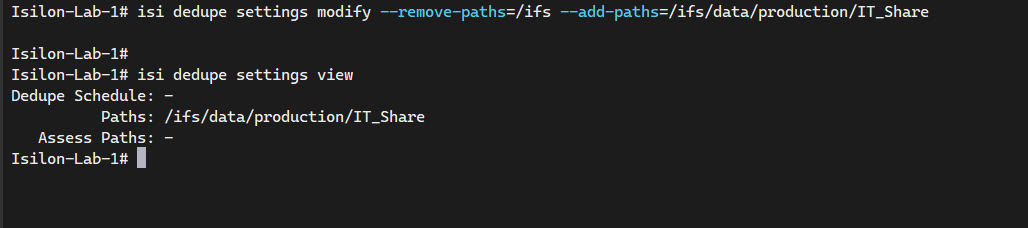
Via CLI:
# Remove the default global path and add the specific directory for deduplication
isi dedupe settings modify --remove-paths=/ifs --add-paths=/ifs/data/production/IT_Share

# Verify the configured deduplication paths
isi dedupe settings view
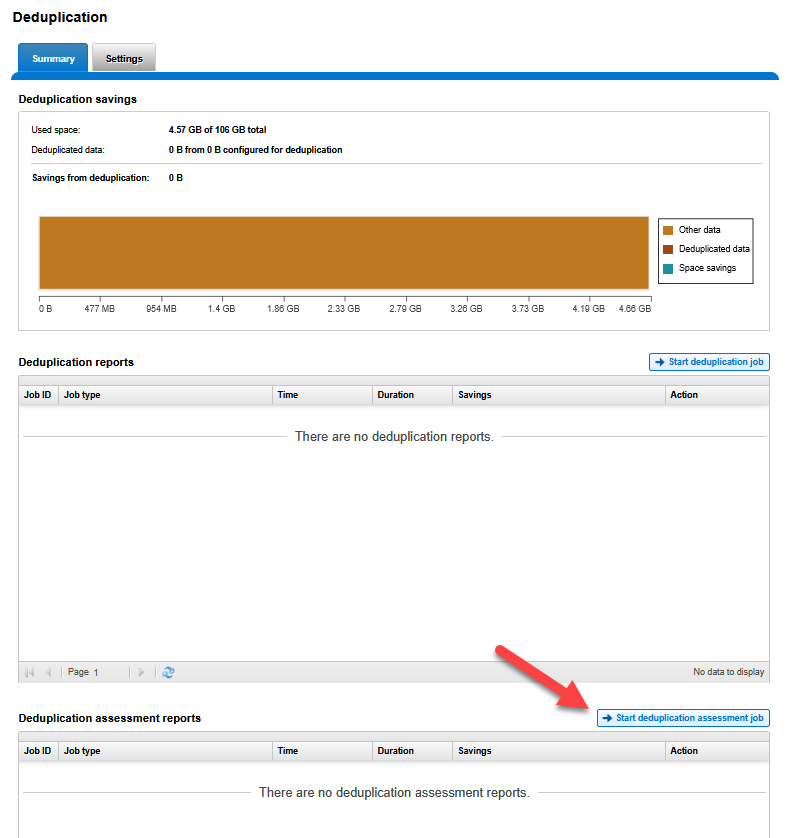
Step 2: Running a Dedupe Assessment (Dry Run)
Enabling SmartDedupe consumes RAM and processing power. It is standard to first run an assessment to determine if the percentage of duplicate data justifies the operation.
Via WebUI:
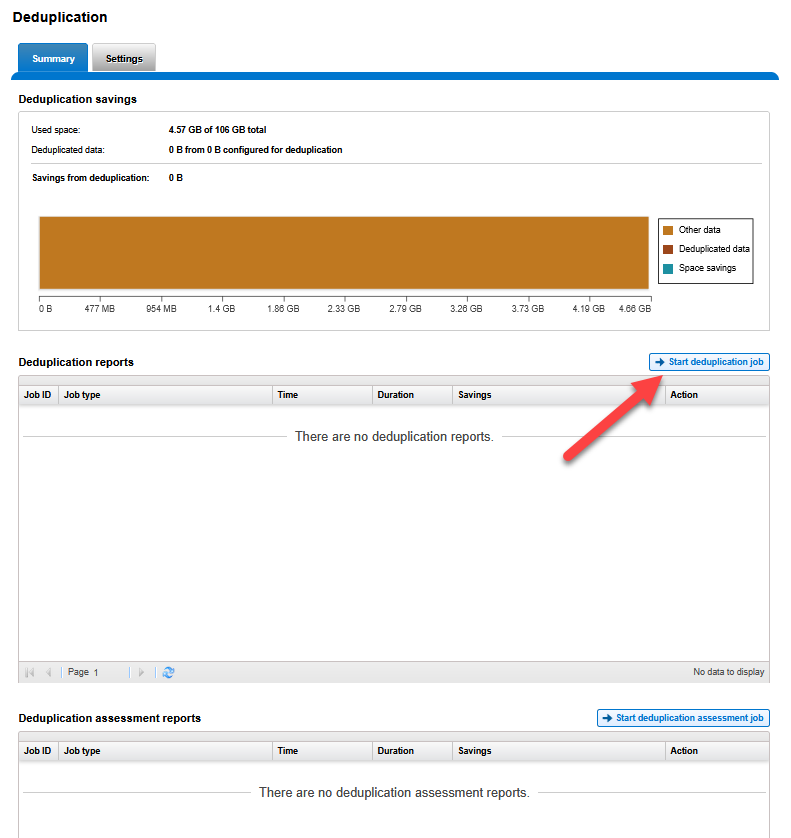
- Navigate to the Summary tab within the SmartDedupe menu.
- In the lower section Deduplication assessment reports, click the Start deduplication assessment job button.
Via CLI:
# Start a deduplication assessment on the configured paths
# This job only scans the data and reports potential savings; it does NOT modify any data.
isi job jobs start DedupeAssessment
Once the job is complete, the report in the Summary tab will indicate the percentage of space that can be recovered.
Step 3: Executing and Monitoring the Job (SmartDedupe Job)
If the estimated savings justify the process, the block consolidation is initiated. This job operates in the background.
Via WebUI:
- In the Summary tab of SmartDedupe.
- In the middle section Deduplication reports, click the Start deduplication job button.
Via CLI:
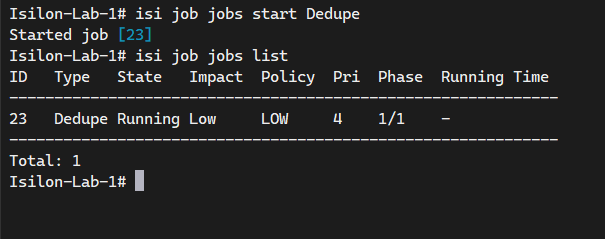
# Start the actual data deduplication job
isi job jobs start Dedupe

# Monitor the progress of the deduplication job
isi job jobs list
Result Validation
Once the job has concluded, the upper panel Deduplication savings in the Summary tab will show an updated graph with the gigabytes saved. This process is completely transparent to users connected via SMB; files will maintain their original logical size in Windows, while the cluster optimizes the physical disks.
End of transmission.