
When building an enterprise backup architecture, immutability is your last line of defense against ransomware and malicious insider threats. Veeam introduced the Veeam Infrastructure Appliance, a bootable Just Enough Operating System (JeOS) Linux distribution designed specifically to streamline the deployment of hardened backup repositories and backup proxies.
By delivering a minimal Linux OS pre-configured with strict security benchmarks (STIGs), Veeam eliminates the complexity of manually hardening a standard Linux distribution. This guide details the complete deployment process of the Veeam Infrastructure Appliance, highlighting critical setup nuances, network segmentation strategies, and security best practices.
For additional background, refer to the official Veeam Appliance Documentation and Hardened Repository Limitations.
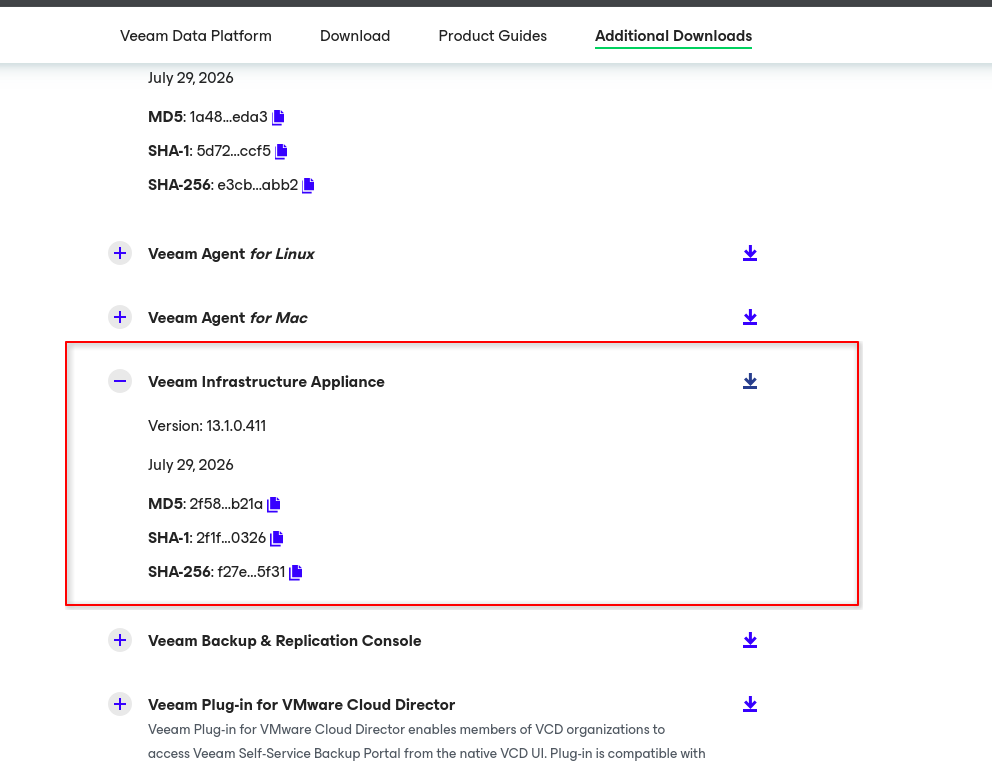
Step 1: Download the ISO
Download the official Veeam Infrastructure Appliance JeOS ISO installer from the official Veeam Download Portal.

Step 2: Prerequisites & VM Configuration Requirements
Before creating the Virtual Machine or deploying on bare-metal, ensure your environment meets the strict requirements of the Veeam Infrastructure Appliance.
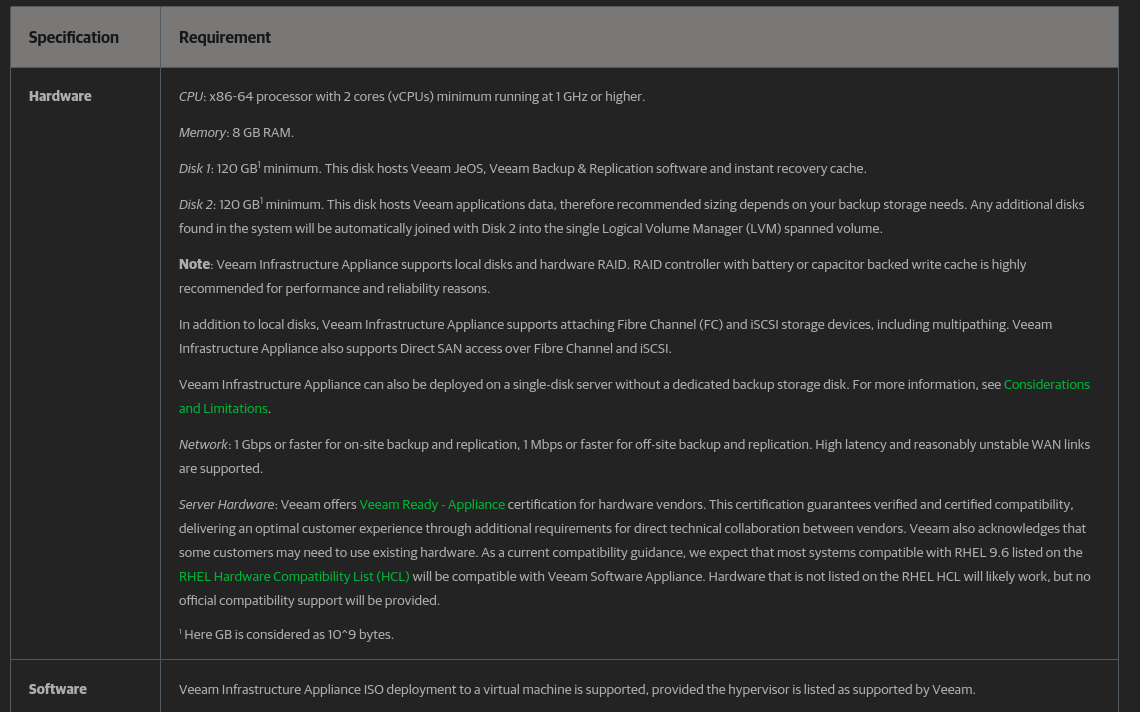
Disk Space Requirement: The installer requires a system disk of at least 120 GB. Allocating less storage will cause the installation script to fail during disk partitioning.

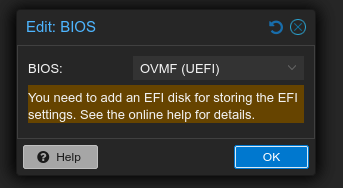
UEFI Firmware Required: The Veeam Infrastructure Appliance strictly requires UEFI boot mode. Legacy BIOS mode is not supported. When creating your Virtual Machine in Proxmox VE or VMware vSphere, ensure the BIOS type is explicitly set to OVMF (UEFI).
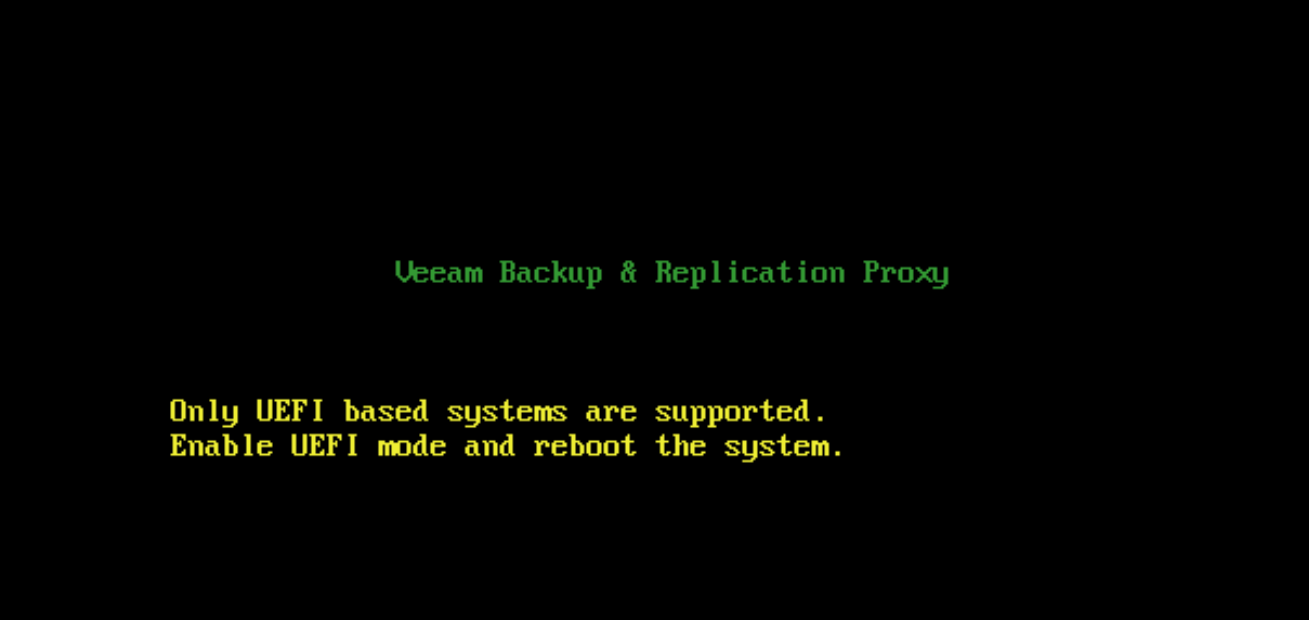
Configuring UEFI BIOS mode in Proxmox VE:
Step 3: Boot the Appliance & Deployment Type Selection
1. Boot the Appliance Installer
Attach the ISO to your VM or bare-metal server and initiate the boot sequence.
2. Choose Deployment Type
The installer offers two deployment modes:
- Standard (Multi-Disk) Deployment: Uses all available disks to create separate system and data volume groups. This is the default option for local storage.
- Single-Disk Deployment: Installs the appliance OS onto a single disk. If multiple disks are present, the installer uses the smallest disk.
For our architecture, we select Single-Disk Deployment.
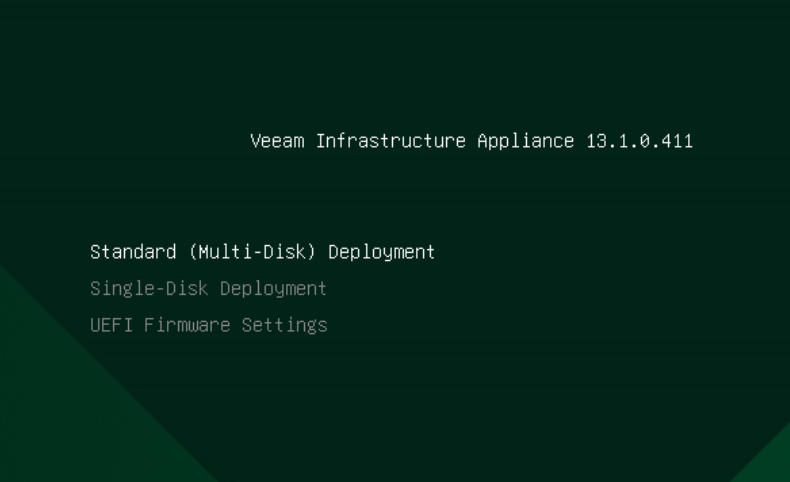
Warning on Single-Disk Deployment: Selecting Single-Disk Deployment will format all local disks connected to the host during installation, even though only one disk is used for the operating system.
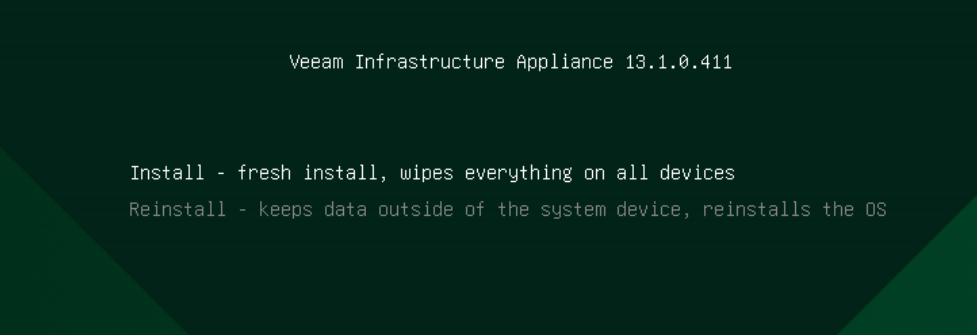
3. Start Installation
Select Install and press [Enter].
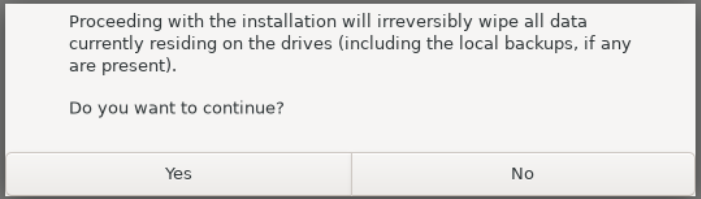
4. Confirm Disk Formatting
Confirm the warning to wipe the target disk and proceed.
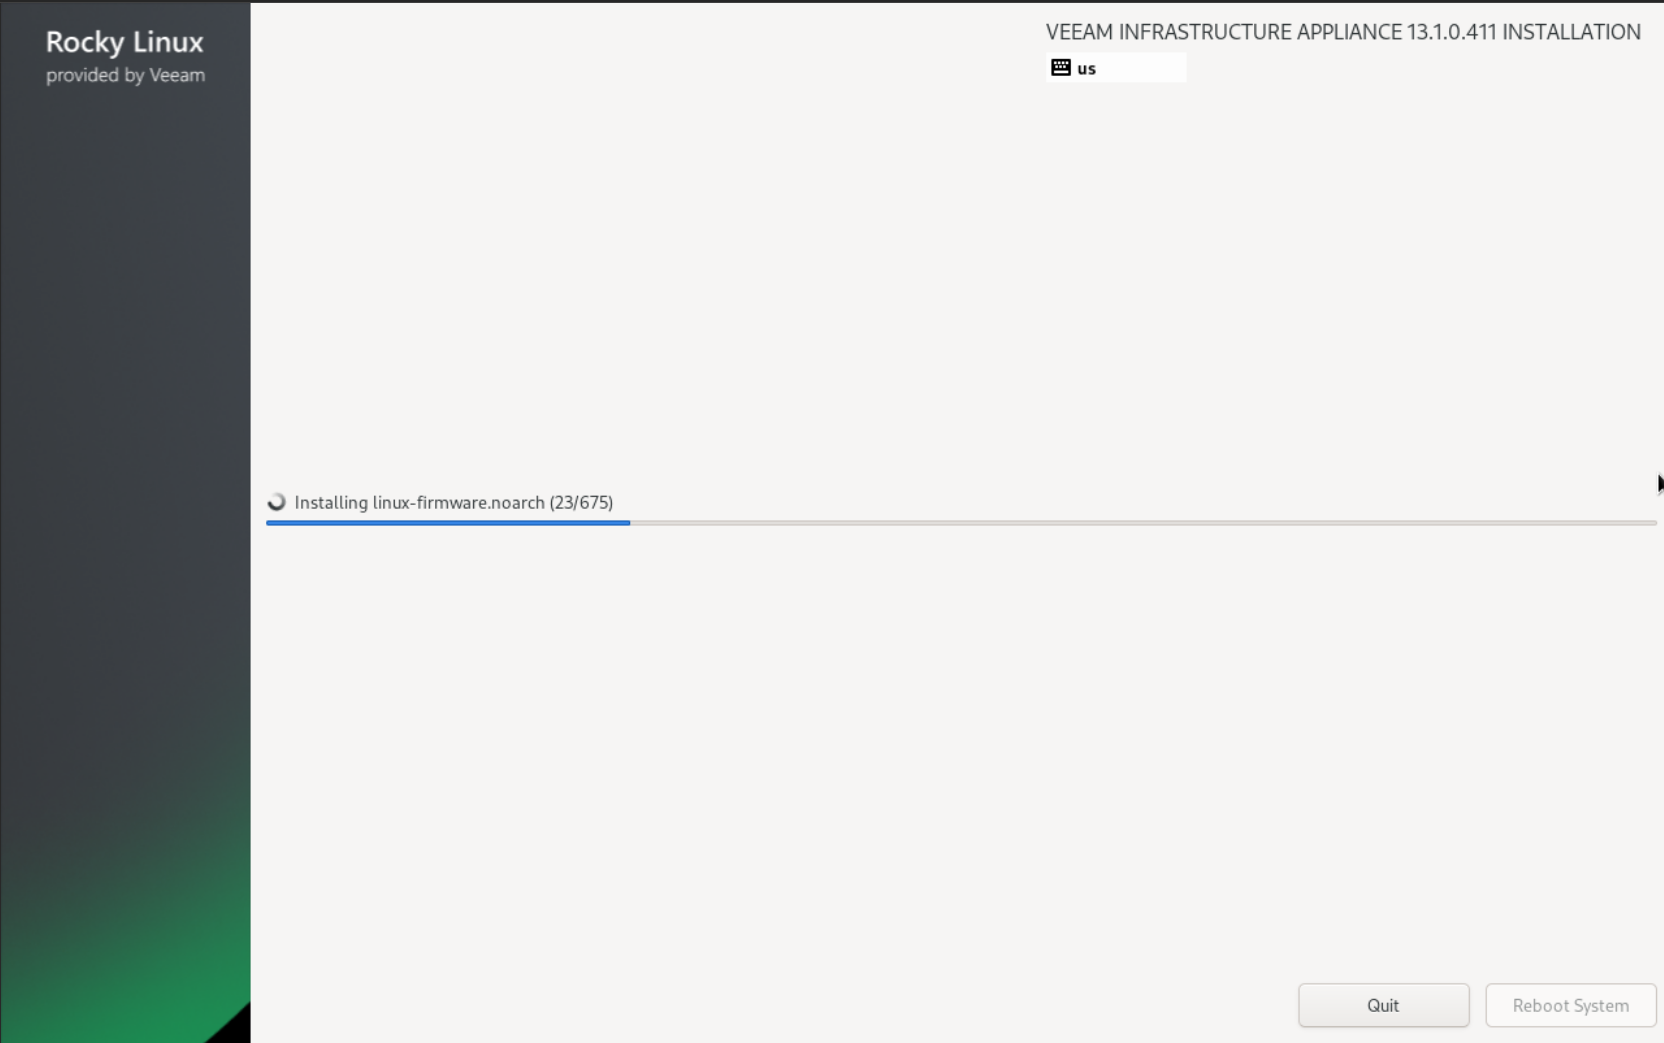
Wait for the base system packages to install.
Step 4: EULA & Role Selection
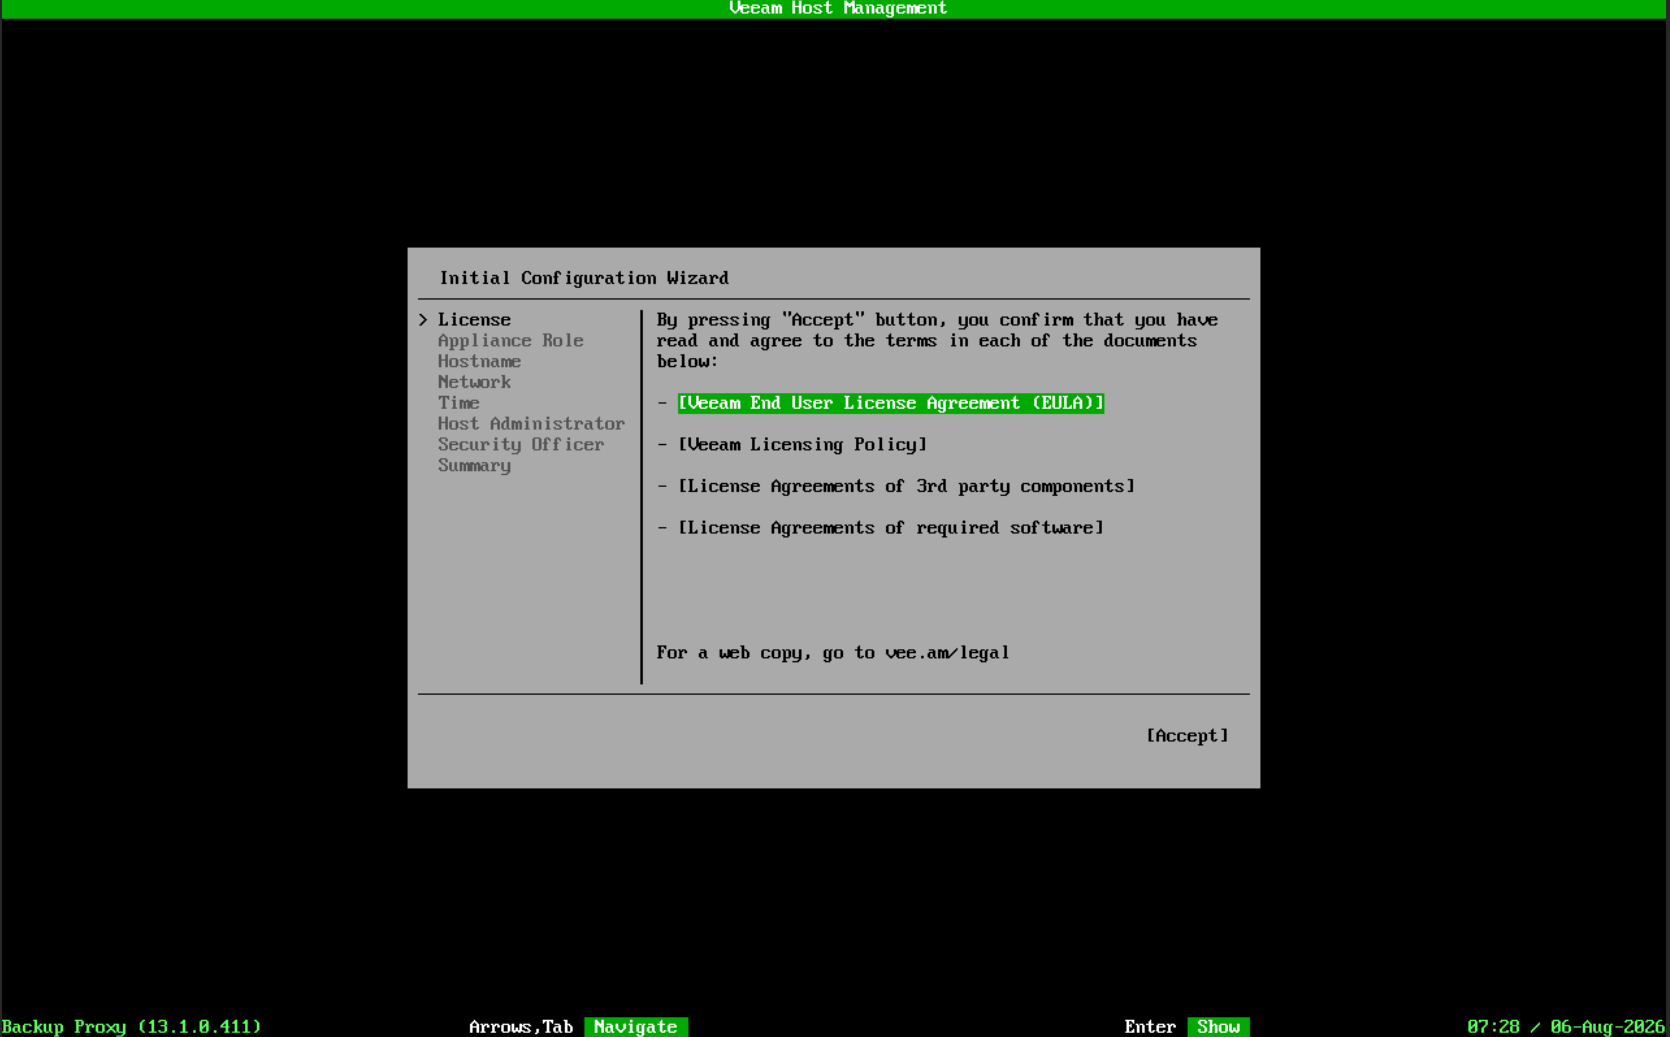
1. Accept EULA
Accept the End User License Agreement (EULA) to proceed to role configuration.
2. Select Appliance Role
Select the ( ) Hardened Repository role.
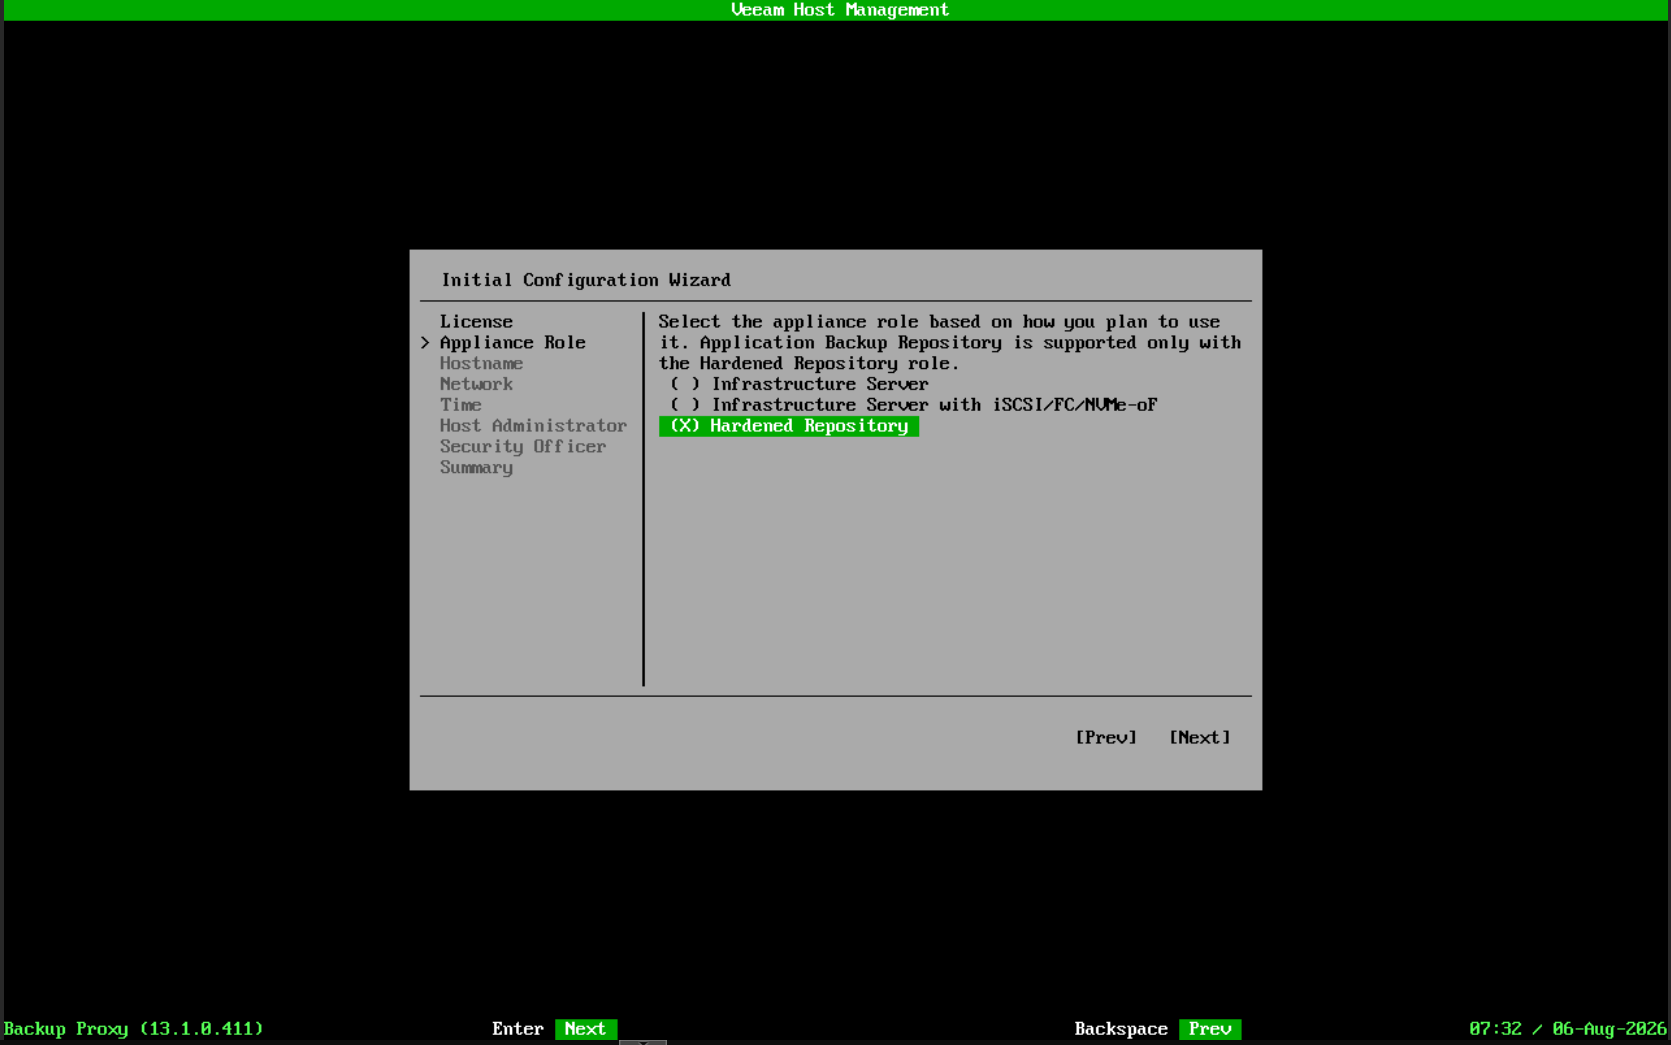
Architectural Note on Appliance Roles: Do not select Infrastructure Server with iSCSI/FC/NVMe-oF. That role is strictly intended for VMware Backup Proxies utilizing Direct SAN Access mode to read VM snapshots directly from production storage. It is not intended for repository storage backend endpoints.
For setups utilizing external SAN storage (such as iSCSI or FC LUNs from TrueNAS or Pure Storage), select Hardened Repository, complete the base wizard for the local disk, and later configure iscsiadm, multipath.conf, and reflink XFS formatting directly via shell/CLI.
Step 5: Hostname & Network Configuration
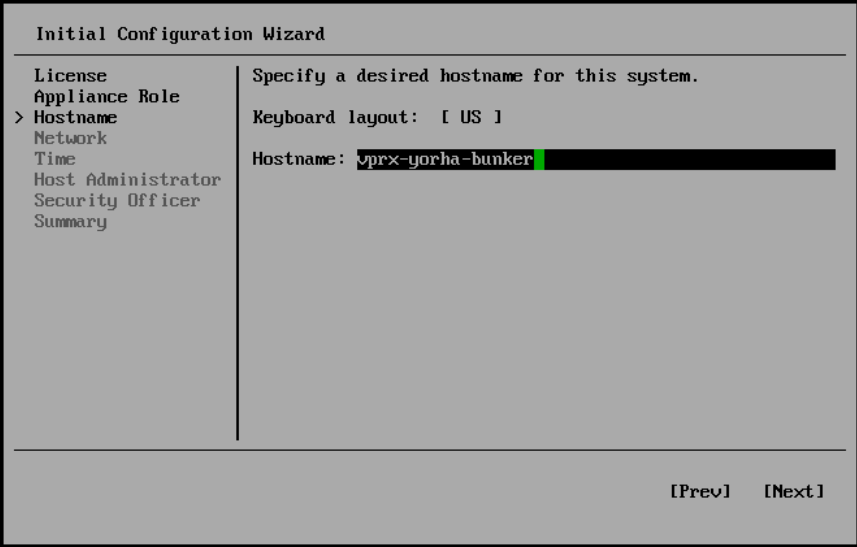
1. Set Hostname
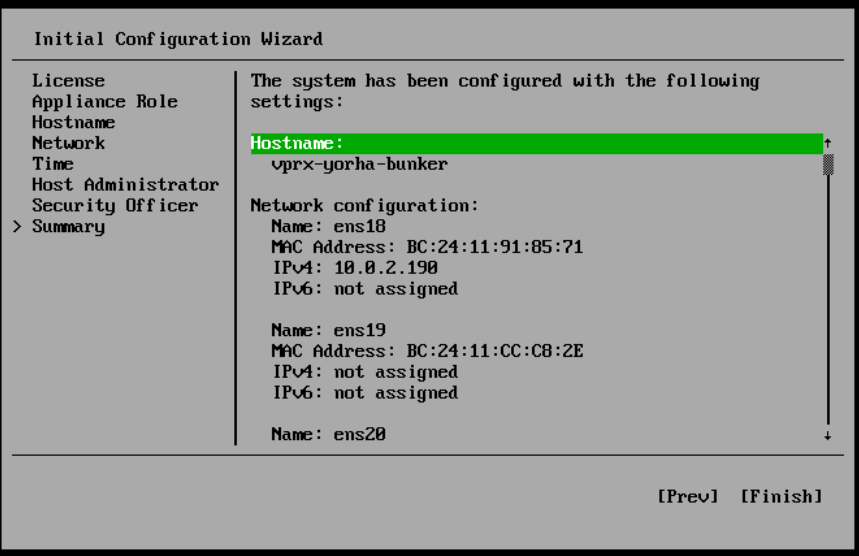
Assign a fully qualified domain name (FQDN) or hostname for the appliance (e.g., vprx-yorha-bunker).
2. Configure Network Interfaces
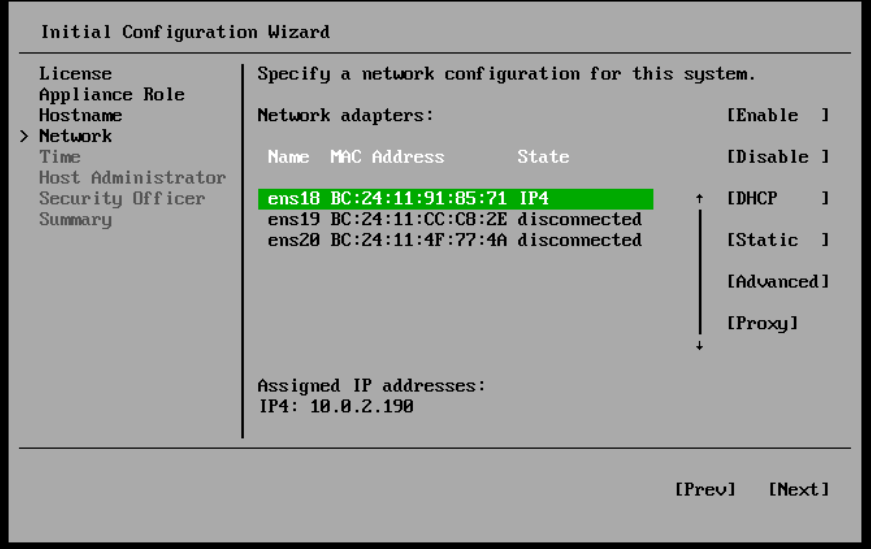
In our virtual machine setup, we attach three network interfaces (vNICs) to enforce strict traffic segmentation:
ens18(Management Network): The primary interface configured with a static IP address. It is dedicated exclusively to administrative tasks (SSH/Web UI), control plane communication with the Veeam Backup Server, and certificate exchange.ens19&ens20(Storage / SAN Network): Left disconnected during initial OS setup. Reserved exclusively for high-throughput block storage traffic (iSCSI / FC) connected to dedicated VLANs.
Why Segment Traffic? Combining management and storage traffic creates severe performance bottlenecks during backup windows. Isolating storage traffic onto dedicated interfaces guarantees that management sessions remain responsive and significantly reduces the attack surface of the repository.
Step 6: Time Synchronization (NTP) & Timezone
1. Configure NTP & Timezone
Specify reliable internal NTP servers and set the local timezone.
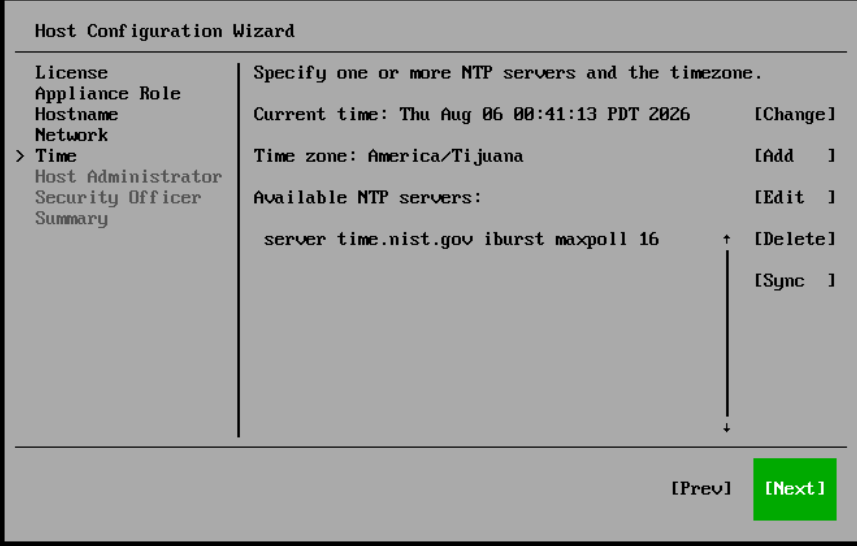
Time Accuracy & Immutability: In a Hardened Repository, cryptographic immutability relies strictly on system clock integrity. If an attacker tampers with system time, backup retention locks could be prematurely invalidated. Ensure NTP is locked to trusted time sources.
Step 7: User Accounts & The Four-Eyes Principle
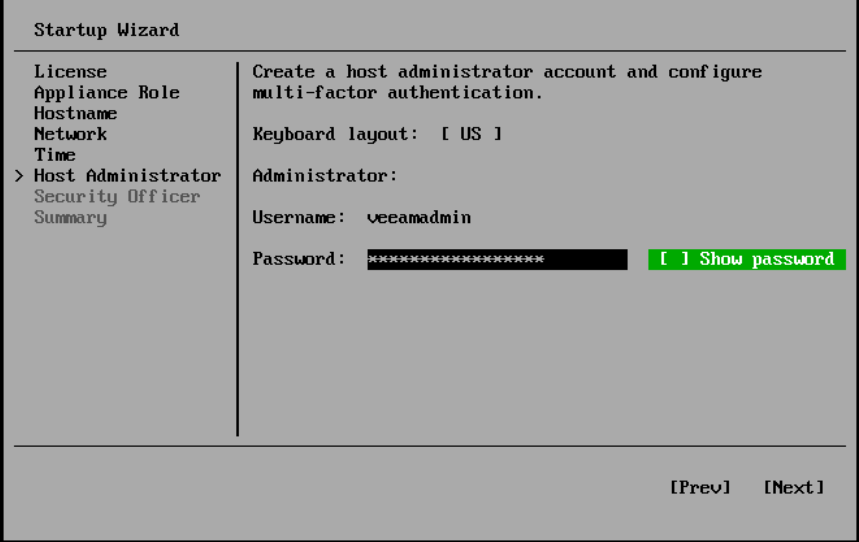
1. Create Host Administrator Account (veeamadmin)
Set the password for the primary operational user veeamadmin.
Password Requirements:
- Minimum 15 characters.
- At least 1 uppercase, 1 lowercase, 1 numeric, and 1 special character.
- Maximum 4 consecutive characters of the same class.
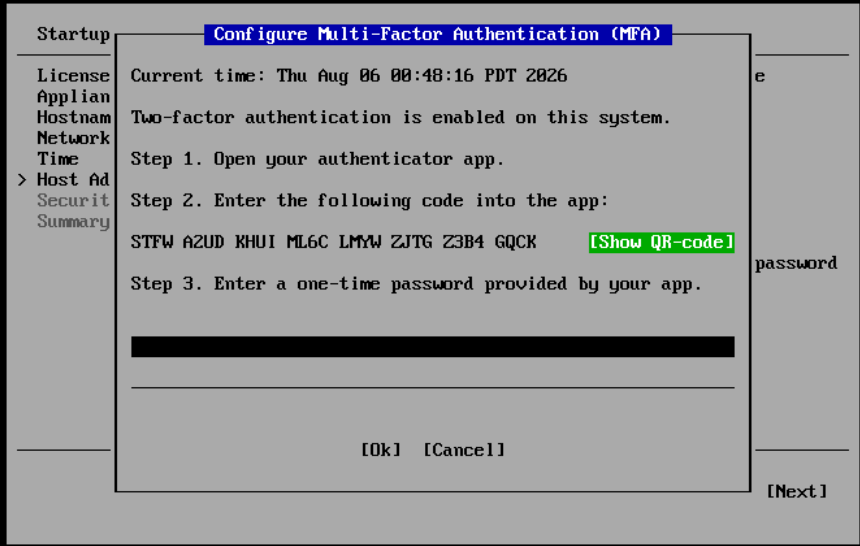
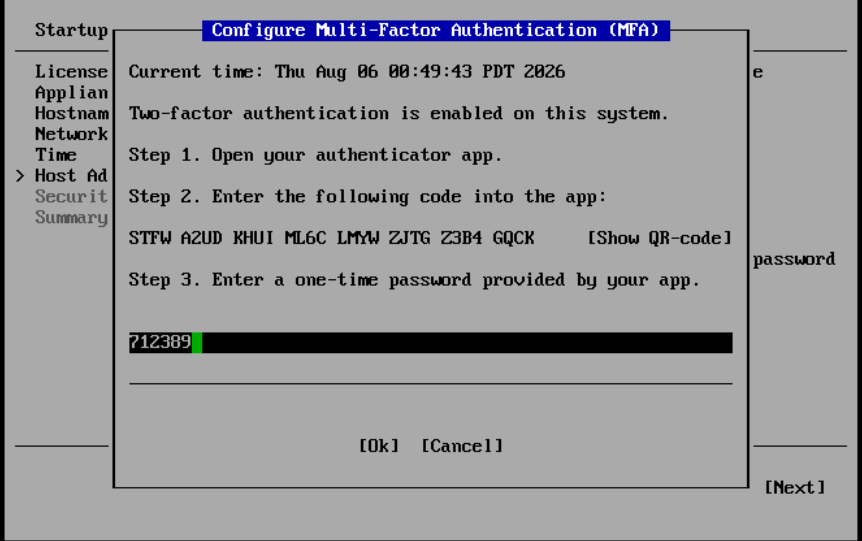
2. Configure Multi-Factor Authentication (MFA)
Scan the QR code to enroll veeamadmin in your TOTP authenticator app.
3. Configure Security Officer Account (veeamso)
During initial setup, the installer allows skipping the Security Officer account. Do not skip this step in production.
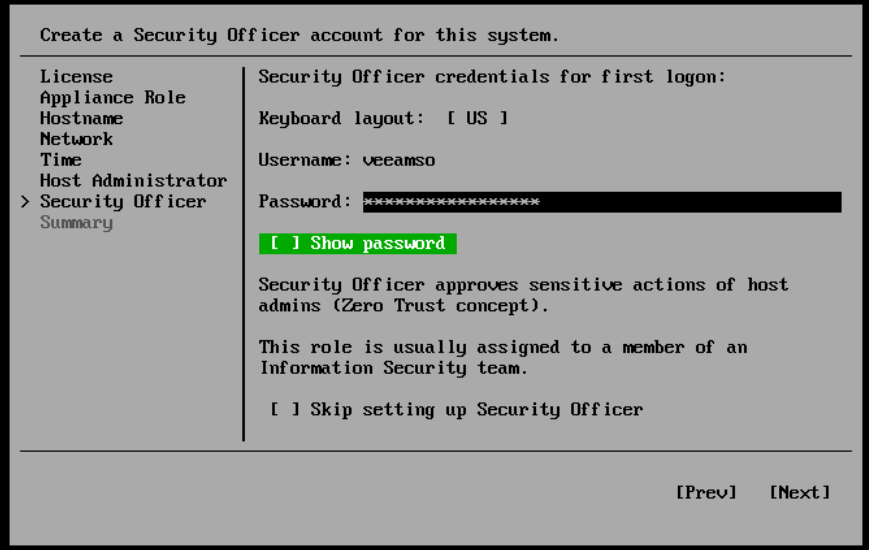
The “Four-Eyes” Security Principle
To comply with Zero Trust standards, Veeam enforces segregation of duties between operational maintenance and security oversight:
- Host Administrator (
veeamadmin): Operational account with access to the Web UI and local TUI console. Handles network settings, system updates, and routine maintenance. - Security Officer (
veeamso): Audit and emergency recovery account with access restricted strictly to the Web UI (no TUI access). Responsible for resetting user MFA tokens, approving security overrides, and exporting audit logs.
If veeamadmin loses MFA credentials or is compromised, veeamso provides the administrative backdoor needed to recover access without wiping the system.
Step 8: Complete Setup & Verify Access
1. Review Summary & Finish
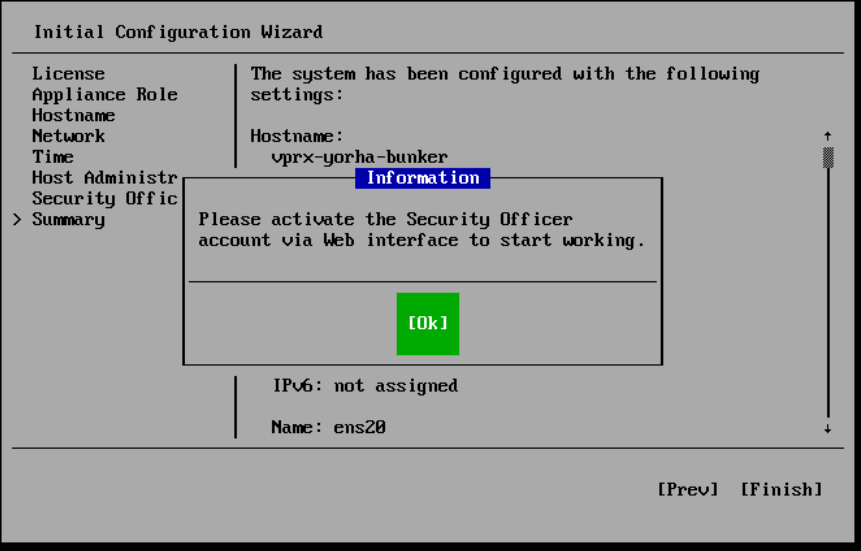
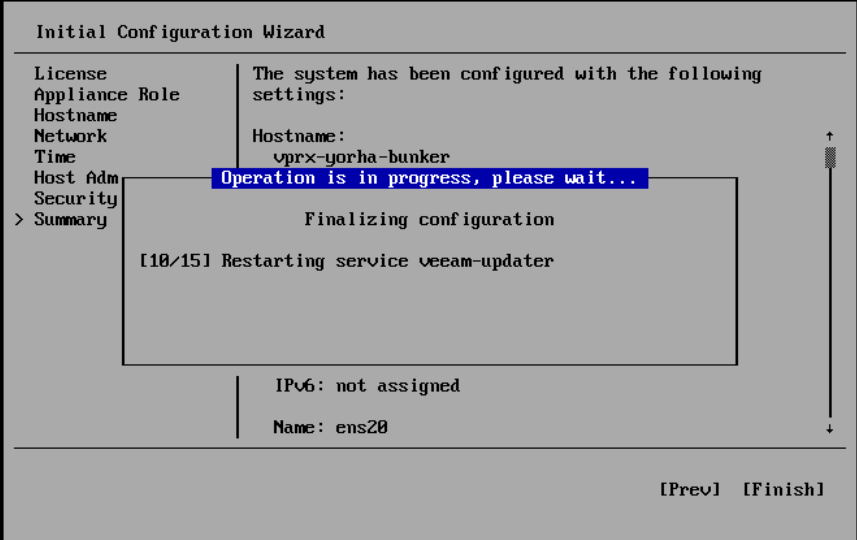
Review the configuration summary and click Finish. The appliance will apply configuration settings and restart core services.
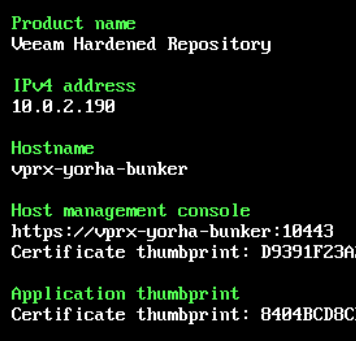
2. Verify Management Web Console
Access the Host Management Console via HTTPS: https://vprx-yorha-bunker:10443
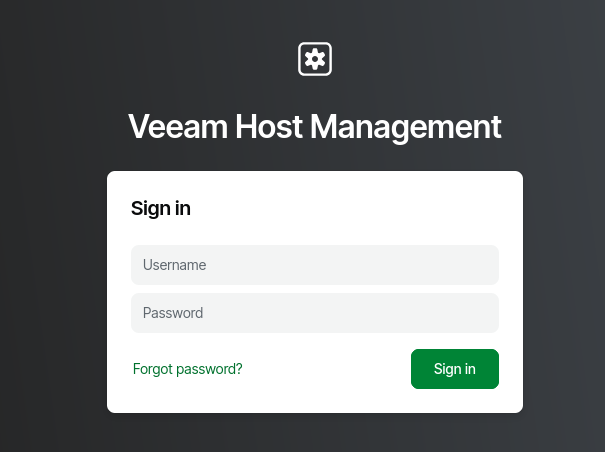
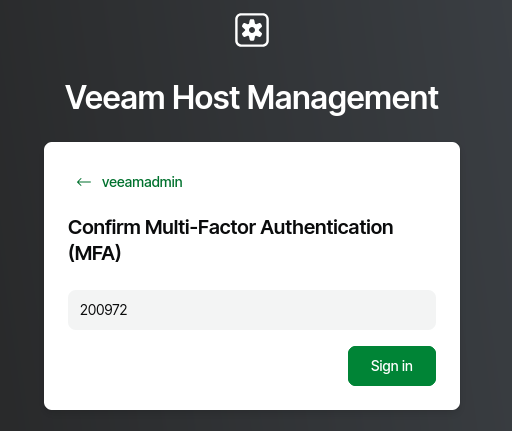
Step 9: Initial Console Overview & Security Posture
Upon logging into the Veeam Host Management Console, review the system status on the Overview dashboard:
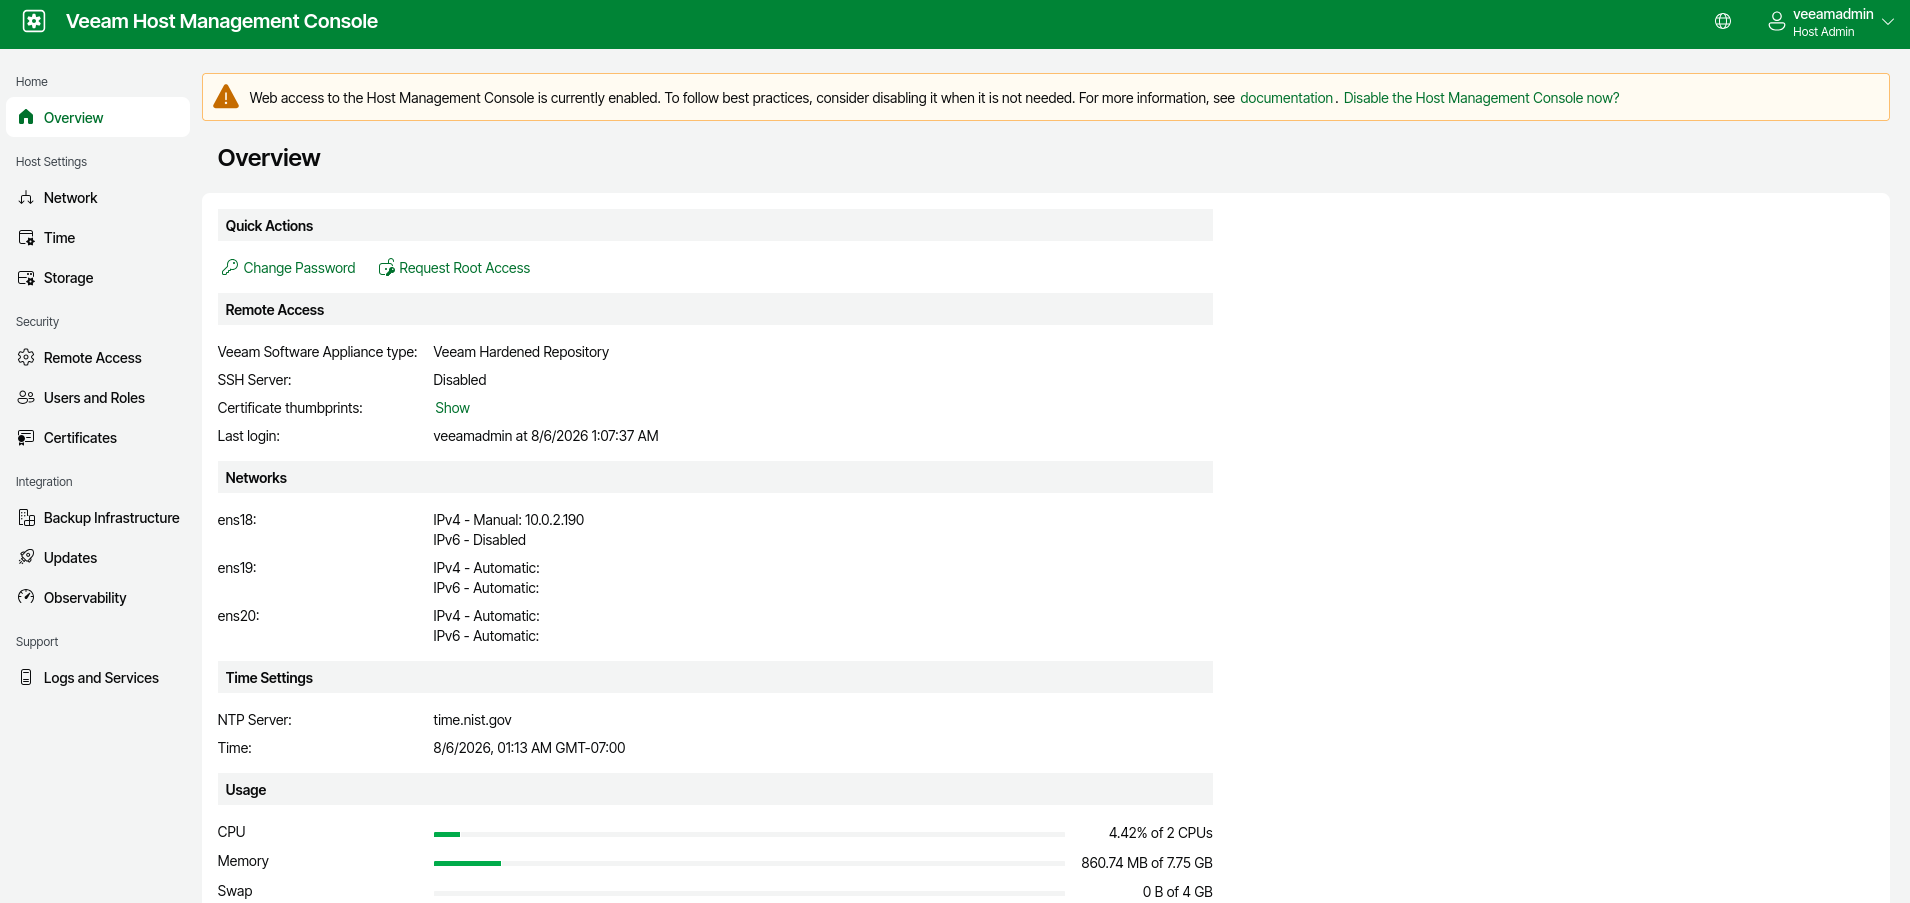
- Web Access Warning Banner: The orange warning banner suggests disabling Web UI access for maximum security. For our setup, we keep Web UI access enabled because the local TUI console is restricted by OS hardening rules. The Web UI will serve as our interface for configuring storage connections in upcoming guides.
- SSH Disabled by Default: Under Remote Access, verify that the SSH Server is set to Disabled. This ensures zero remote command-line access out of the box, mitigating brute-force and lateral movement risks.
Conclusion
The Veeam Infrastructure Appliance provides a robust, pre-hardened Linux foundation for immutable backup repositories. By enforcing strict password entropy, MFA, network segmentation, and the Four-Eyes principle, your repository is protected against unauthorized access from day one.
In the next guide of this series, we will configure storage volumes and attach external iSCSI targets directly from the management console.