
Configuring block storage correctly is a critical step in building a resilient backup architecture. When integrating Veeam with TrueNAS SCALE, using iSCSI provides the necessary block-level access for immutable repositories. This guide walks you through the process of creating a Zvol, configuring the iSCSI target using the wizard, and establishing secure connections using Zero Trust principles. By the end of this tutorial, your TrueNAS storage will be fully prepared to connect with the Veeam Infrastructure Appliance.
The workflow in TrueNAS requires creating the logical puzzle pieces separately and then joining them at the end.
1. Creating the Zvol (The Raw Disk)
Unlike traditional network storage (SMB/NFS) which uses Datasets, iSCSI requires block storage.
- Go to Datasets and select your main pool.
- Click Add Zvol.
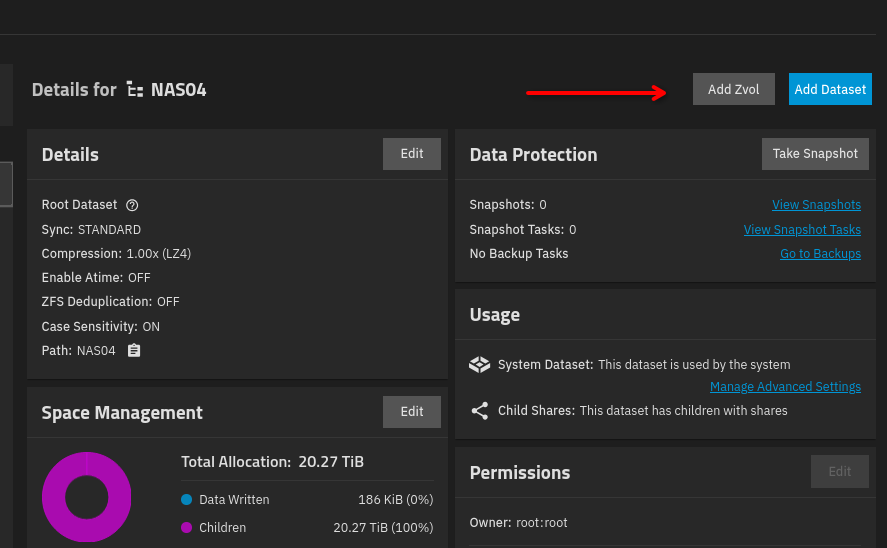
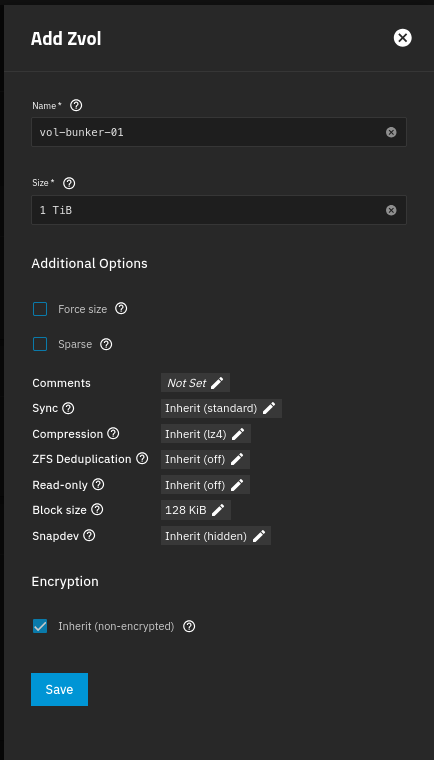
Note: Assign the name (for example, vol-bunker-01) and define the size you will allocate for backups. Leave the provisioning as Sparse (Thin provisioning) if you want to save initial space, or uncheck it to reserve the entire block (Thick provisioning) and guarantee performance. Architecture recommendation: On this same screen, open the Block size menu and select 128 KiB (the highest value available in the menu for Zvols). This adjusts the physical layer of ZFS to mitigate write amplification and optimize performance when interacting with Veeam data blocks.
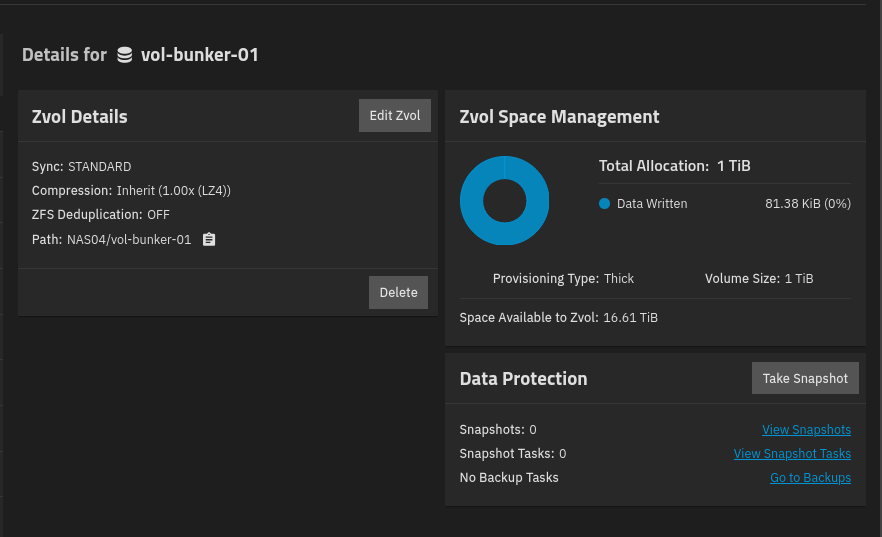
2. The iSCSI Wizard
Once the Zvol is ready, go to Shares > Block (iSCSI) Shares Target and click the Wizard button.
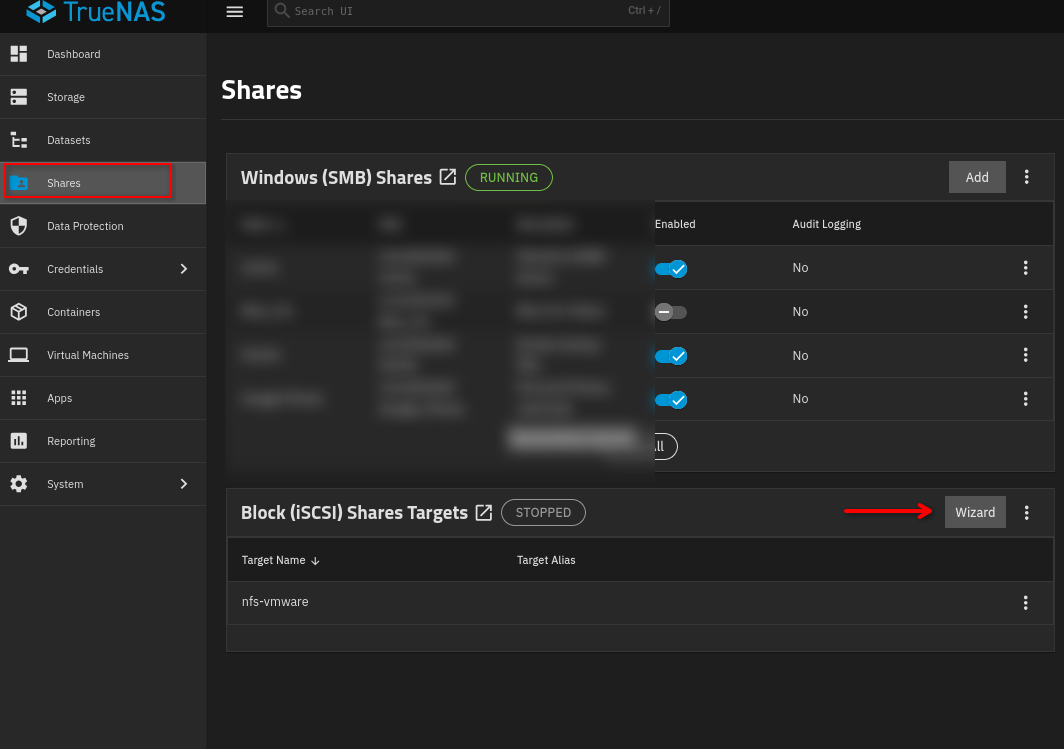
Step 1 - Target
- In the
Target *dropdown menu, simply select Create New and click Next. TrueNAS will take care of creating the backend structure based on the data we enter in the next step.
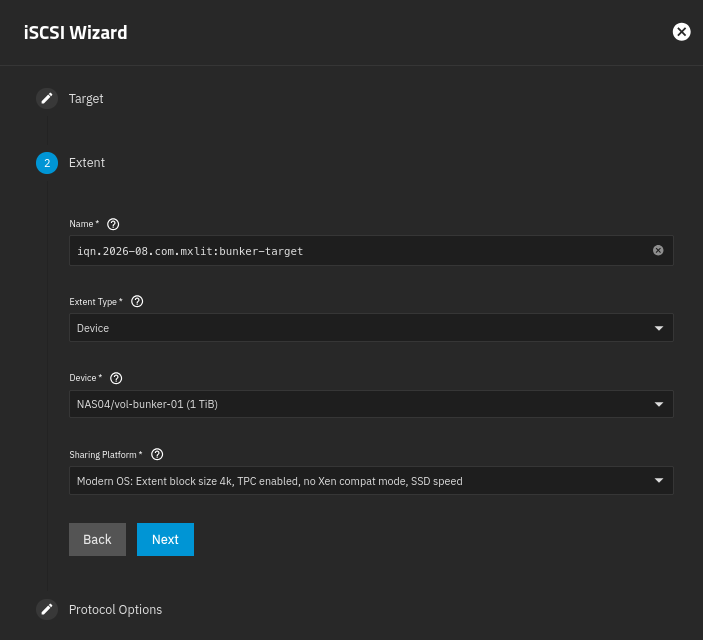
Step 2 - Extent (The Physical Mapping and Logical Name)
- This step is the bridge where we name our iSCSI connection and link it to the physical Zvol on our disks.
- Name: Enter the identifier that the Veeam Appliance will connect to. To maintain a standard in your network, use the IQN format (e.g.,
iqn.2026-08.com.mxlit:bunker-target).
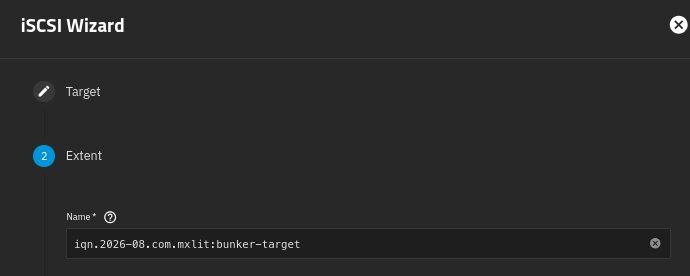
Architecture Note (RFC 3720 Standard): The naming format is not arbitrary. It responds to a strict industry standard designed to prevent disk collisions on the network. The acronym iqn stands for iSCSI Qualified Name. The convention dictates the structure iqn.yyyy-mm.reverse-domain:local-name. By using your organization’s web domain in reverse (e.g., com.mxlit) and the implementation date (2026-08), the protocol guarantees that your identifier is globally unique. Everything after the colon (:bunker-target) is the local name you define to identify the resource.
- In Extent Type, make sure to select Device.
- In the Device field, select the block disk you created earlier (e.g.,
NAS04/vol-bunker-01 (1 TiB)). - In Sharing Platform, select Modern OS: Extent block size 4k, TPC enabled…. Since the disk will be consumed directly by the Veeam appliance’s Linux operating system and formatted in XFS, using a native 4K logical block size eliminates legacy 512-byte emulation, aligning partitions optimally to maximize immutable repository performance.
Step 3 - Initiators Configuration (Zero Trust Security)
To achieve a truly Zero Trust architecture, we will not rely solely on IP addresses. We will force TrueNAS to validate the exact logical identity of our Linux server, guaranteeing that only the legitimate backup node can mount the immutable repository.
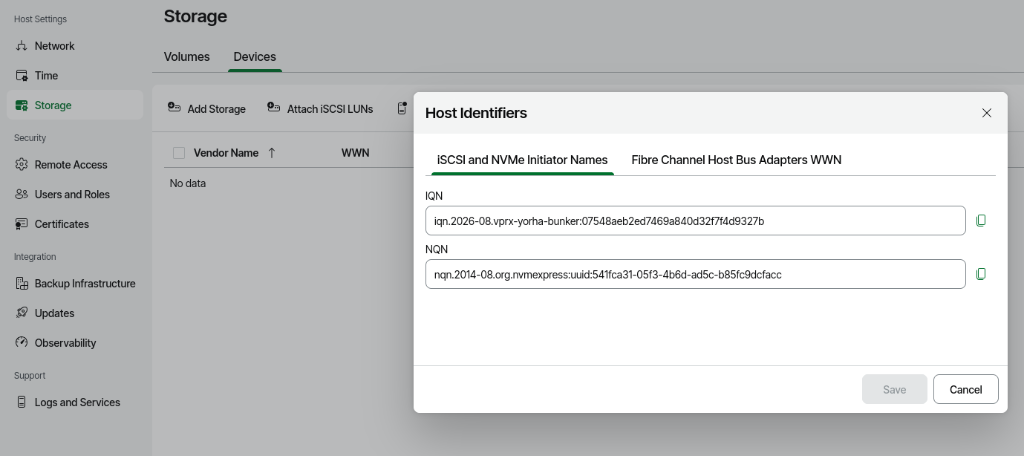
- Obtain the Appliance Identifier (Veeam):
Before defining access in TrueNAS, we need the “identity” of our server. Open your Veeam Appliance web console, navigate to Storage > Devices, and click the Hosts Identifiers button. Under the iSCSI and NVMe Initiator Names tab, copy the exact logical name that appears in the IQN field (e.g.,
iqn.2026-08.vprx-yorha-bunker:07548...).
Portal: Select Create New. Add the IP addresses of your two dedicated storage network interfaces (e.g.,
10.0.6.191and10.0.7.191). This is critical, as it will enable Multipath (MPIO) across both VLANs.Apply the Whitelist in TrueNAS (Initiators): Back in the TrueNAS initiator group settings (Initiators), ensure the “Allow All Initiators” checkbox is unchecked, and paste the exact IQN you just copied from Veeam into the whitelist. This guarantees that even if a malicious machine manages to spoof your IP on the storage VLAN, TrueNAS will block access since the source identifier will not match.
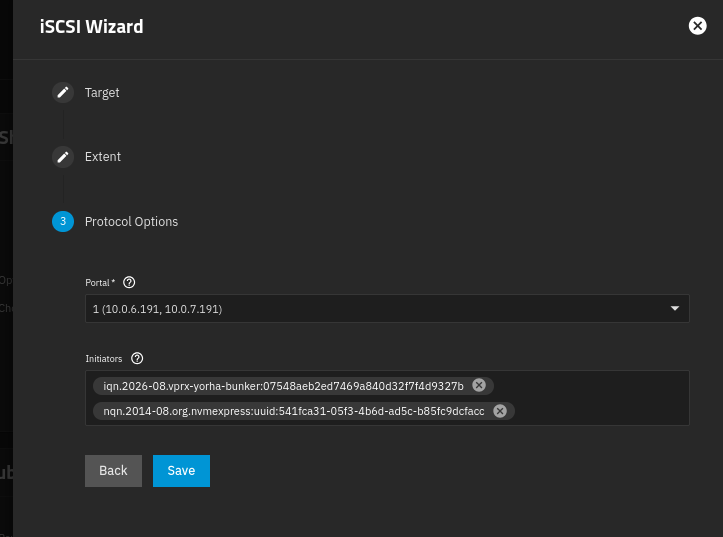
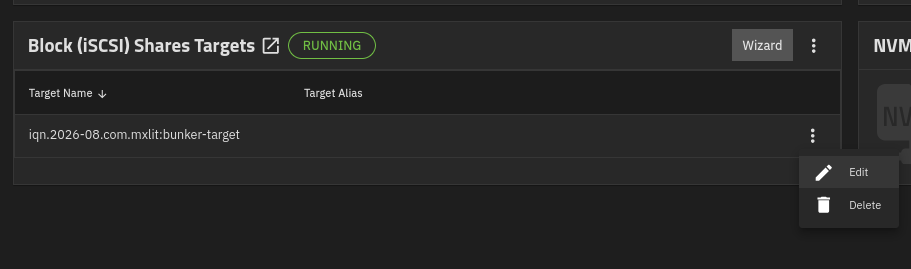
- Configuring Authorized Networks (Post-Creation): Once the wizard is finished, you must edit the newly created initiator group to restrict access at the network level. Go back to the Initiators tab, click the three dots next to your initiator group, and select Edit.
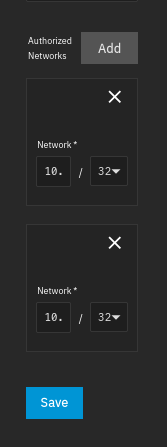
In the Authorized Networks section, exclusively add the IP addresses of your appliance interfaces using the /32 notation to restrict access to a single host (e.g., 10.0.6.190/32 and 10.0.7.190/32).
3. Enabling the Service
- Finish the wizard by clicking Save, you can select for the service to start automatically.
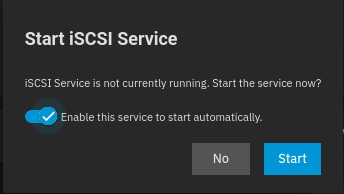
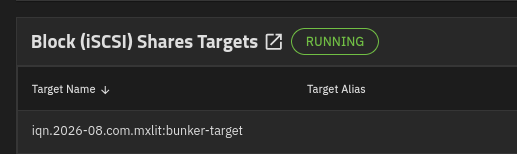
If you didn’t start it automatically, you can start it from here.
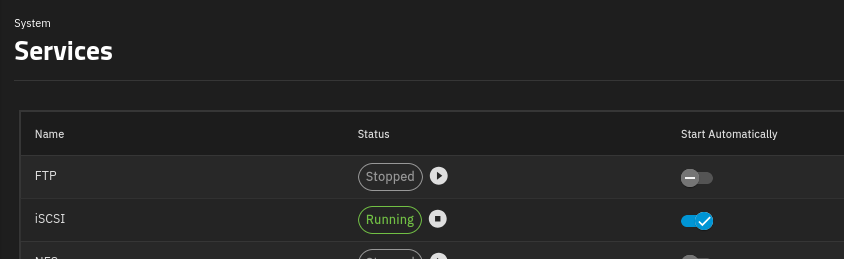
- Lastly, go to System > Services.
- Look for the iSCSI service, turn it on, and check the Start Automatically box so that the storage spins up on its own after any NAS reboot.
Conclusion
By meticulously configuring your Zvols and iSCSI targets, you ensure that your Veeam backups are written to a high-performance, secure storage layer. Adhering to best practices like setting the optimal block size for ZFS, using standard IQN naming conventions, and restricting initiator access strictly to the Veeam Appliance’s IPs are essential steps for maintaining a robust Zero Trust environment. With the iSCSI service enabled and set to start automatically, your TrueNAS SCALE system is now ready to securely host immutable backup data.