In this post, we’ll see how to create a new virtual machine from scratch. While the ideal approach is to create virtual machines from a template, here we’ll see how to do it if you don’t have one. In future posts, I’ll explain how to create a template from an existing virtual machine and then create virtual machines from that template.
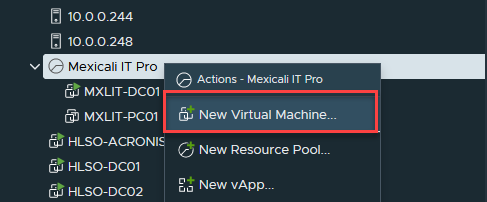
Right-click on the cluster or resource pool where you want the new virtual machine to be located, and select “New Virtual Machine…”
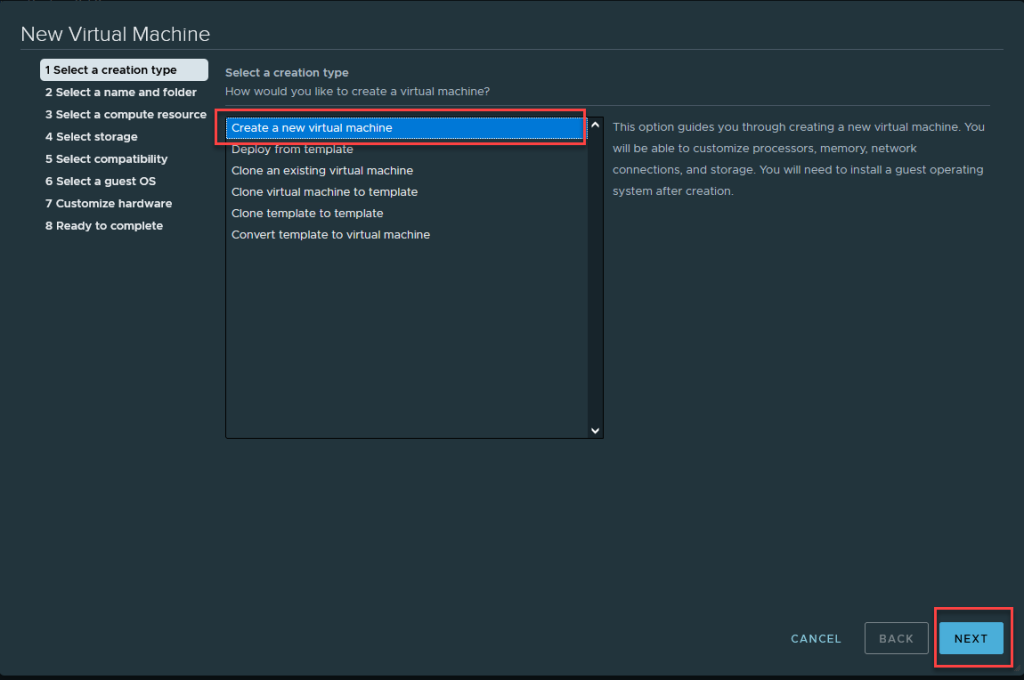
Select “Create a new virtual machine” and click Next.
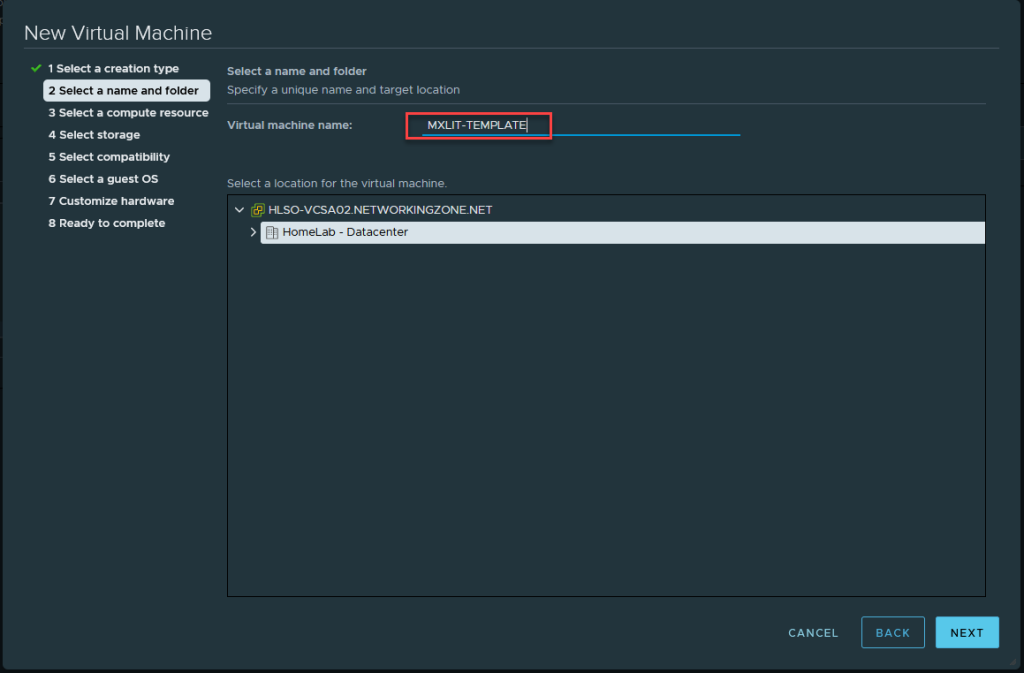
Select the desired name for the virtual machine and choose the location.
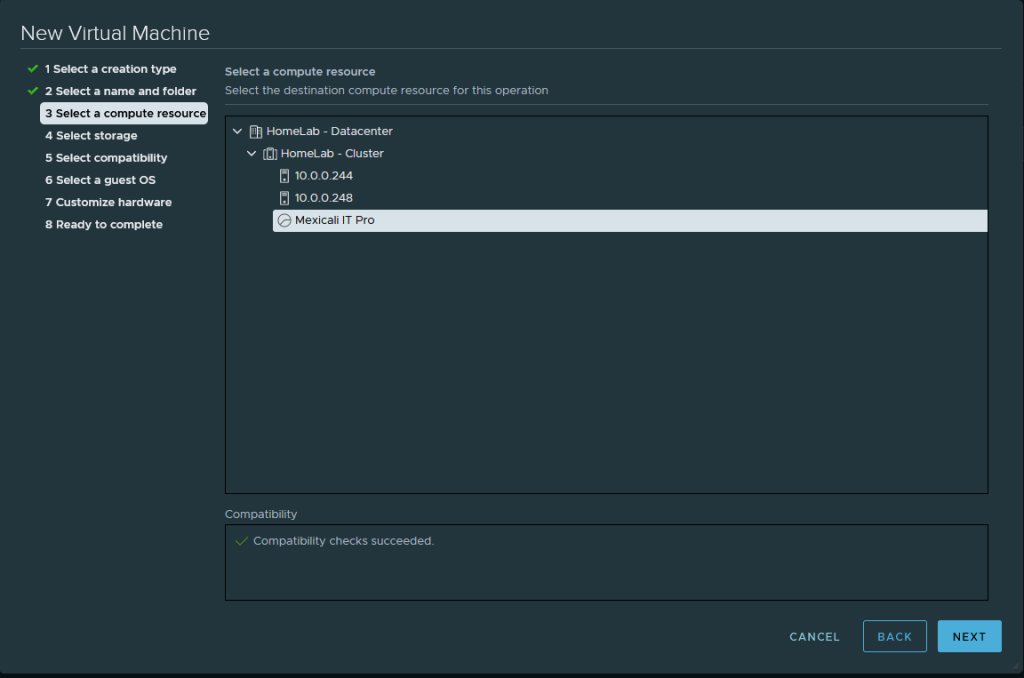
In this section, you must select the resource.
Here, you must select where the virtual machine will be stored.

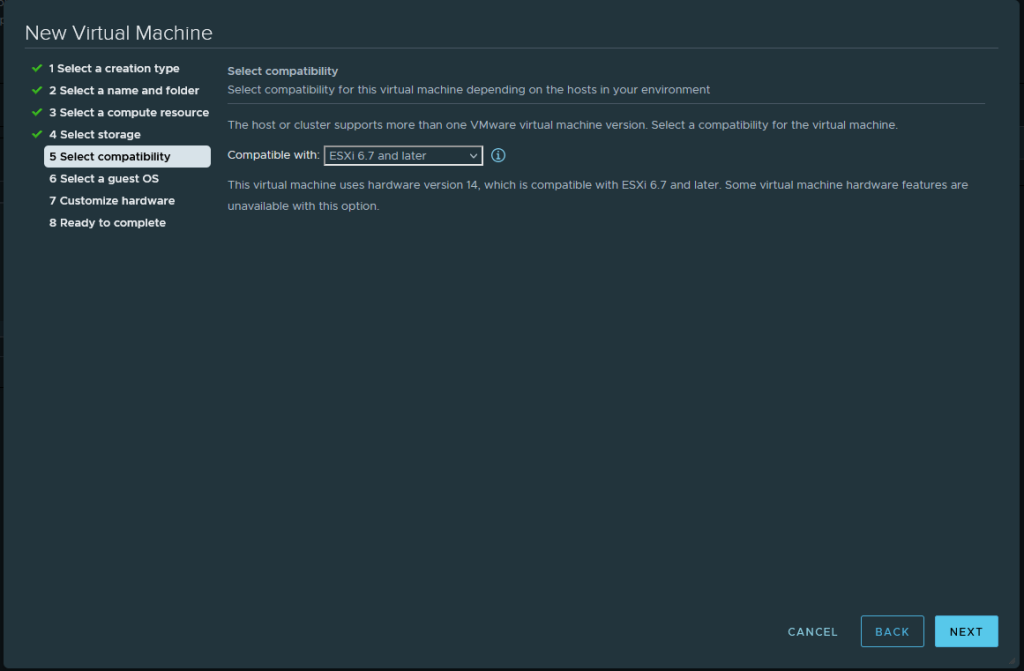
Select the compatibility (I recommend using the latest available).
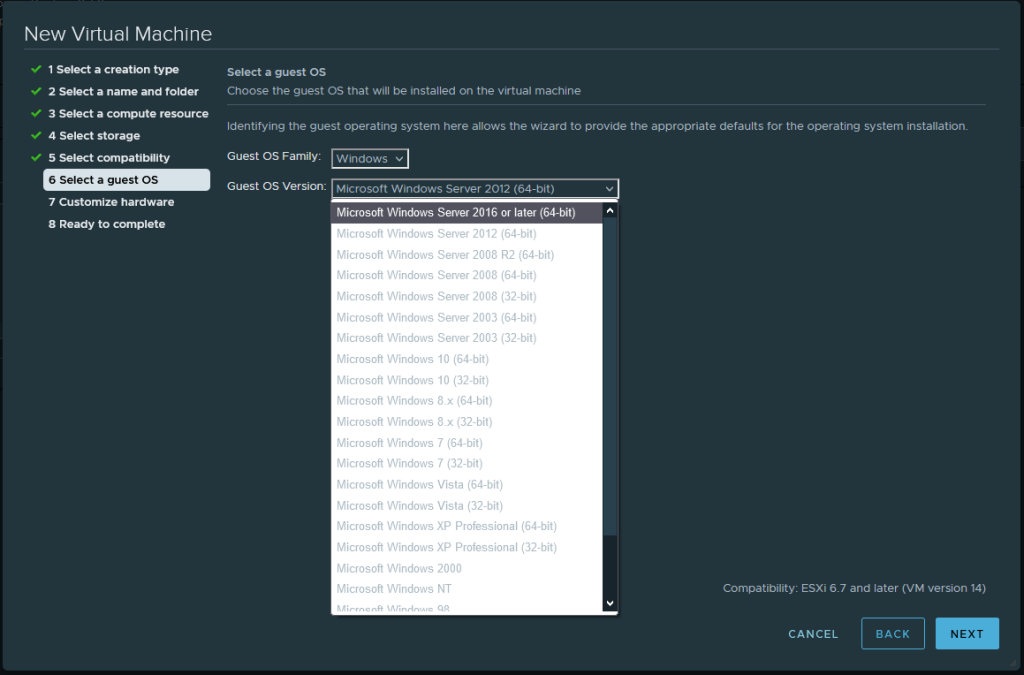
Select the operating system family and then select the version.
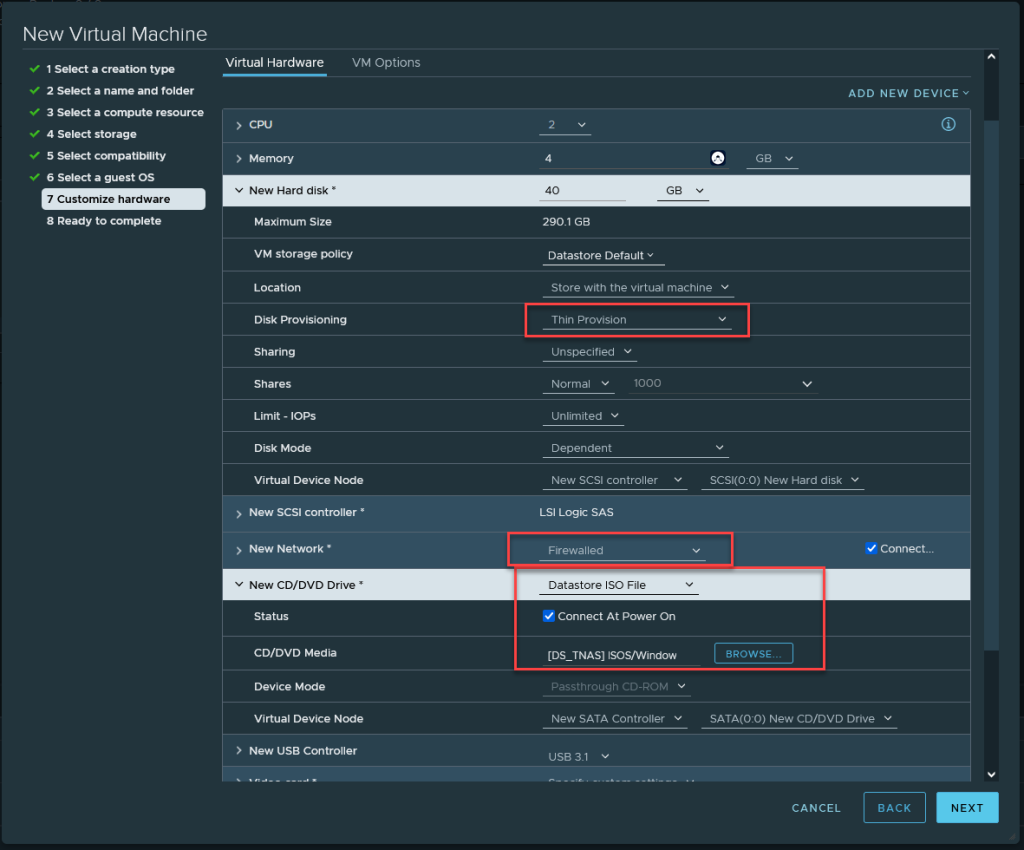
Here, you must select the hardware options. There is something to keep in mind regarding the hard drive. VMware uses Thick and Thin Provisioning options.
Thick provisioning is a type of storage pre-allocation, meaning that the allocated disk space will be taken from the physical storage. Example: If my physical space where I will store the virtual machine has 300GB free, and the hard drive allocated to my machine is 40GB, with Thick provisioning, it will take those 40GB from my 300GB, >leaving only 260GB for other virtual machines.
Thin provisioning on the other hand, only allocates the amount of actual space used on my hard drive. Let’s take the same example as before. I have a 300GB datastore and I assign a 40GB hard drive to >my virtual machine. With thin provisioning, it will ONLY use the space it needs. Let’s say my virtual machine only uses 15GB for the entire operating system. Within my system, I’ll see that I’m using >15GB out of 40GB, but if I check my physical storage, I’ll only see that I’m using those 15GB, leaving me with 285GB available for other virtual machines.
Another option we need to select is the network interface we’ll use, in addition to connecting the CD/DVD drive and mounting an ISO of the operating system we want to install.
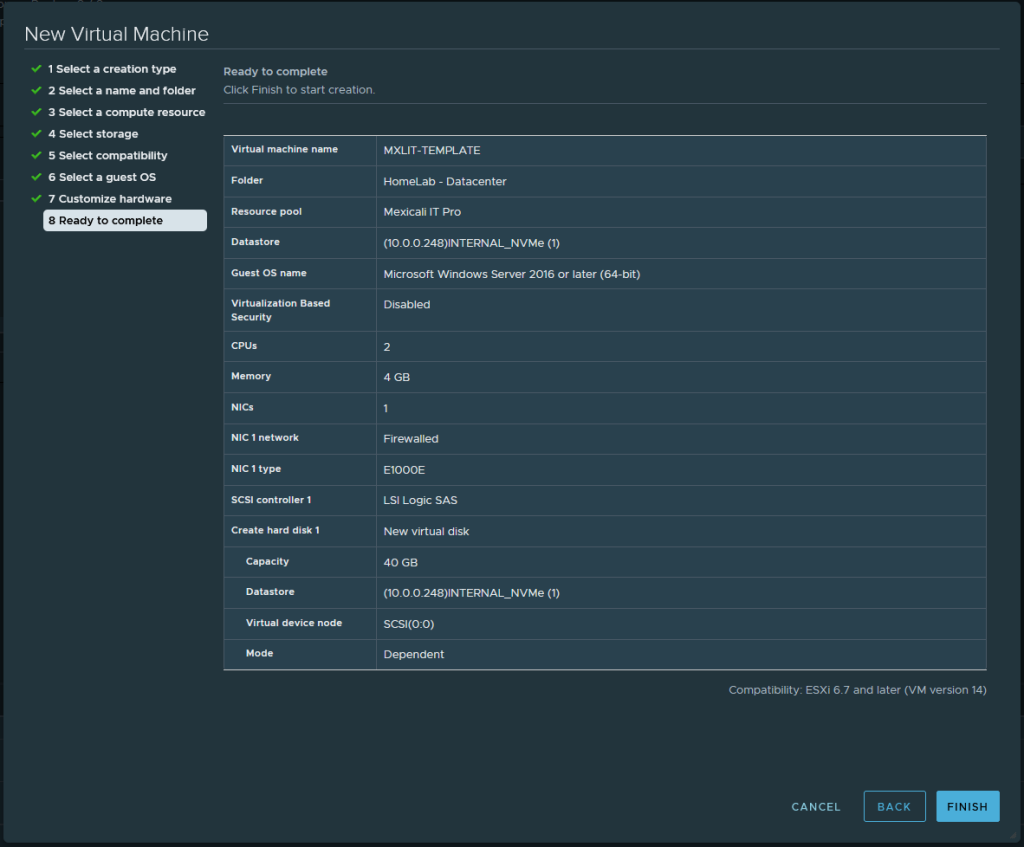
Here, a summary of our selections will be displayed. If everything is correct, select “Finish.”
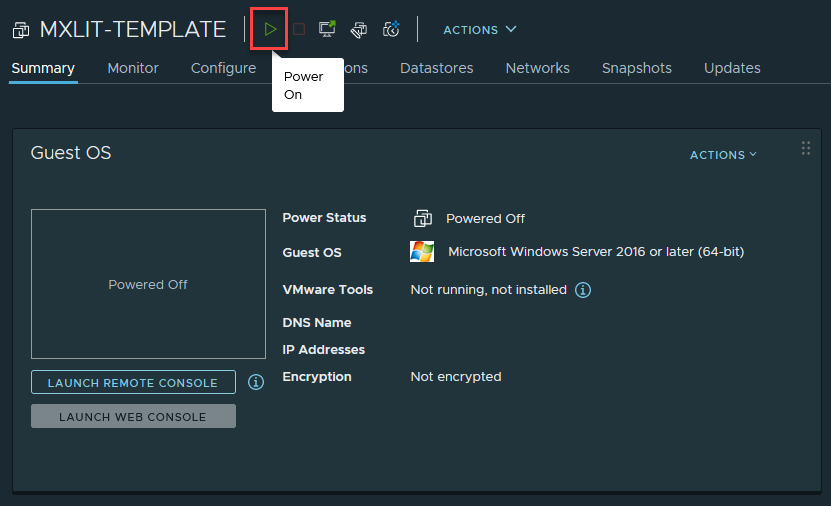
Turn on the created virtual machine by clicking the play button.
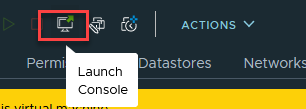
Select Lunch Console.
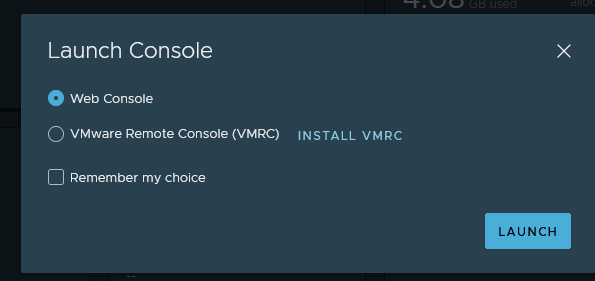
Select Web Console if you don’t have VMRC installed.
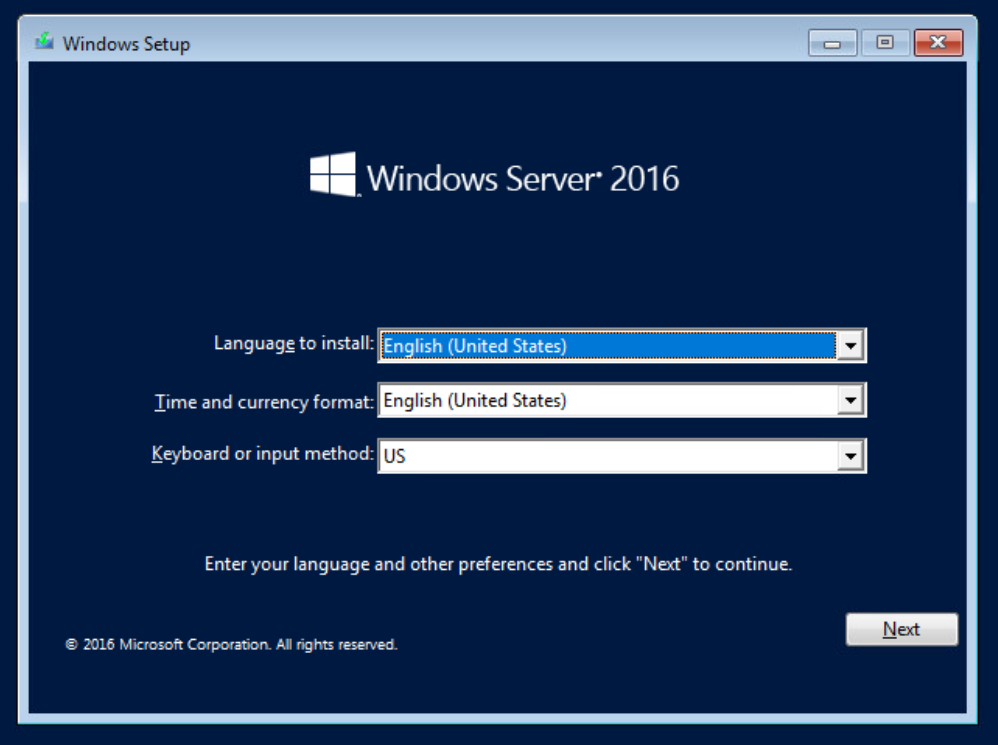
Click Next.
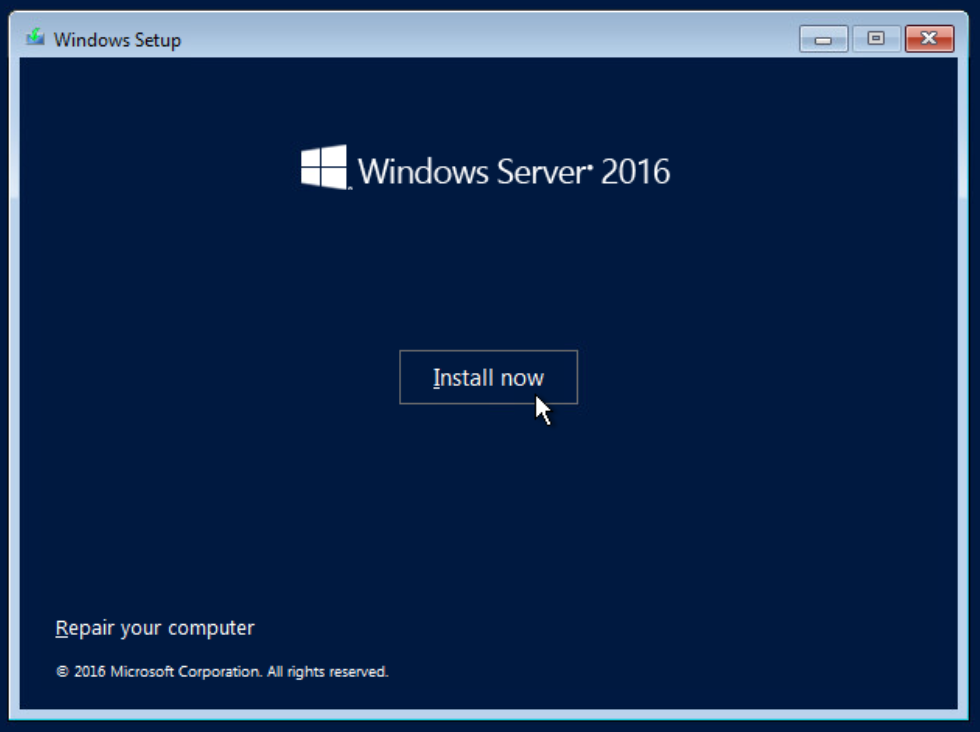
Select Install Now.
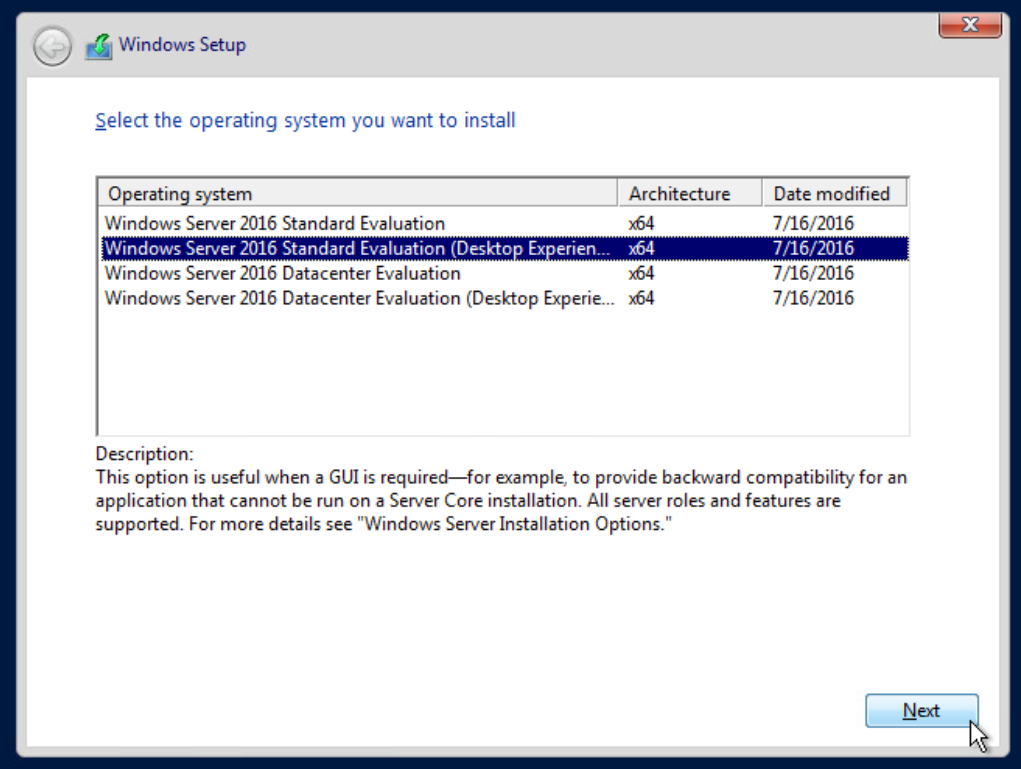
Select the system you want to install.
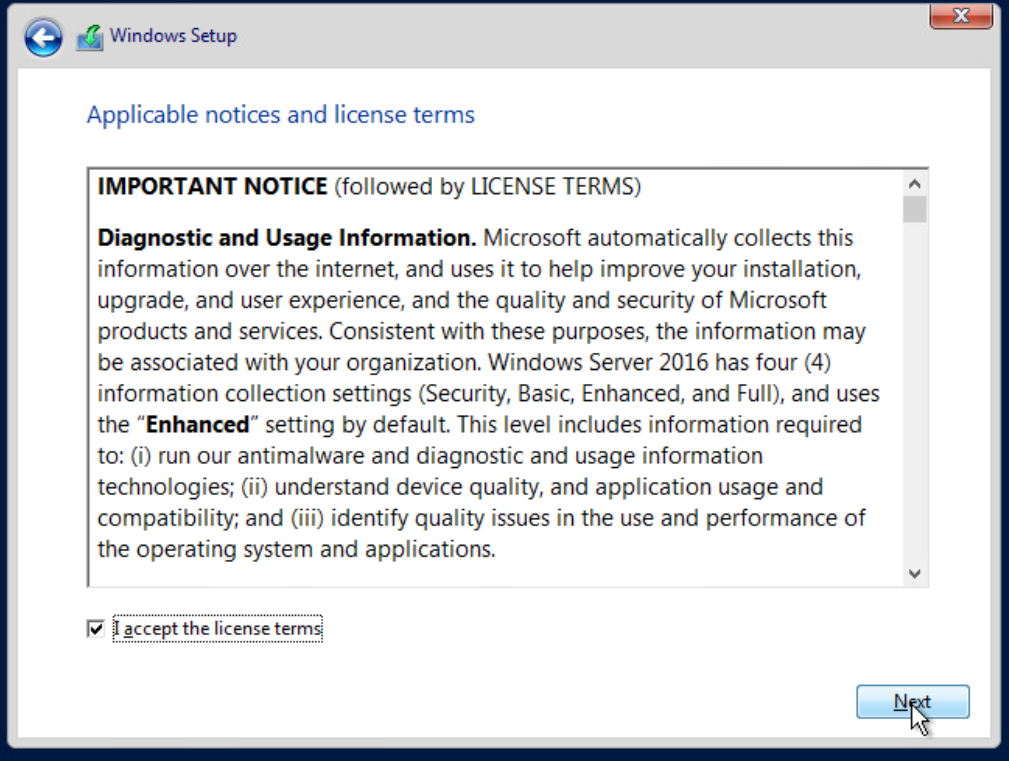
Accept and click Next.
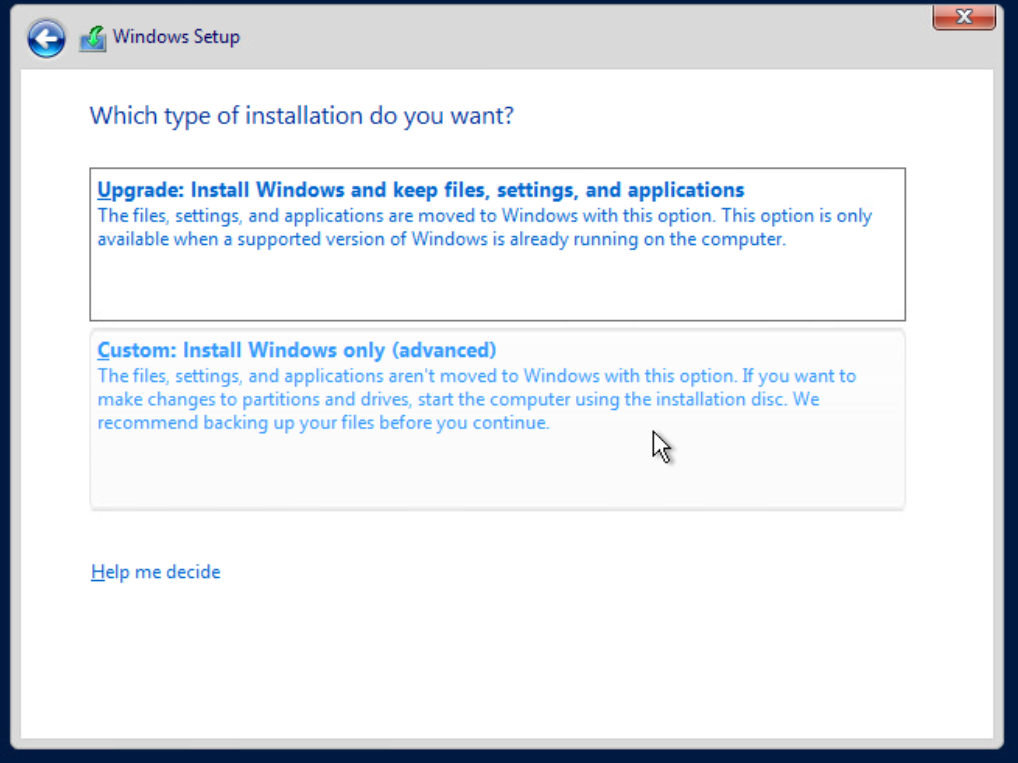
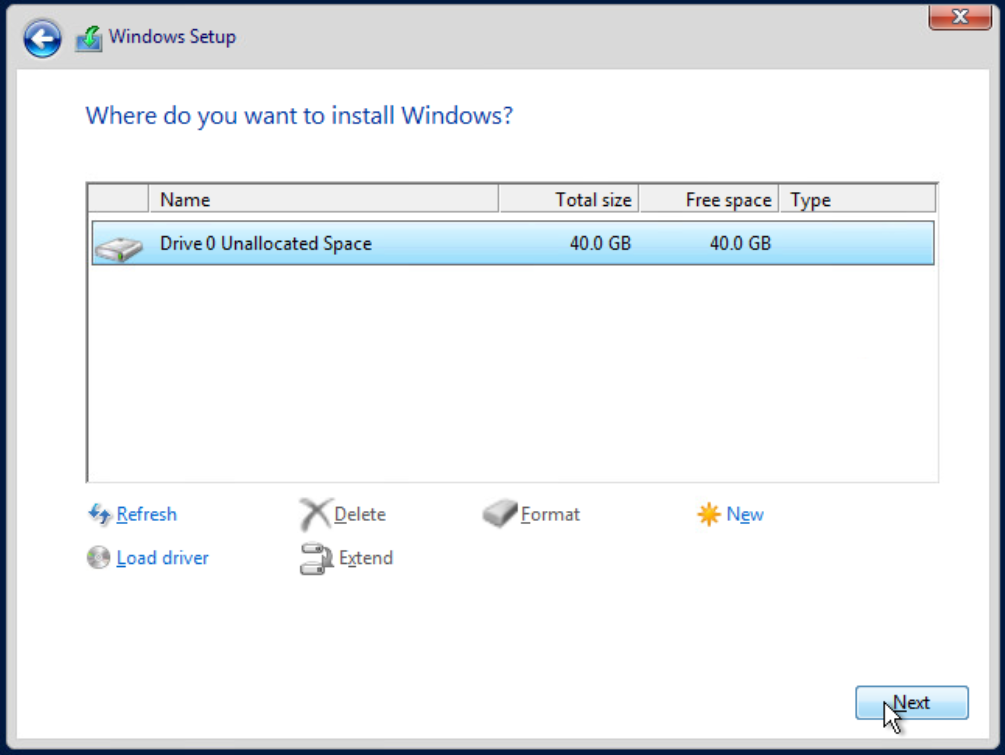
Select Advanced.
Select Next.
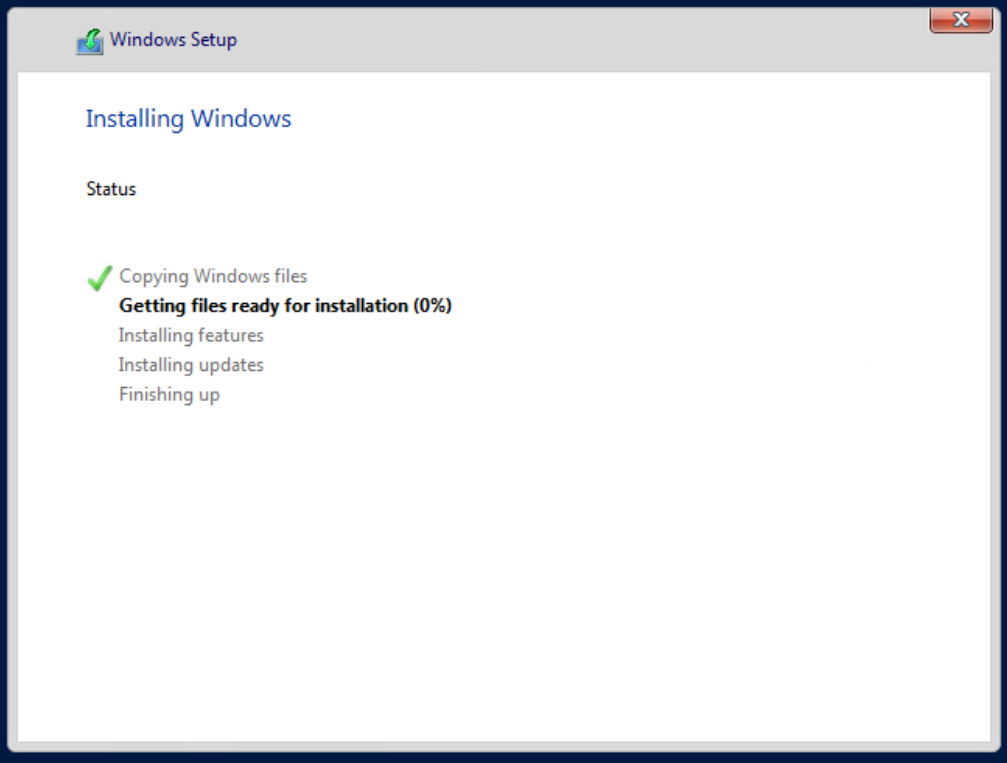
Wait for the process to finish, between 5-10 minutes.
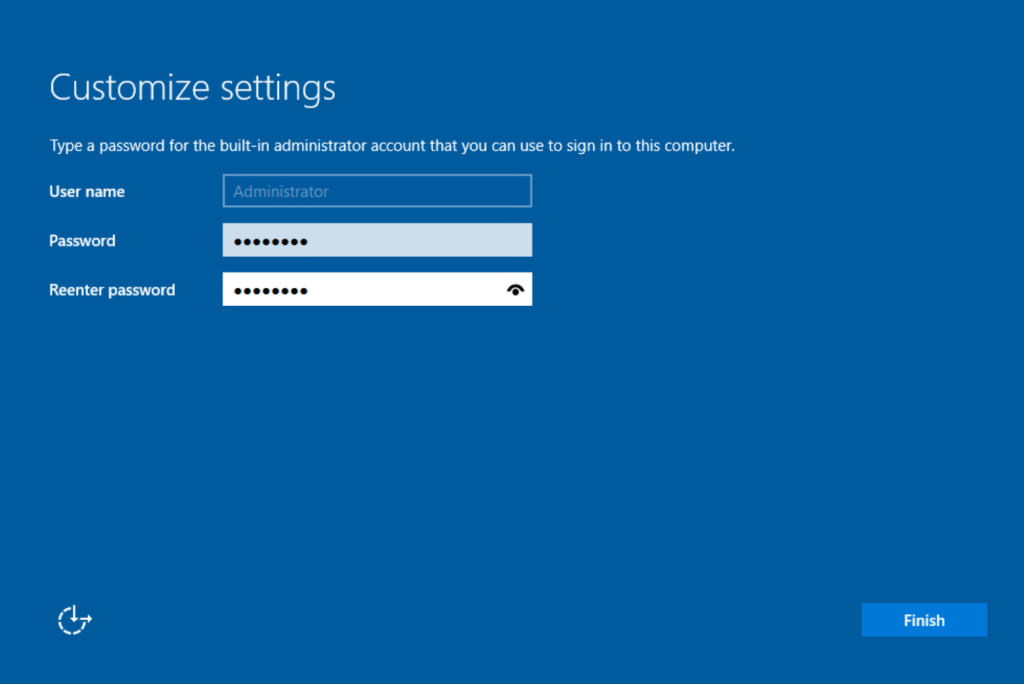
Select the password.
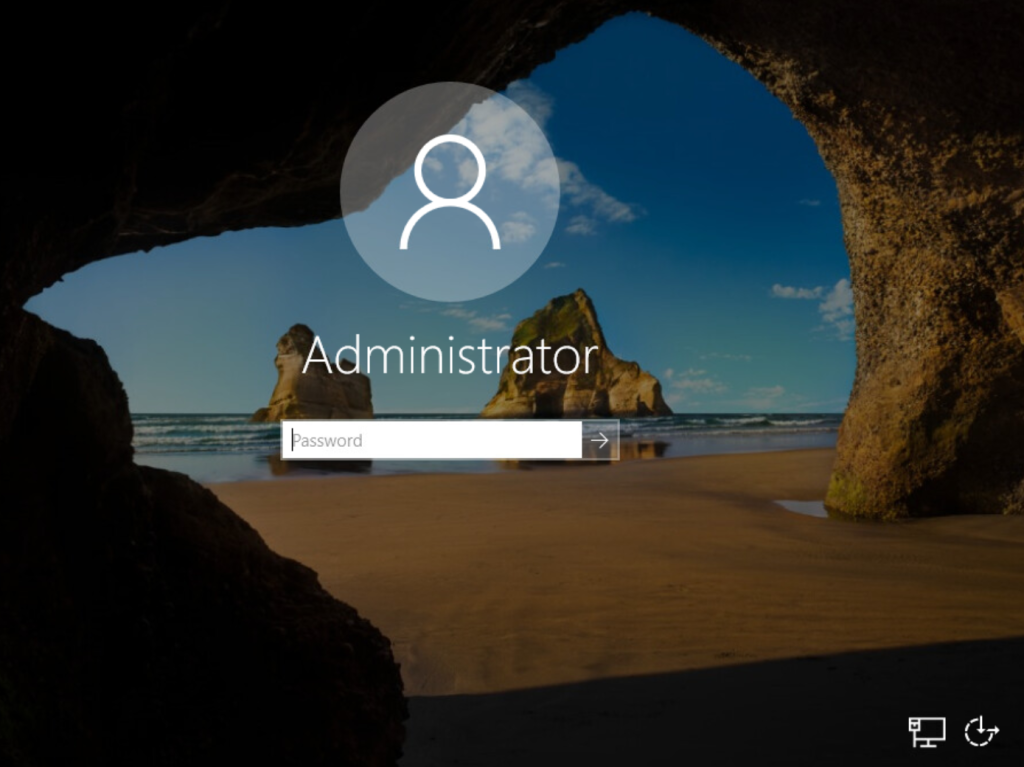
Once finished, you will see the login window.
With this, we have completed the creation of a new virtual machine. I recommend installing VMware Tools, unmounting the ISO we mounted to install the operating system, and installing all pending updates.