In this post, we’ll see how to add an additional LAN to pfSense.
PFSense is an open-source firewall/router based on FreeBSD. It can be installed physically or virtually. PfSense has undoubtedly established itself as a great alternative for firewall use because it is highly configurable with its extensive package list, allowing for expanded functionality.
The Community version can be downloaded from this link.
Now that we’ve briefly explained what pfSense is and what it’s used for, let’s see how to create another LAN and why.
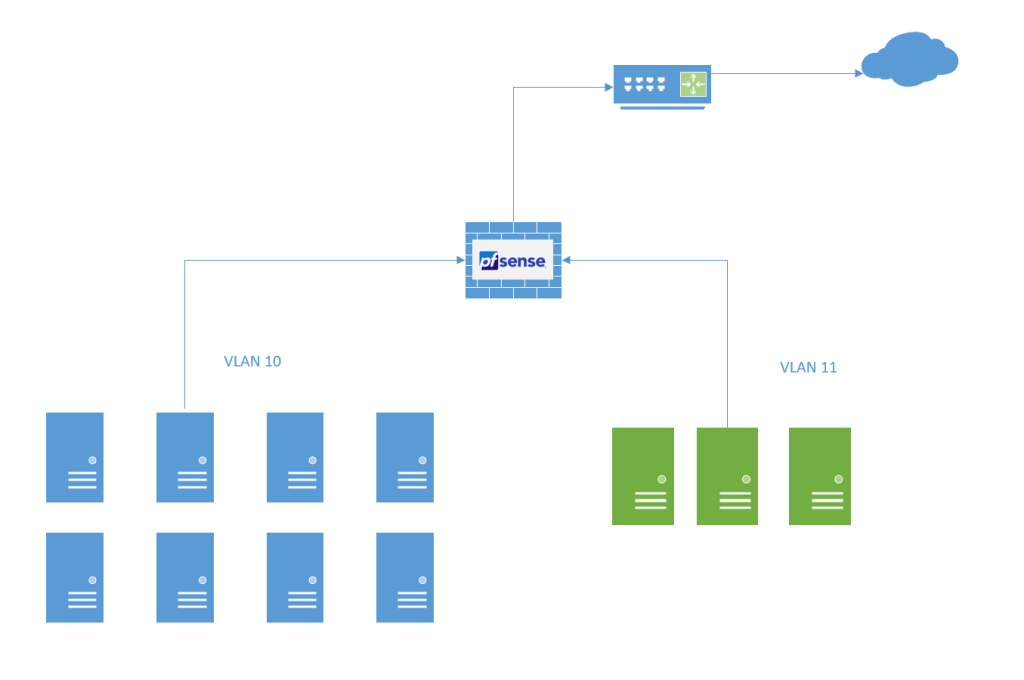
Let’s assume you have a basic pfSense configuration: just one WAN interface and one LAN interface. Within your current LAN, you have the devices you want to isolate and protect with the firewall. You have a DHCP server that handles IP address assignments through Windows (this is just one option, but you can also do it from within pfSense). Now you want to add a second interface with a different VLAN, where you’ll use a different DHCP server, a different domain, etc.
Let’s take the following image as an example. You have one LAN (VLAN 10) and you want to add a second LAN with VLAN 11.
Just to clarify before continuing, this only applies if pfSense is running on a virtual machine (VM). Otherwise, it will be limited by the physical interfaces, and you won’t be able to proceed.
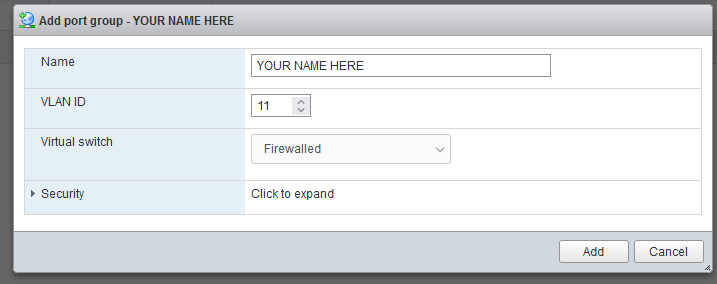
The first thing to do is add the port group within the hypervisor (in my case, VMware), assign a name, and the desired VLAN ID.
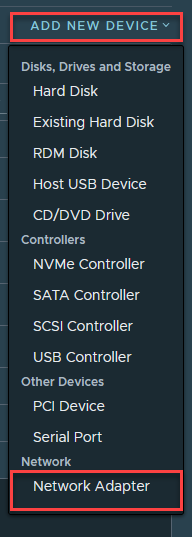
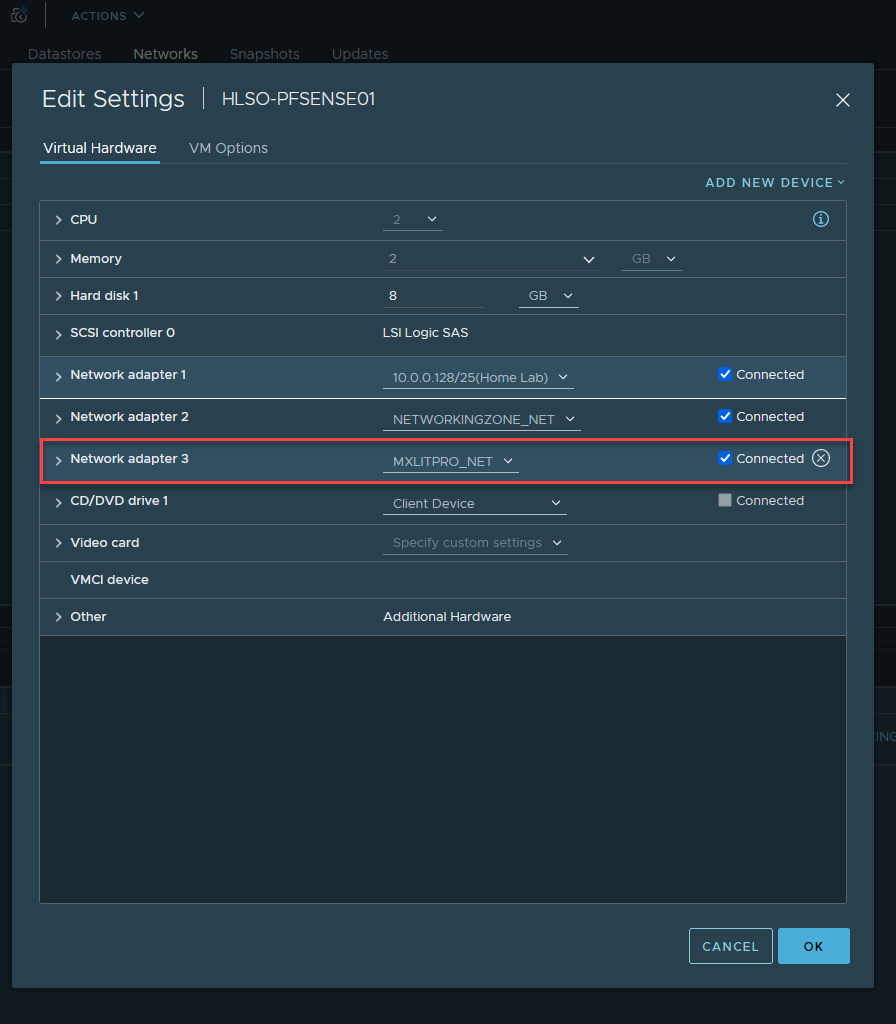
Since the group where you edit the VM has been created, select Add New Device and then select Network Adapter.
Select the correct group and make sure it is connected.
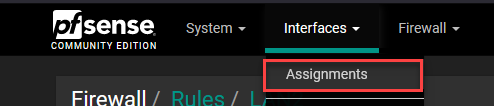
In pfSense, go to Interfaces, then Mappings.
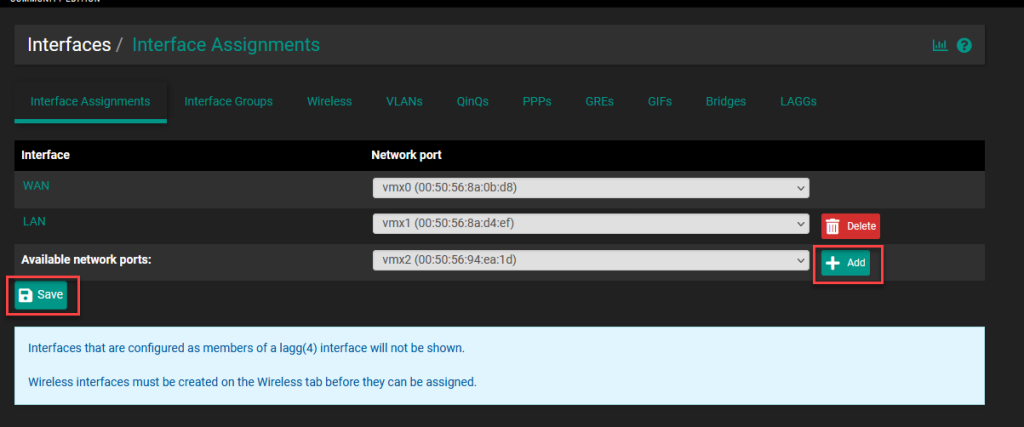
Add the new available network port using the Add button and then save the changes.
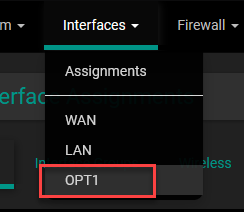
Go back to Interfaces and select the new interface you just added.
In the interface configuration, select the checkbox to activate it, add a description, select the configuration type as static IPv4, and you can add the MTU (Maximum Transmission Unit) of 1500, which is the standard, or select a higher MTU. A value of 9000 to 12000 is commonly used, known as jumbo frames (typically used between connections to a NAS). Note that the interface at the other end must have the same MTU; otherwise, it may cause instability.
At the bottom, select the IP address that will serve as the Gateway for the LAN, select the subnet mask bits, and save the changes.
NOTE: If you select the “Block Private Network and loopback addresses” option, you will block all private addresses.
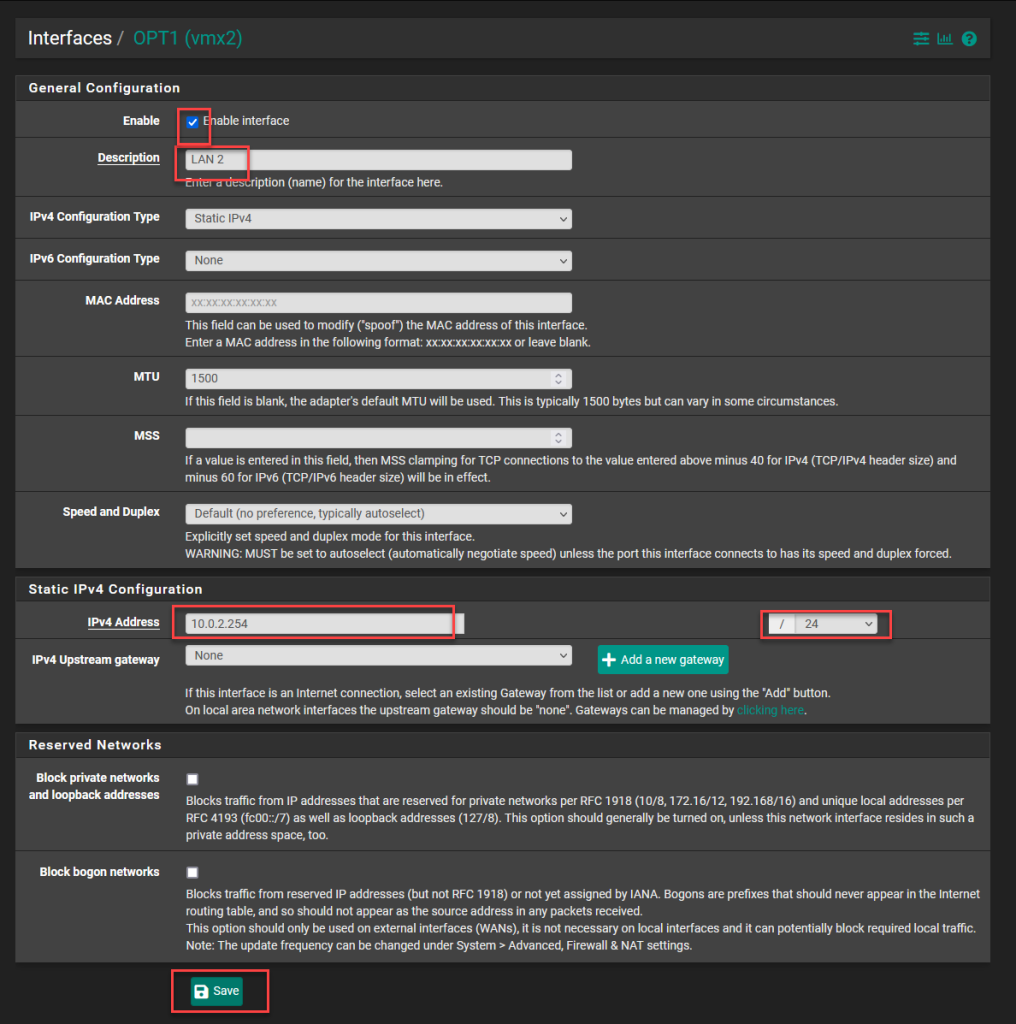
Apply the changes.

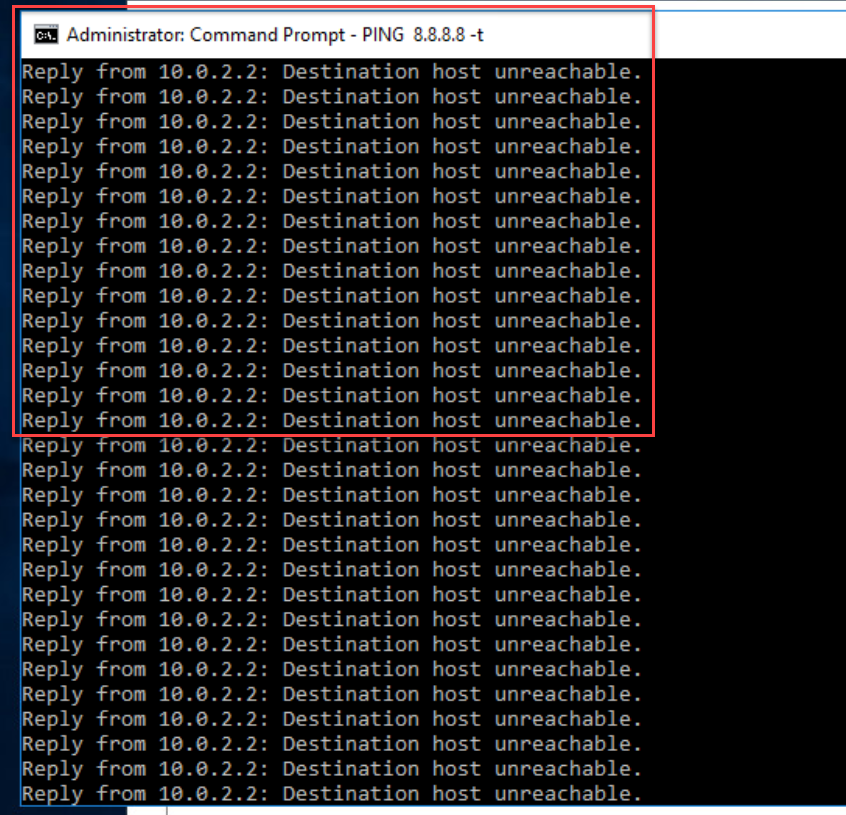
At this point, I’ve assigned an IP address to a device within VLAN 11. However, it doesn’t yet have internet access because a rule needs to be created to allow internet access from the created LAN to the WAN.
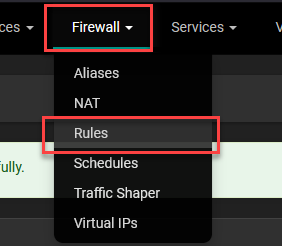
Go to Firewall and select Rules.
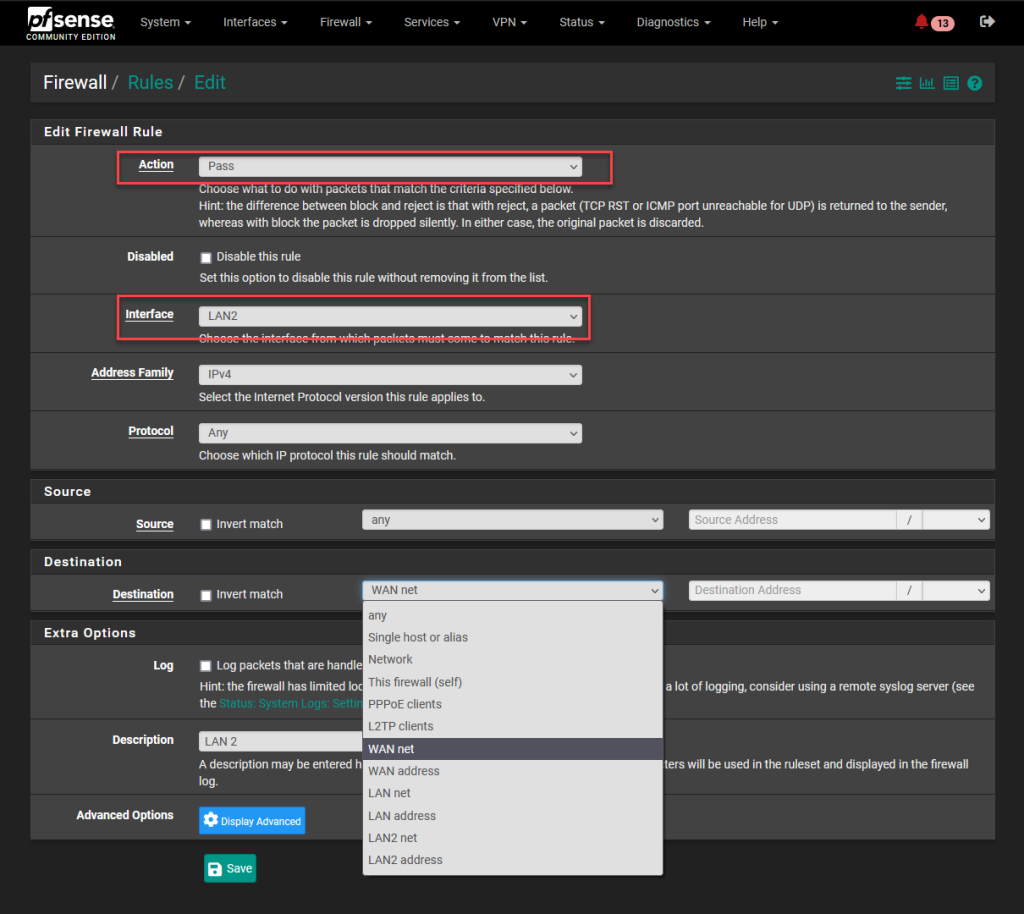
Select the Pass action, apply it to the interface you created, leave the Protocol option set to Any, select Any for the Source, and select WAN net for the Destination if you only want your devices to be able to access the local network outside of pfSense, or select Any if you want them to have internet access. Add a description and save the changes.
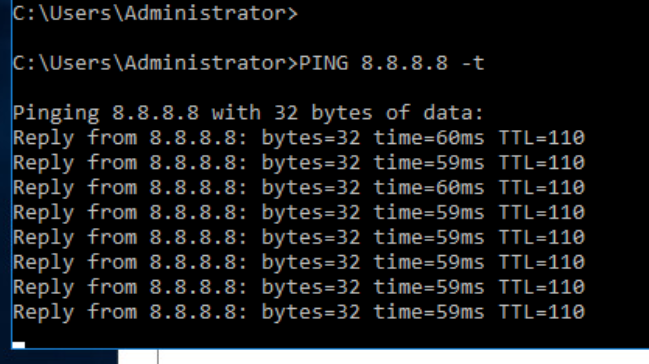
Now, if you ping the device again from within VLAN 11, you’ll see that it’s working successfully.
Now let’s see how to reach the LAN of the new interface from the pfSense WAN. Remember that the WAN is connected to a LAN and not directly to the internet.
This is in case you want to manage the devices behind the firewall.
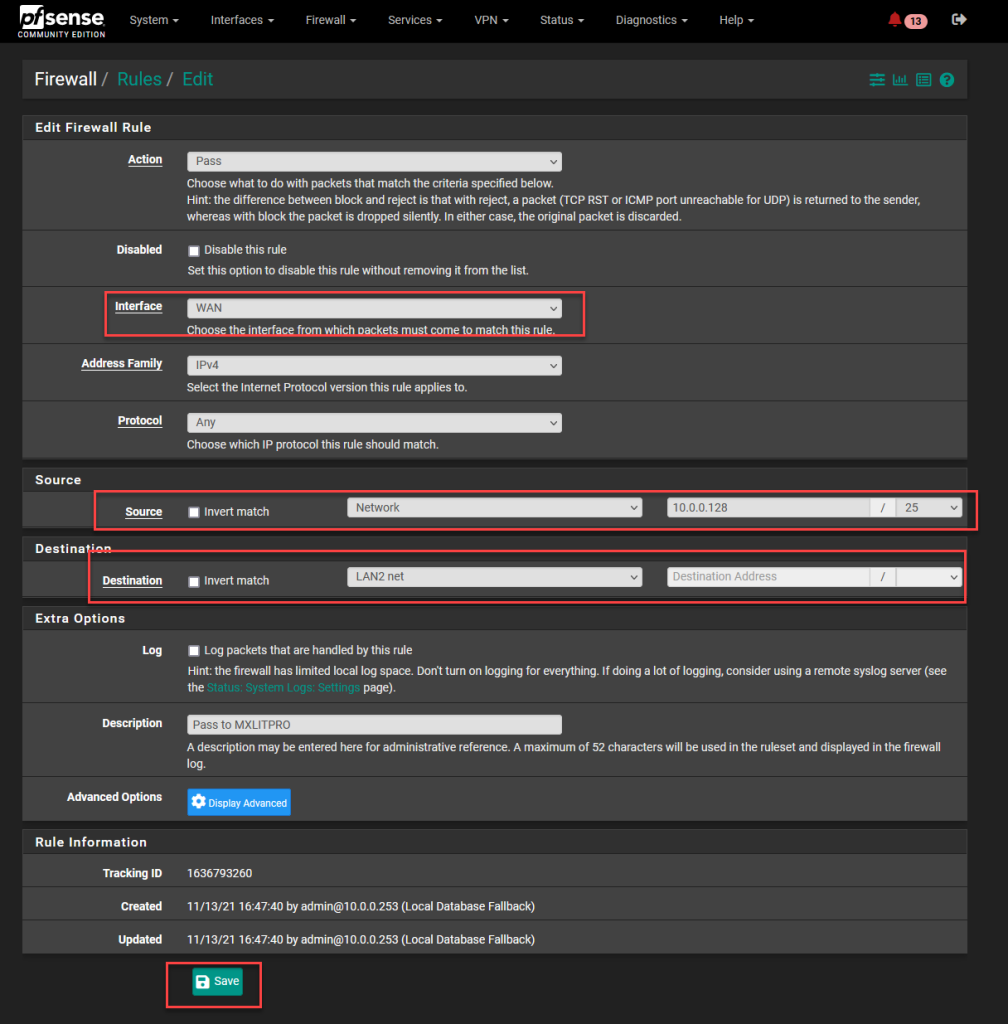
To do this, you must create a rule. Select Firewall and then Rules.
In the firewall rules editor, select the Pass action, the WAN interface, the Any protocol, and in the Source, select Network, adding the internal network along with the subnet mask bits. You can also select a single host if you only want to access it from one device.
Now let’s see how to tell Windows how to reach that network.
As you can see in the image on the left, I have an IP address of a computer within the new LAN. On the right, I have a command line from another machine outside of pfSense. The first attempt to ping fails because Windows doesn’t know how to reach that network. By default, it will try to reach that network using the gateway assigned to the interface; however pfSense is not the Windows gateway, so to reach networks within pfSense, you need to teach Windows how to access them.
To do this, run the following command in Command Prompt as administrator:
route add (NETWORK YOU WANT TO REACH) mask (Network mask) (Path, in this case, the pfSense WAN) -p
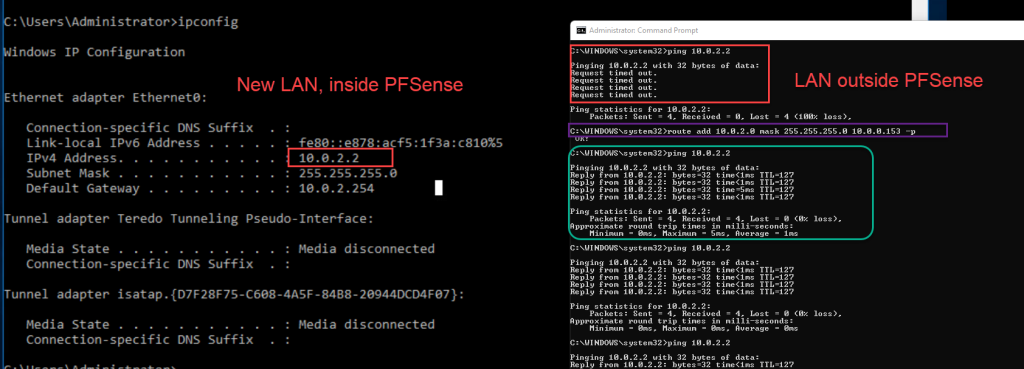
By adding -p to the command, we are telling Windows that this route will be a persistent route. Therefore, if you restart the computer, Windows will still know how to reach that network. If you don’t add -p, you will have to run the command again after restarting.
As you can see in the image, after teaching Windows how to reach the network, it is now able to ping it.