In this post, we’ll see how to configure and promote a second domain controller.
Having a second domain controller is crucial, as it serves as a backup in case the primary controller fails. Redundancy is always beneficial; without an extra domain controller, if the primary controller fails, all users could lose access to the various systems.
To avoid this, we’ll walk you through this task step by step. While this isn’t limited to just a second controller, you can also follow the same steps to add additional controllers.
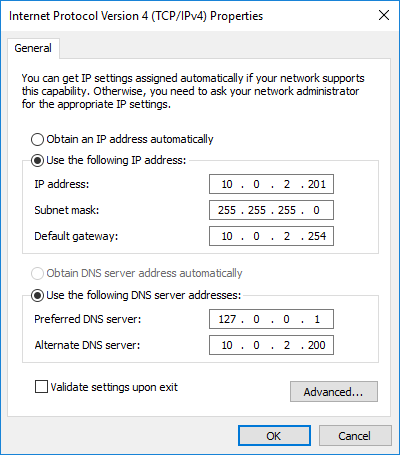
The first thing we need to do is assign a static IP address and the appropriate DNS servers to the computer.
It’s always recommended to assign the primary DNS server as the local host, and in this case, I’ll set the secondary DNS server to my primary domain controller.
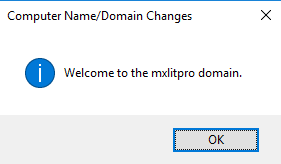
Assign a suitable name to the computer and join it to the domain.
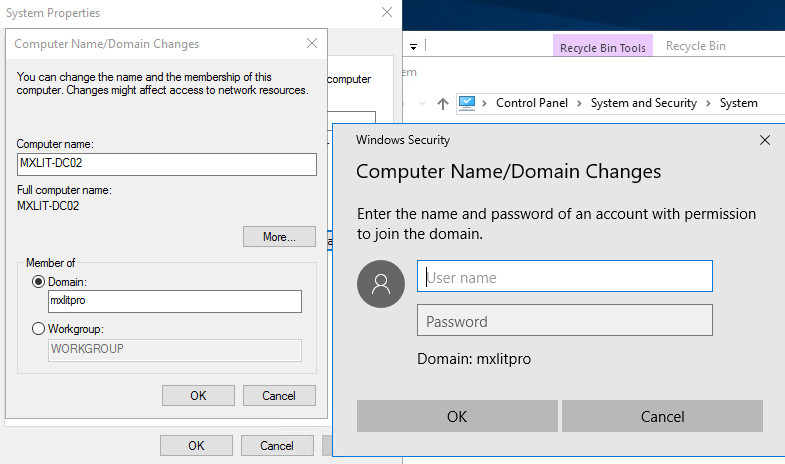
Restart the system to complete the changes.
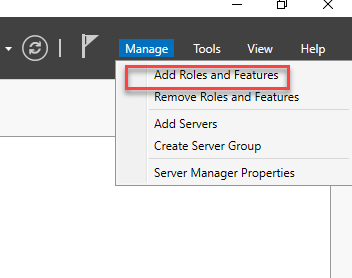
Log in to the system and click on “Add Roles and Features”.
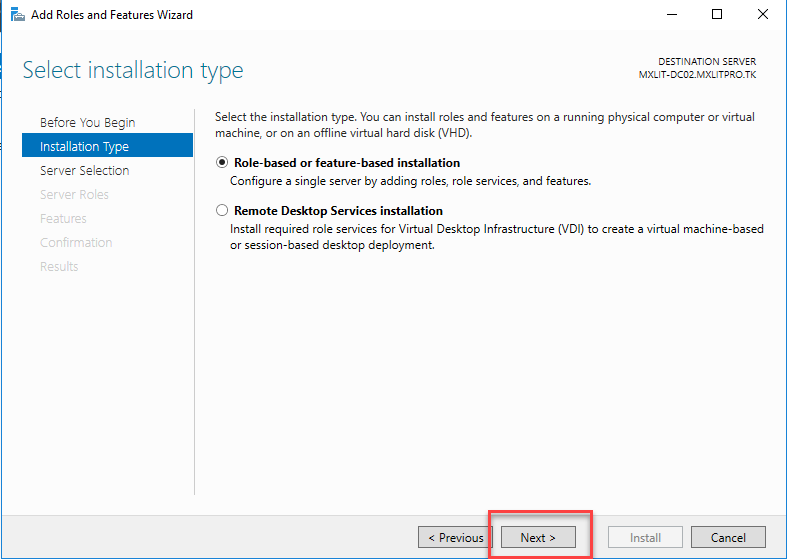
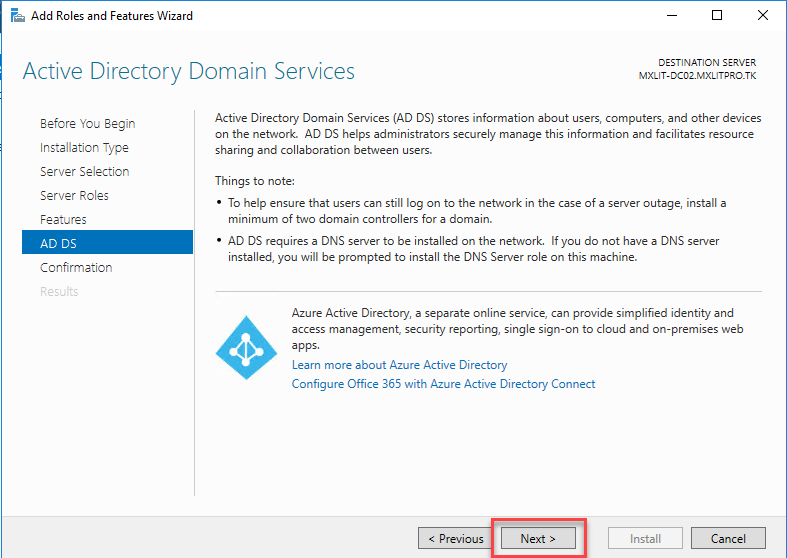
Click Next.

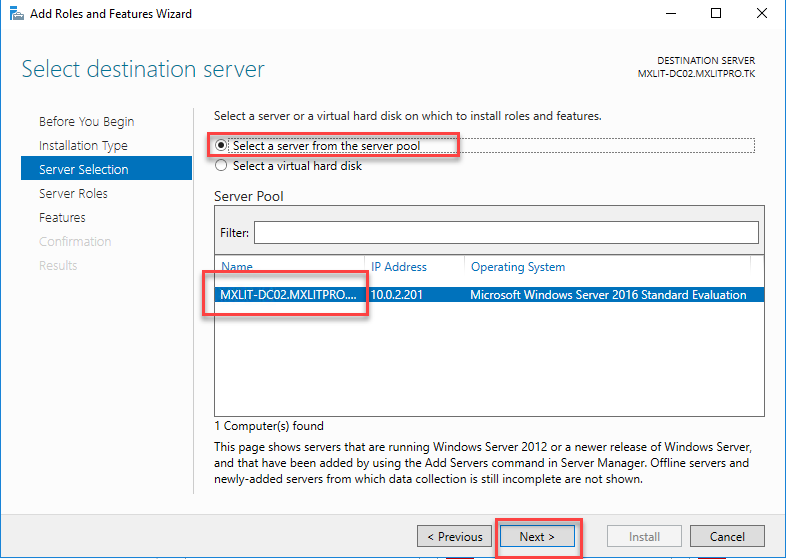
Leave the default selection and click Next.
Leave the default selection and click Next.
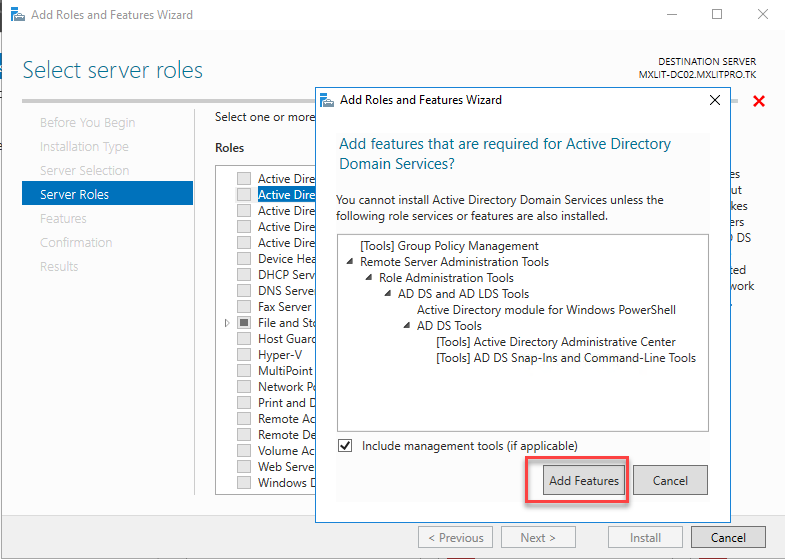
Select the “Active Directory Domain Services” checkbox, then click “Add Features.”
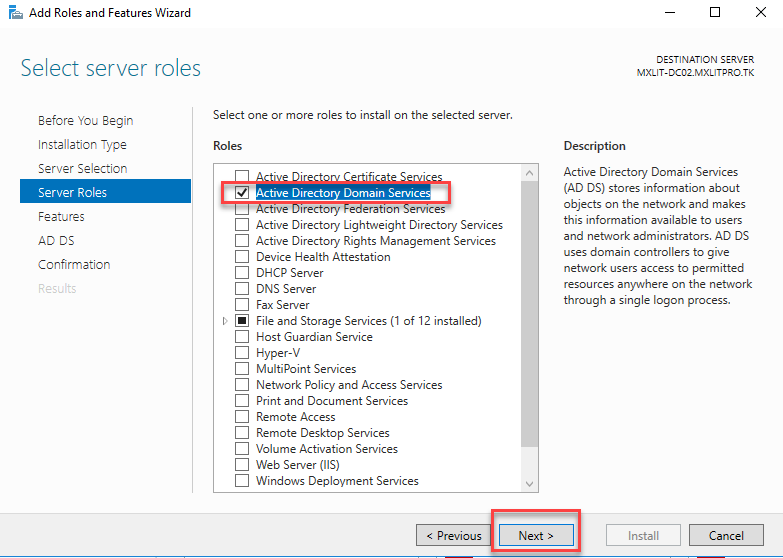
Verify that the “Active Directory Domain Services” checkbox is selected and click Next.
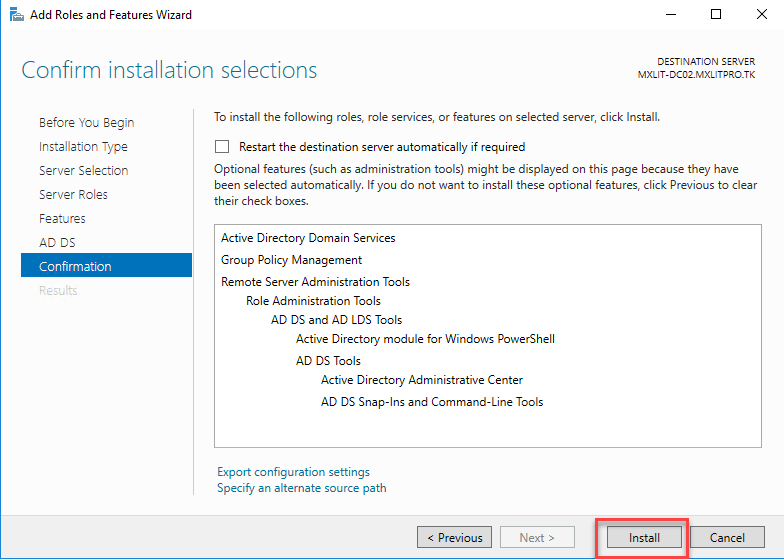
Click Next.
Click Install.
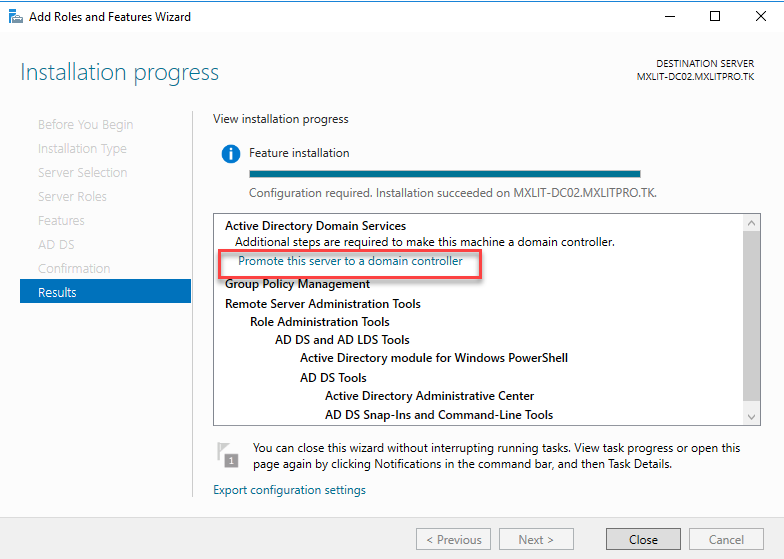
Do not close the window. Wait for the installation to finish and then click “Promote this server to a domain controller.”
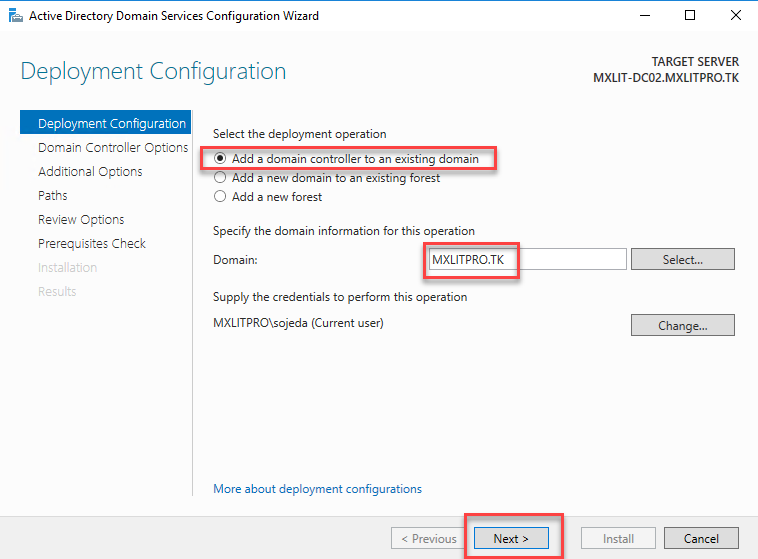
Select “Add a domain controller to an existing domain” since we have already created a domain (Link here) and we want to add a second controller to it. Leave the domain name the same and click Next.
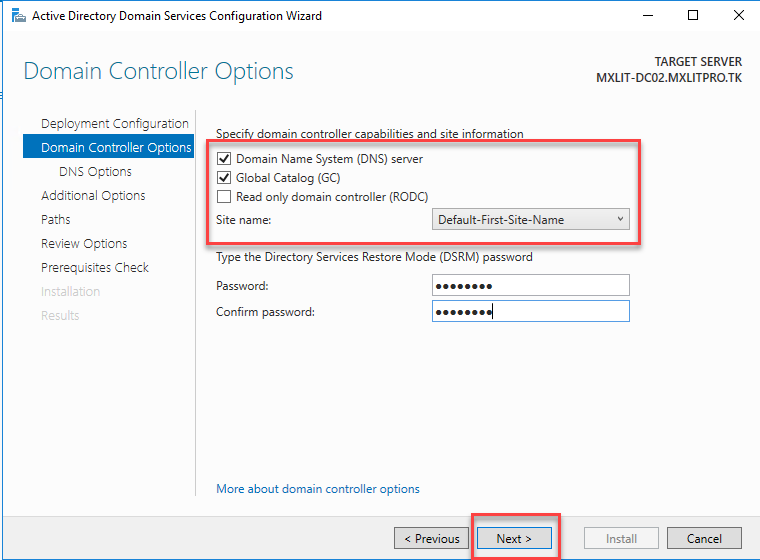
Leave the default selection and create a strong password for the DSRM, then click Next.
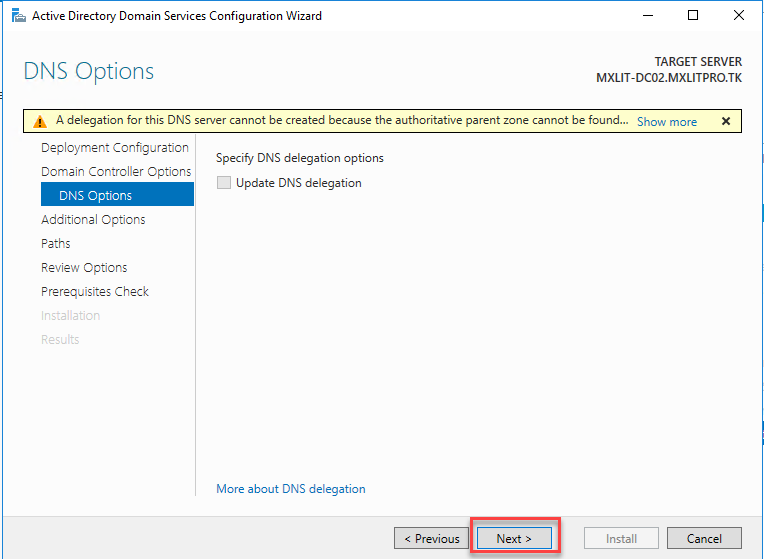
Click Next.
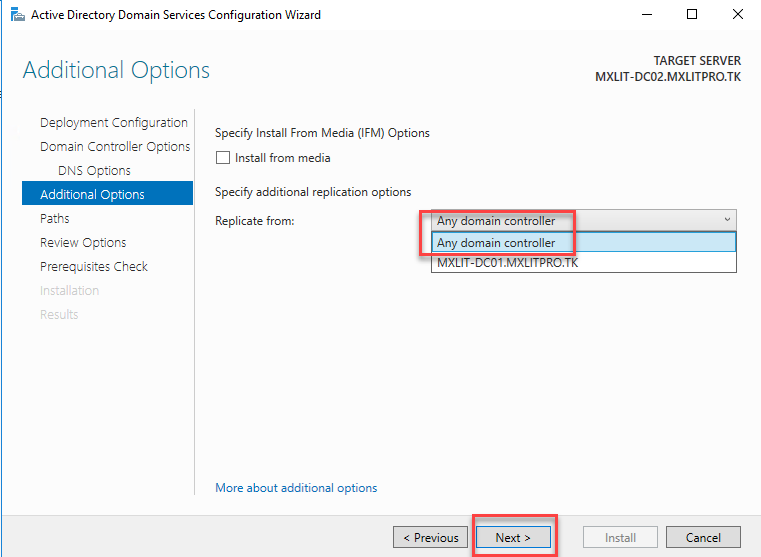
Here you can select where you want to replicate the Active Directory information from. In this case, I suggest leaving the default option and allowing it to replicate from any domain controller.
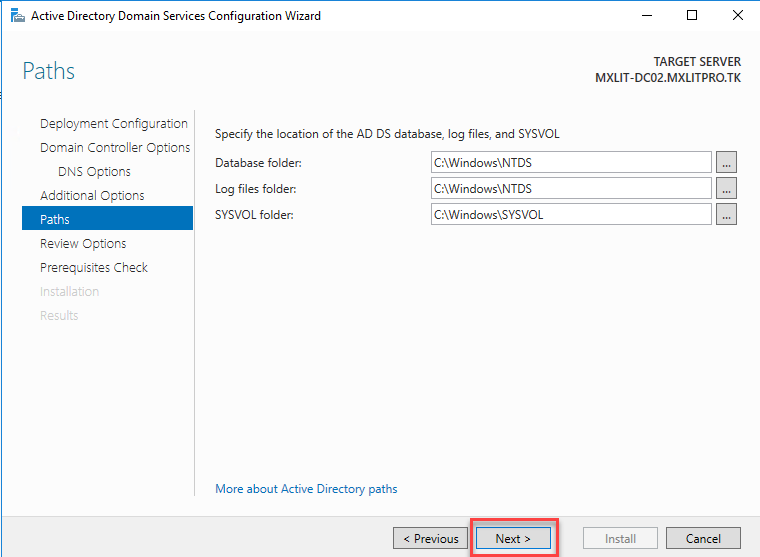
In this section, you can specify where to save the AD DS database, logs, and the SYSVOL folder. You can leave everything as default and click Next.
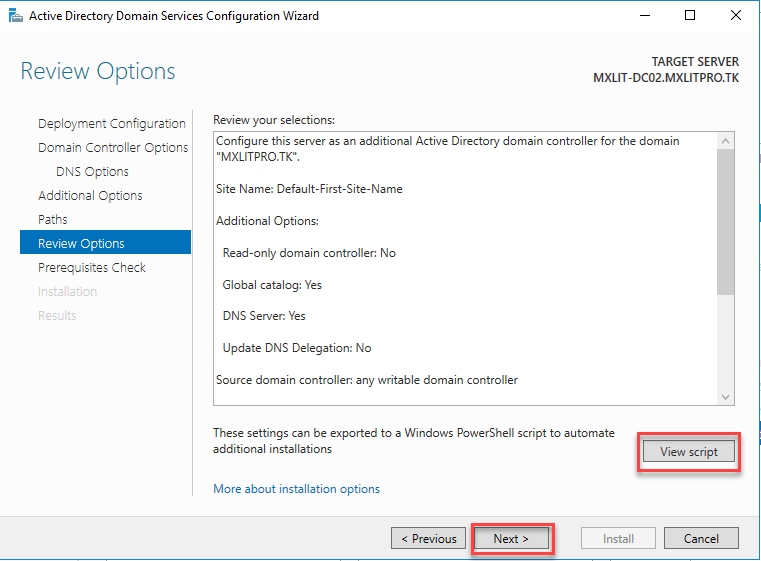
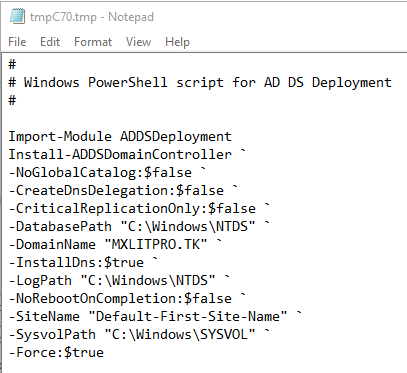
Here is a summary of the changes that will be made. You can also see the PowerShell script that does exactly the same thing we just applied. If everything looks good, click Next.
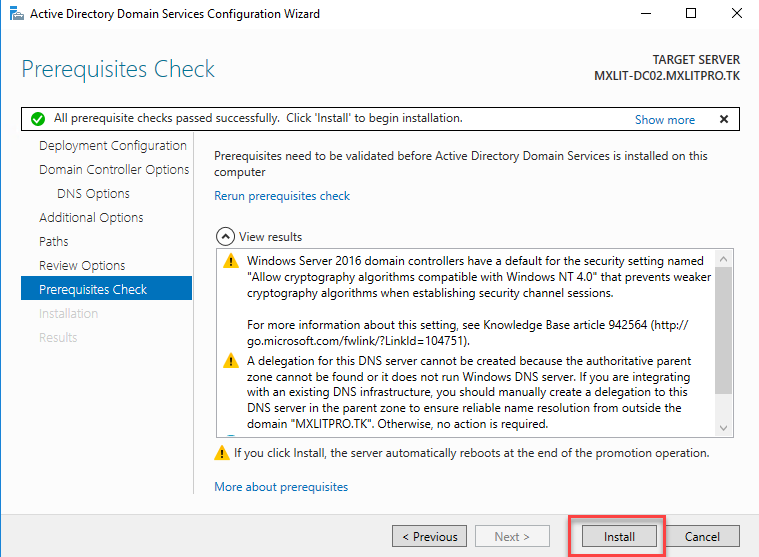
Wait while it checks the requirements. If everything is okay, you can click Install. When it finishes, the system will restart automatically and apply the necessary changes.

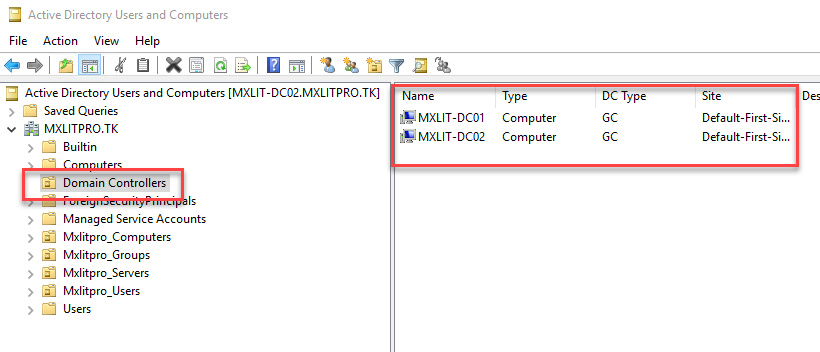
Once the system completes the restart, we can verify in Active Directory that the server was successfully promoted to a domain controller.
This is all that is needed to complete this task. You can follow the same instructions if you want to add more domain controllers. From now on, all changes made to the first domain controller will be replicated to the second, and vice versa. This ensures that access will not be lost in the event of a failure in one domain controller.