First, let’s briefly explain why SSL certificates should be used and what Let’s Encrypt is.
In today’s digital world, online security is a primary concern for all businesses and websites. Cyberattacks and the theft of sensitive information are on the rise, and users have become more aware of the importance of browsing the web securely. One of the most effective ways to protect the privacy and integrity of your visitors’ data is by using SSL (Secure Socket Layer) certificates. In this article, we’ll explore the importance of SSL and how companies like Let’s Encrypt are offering free SSL certificates to help secure the web.
What is an SSL Certificate?
An SSL certificate is a security layer used to encrypt communication between a user’s browser and the server hosting the website. This means that any data transmitted between the browser and the server, such as passwords, personal information, and payment details, is encrypted and becomes unintelligible to malicious third parties. Furthermore, SSL certificates are also crucial for ensuring website authenticity, which helps prevent man-in-the-middle attacks and identity theft.
Importance of Using SSL Certificates
Protection of Sensitive Data: When visitors enter sensitive information on your website, such as credit card numbers or personal data, you need to ensure that this information is protected. An SSL certificate encrypts this data, making it difficult for hackers to intercept and misuse it. Gain user trust: Modern users are increasingly cautious when browsing the web. By displaying the green padlock in the address bar and the address “https://” instead of “http://”, you demonstrate to your visitors that you care about their security and privacy, increasing trust in your website. Improve SEO: Search engines, such as Google, value online security. Websites with SSL certificates often receive a boost in search rankings, which can increase your site’s visibility and traffic. Protection against browser warnings: Modern browsers, such as Chrome and Firefox, warn users when they visit websites that lack SSL. These warnings can scare visitors away and cause them to leave your site. By having an SSL certificate, you avoid these unwanted warnings and ensure a worry-free browsing experience.
Let’s Encrypt and its Free SSL Certificates
Let’s Encrypt is a non-profit organization that has become a driving force behind the widespread adoption of SSL on the web. It was founded with the goal of making the web a safer place for everyone. Through its initiative, Let’s Encrypt offers completely free and automated SSL certificates.
How does Let’s Encrypt work?
Let’s Encrypt has developed software called Certbot that automates the process of requesting, issuing, renewing, and managing SSL certificates. This makes it easier for website owners to obtain and maintain SSL security without complications or additional costs.
Advantages of Let’s Encrypt:
Free: Let’s Encrypt SSL certificates are completely free, removing any financial barriers to protecting your website.
Automated: With Certify the Web, the certificate acquisition and renewal process is automated, saving you time and effort.
Security and reliability: Let’s Encrypt certificates are recognized and supported by the online security community, ensuring robust protection for your website.
Certify The Web is a popular and easy-to-use tool that allows you to automatically obtain and renew Let’s Encrypt SSL certificates on your server. Below, we’ll show you how to incorporate this tool into your SSL certificate acquisition and management process.
Now that we have a clearer understanding of how to obtain Let’s Encrypt certificates, let’s proceed with the steps to obtain them using the Certify The Web tool. To begin, you can download it from the following website: https://certifytheweb.com/home/download
Once the tool is installed, click on “New Certificate”.

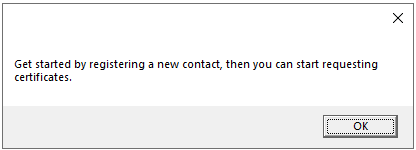
If you haven’t created a profile, the program will prompt you to create a new one.
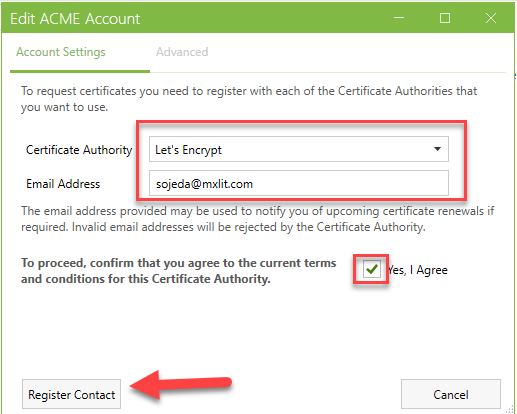
Select Let’s Encrypt and add your email address. Once you accept the terms… You can register the contact here.
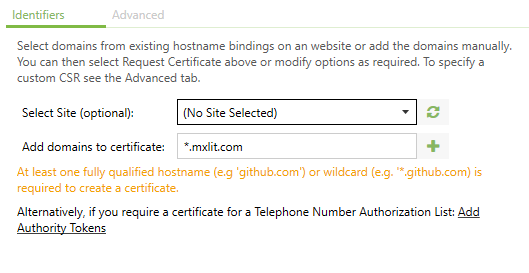
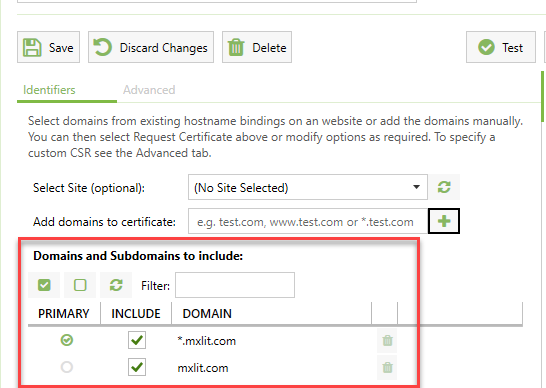
To add the domains we want to request, in this case, I’m adding a wildcard domain. These certificates can be used for multiple subdomains.
Once the domain is added, it will ask us to create a DNS challenge with our domain.

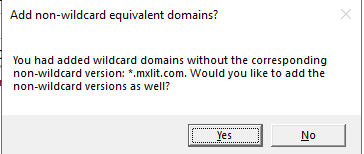
Add the domain corresponding to the wildcard by pressing yes.
Confirm the domains.
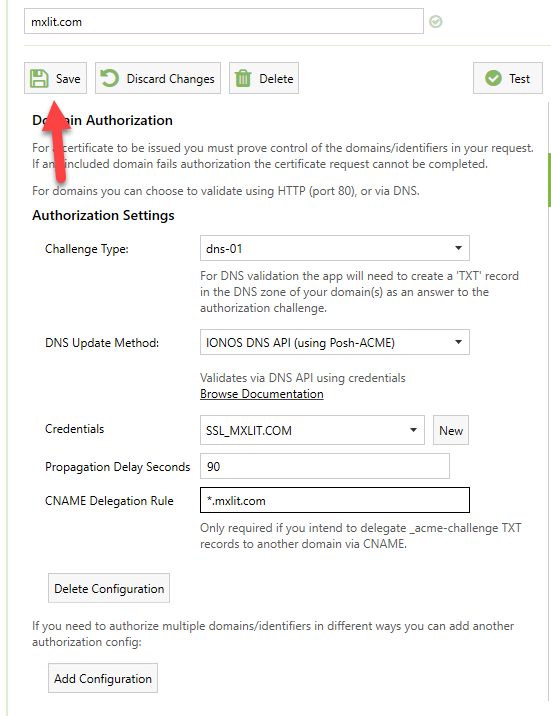
In this option, we must configure the authorization method. We must select the challenge type, which will be dns-01, and the DNS update method will depend on where your DNS is located. Once the above options are selected, new credentials will be created.
Note: In my case, my DNS is registered with IONOS, so for this example, I’ll use the IONOS API. This may vary depending on where you manage your DNS.
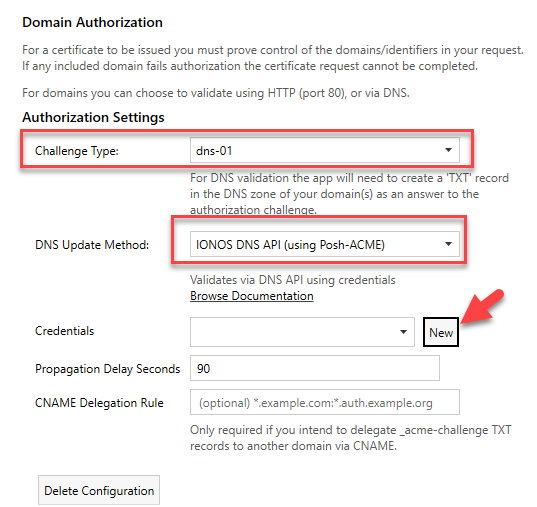
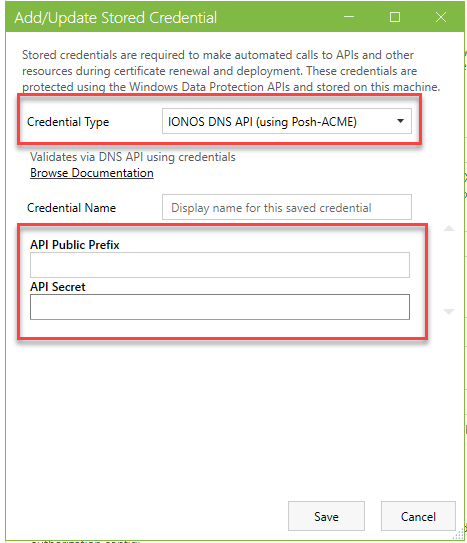
Select the credential type, and you’ll be prompted for an API Public Prefix and API Secret.
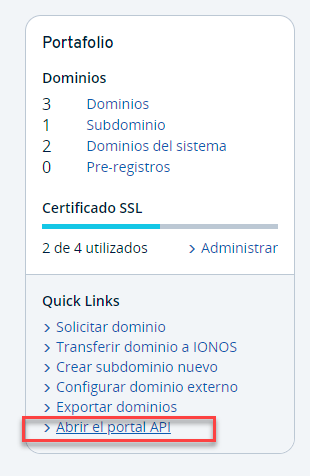
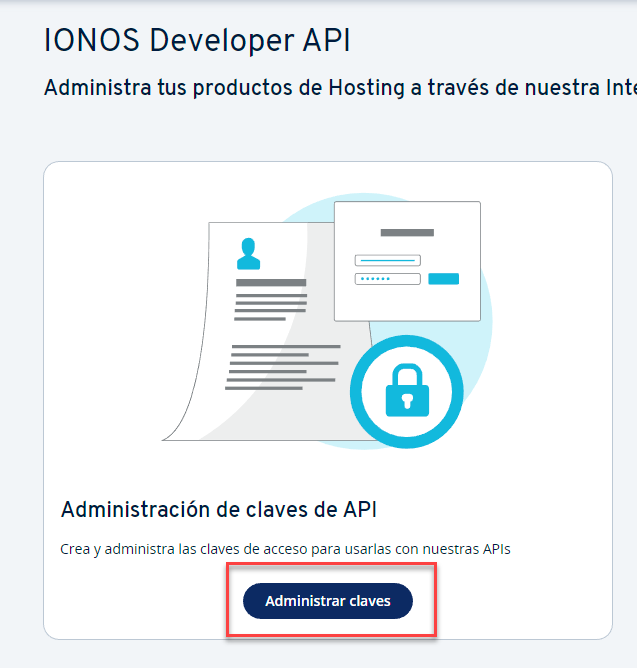
On the IONOS website, select “Open API Portal.”
Manage keys.
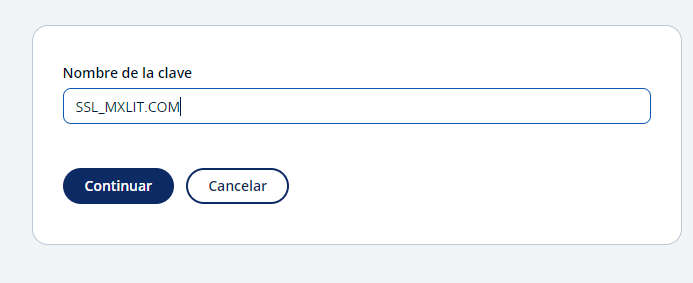
Create a new key.

Select a key name.
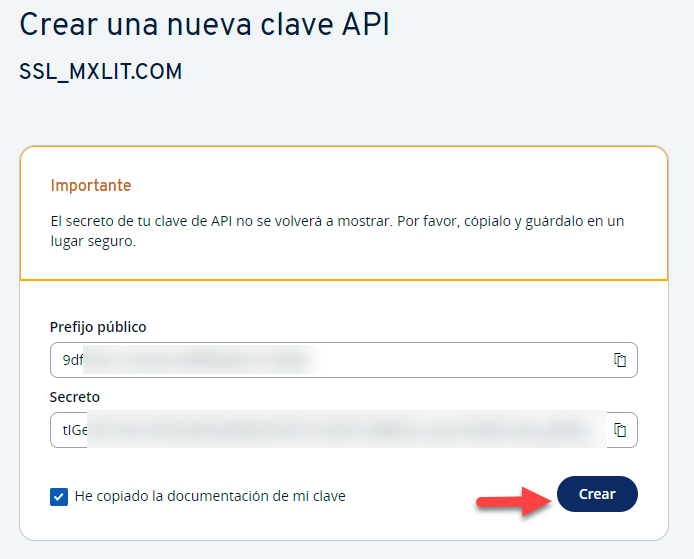
Save your key in a safe place, as it will not be displayed again in the IONOS options and you will have to create a new one.
Return to the program, add the previously generated keys, and save the changes.
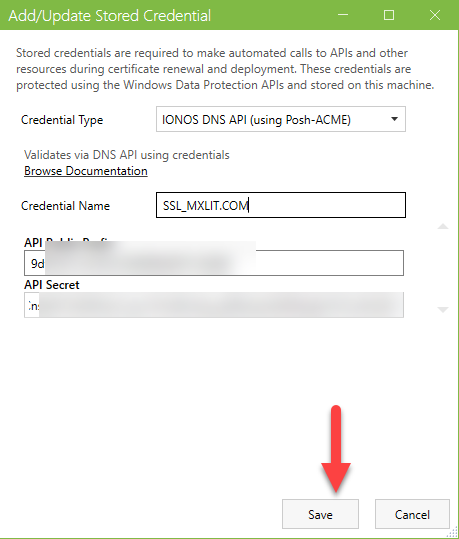
Save the changes again.
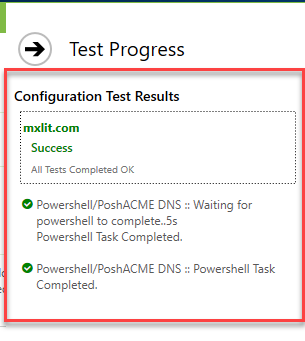
To verify that everything is correct, run a test.
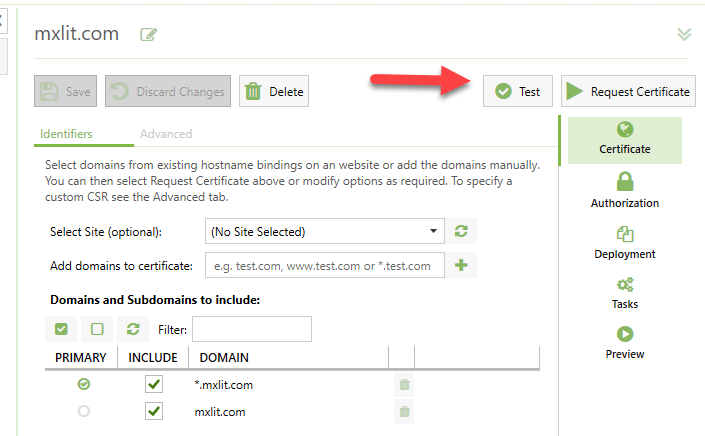
If the results indicate that all tests were successful, then we are ready to request certificates.
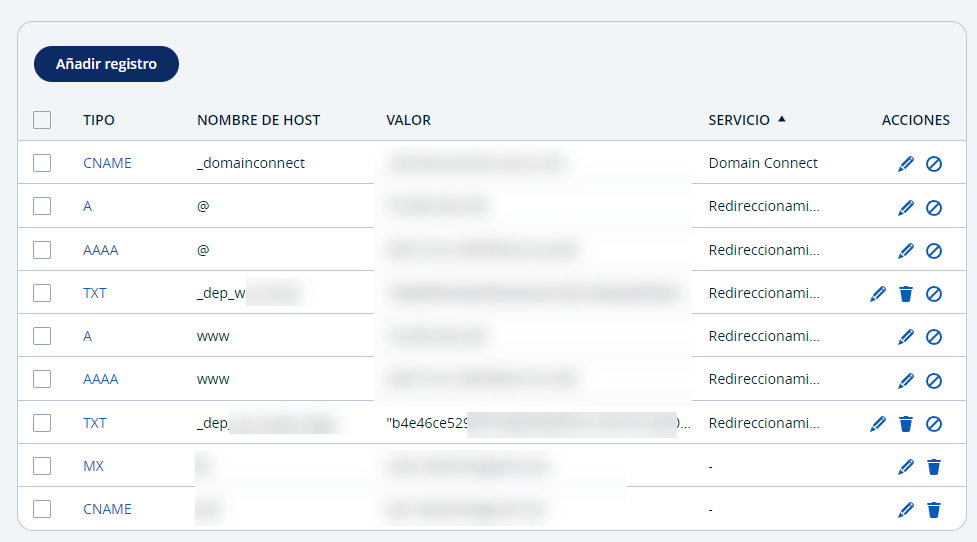
One way to verify that the changes were made correctly is by checking your DNS records; you will see some newly created TXT records.
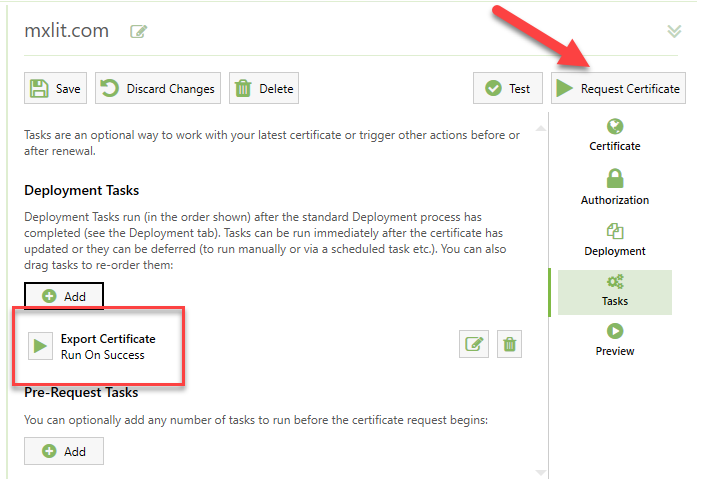
Before requesting certificates, I want to show you one of the options Certify The Web offers: tasks.
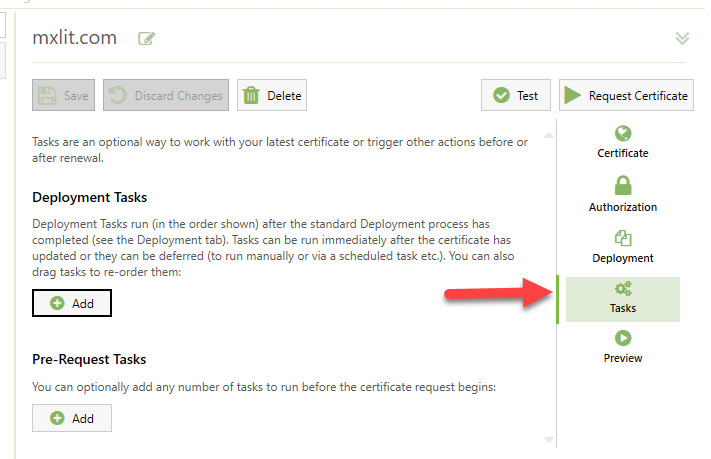
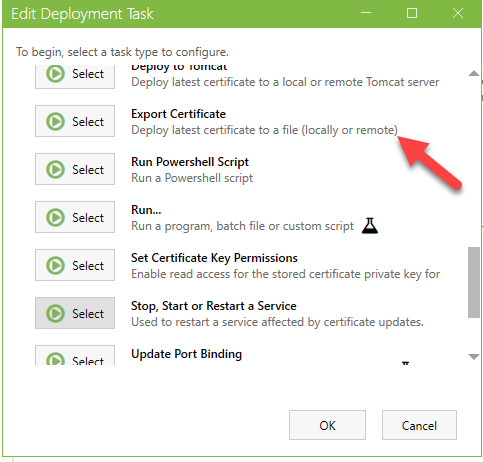
We have different types of tasks to choose from, such as deploying to a Tomcat server, running PowerShell scripts, adding the certificate to IIS, or exporting it if we want to use it on other servers. In this case, I’ll export the certificate as an example.
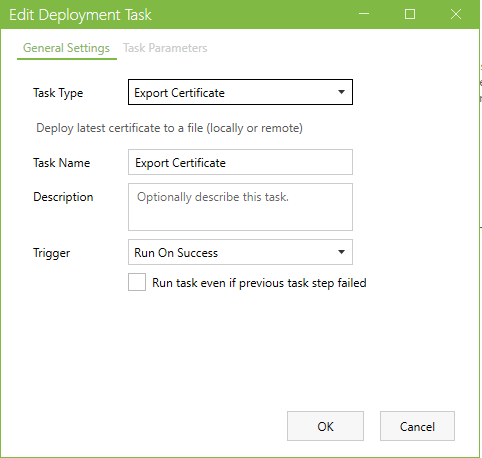
Within the task, I make sure the task type is correct and that the task only runs if the certificate was created successfully.
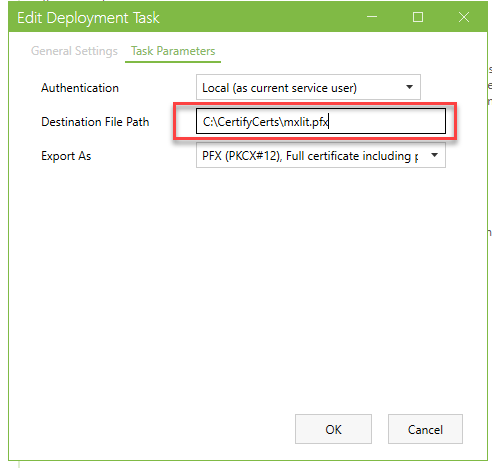
Within the task parameters, select the authentication type. Use Local if you want to export the certificate within the server. If you want to export it to a network path, you will need to change the authentication method and add the appropriate credentials. Add the destination and how you want to export the certificate. In this case, I will select PFX to include the private key.
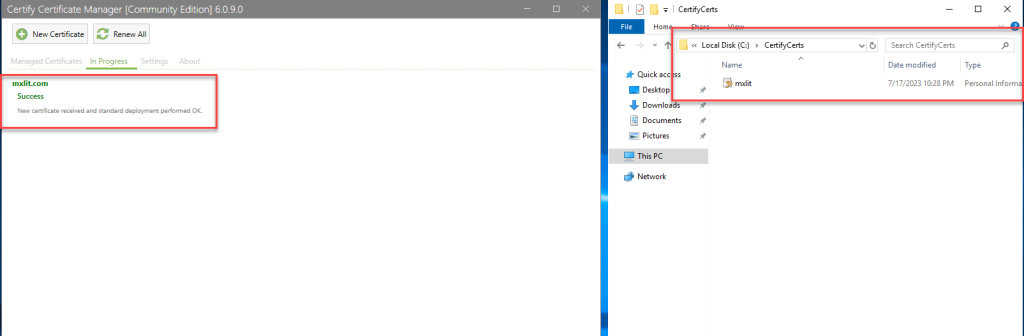
Once everything is set up correctly and we have confirmed that the task will only run when the certificate request is successful, select Request Certificate.
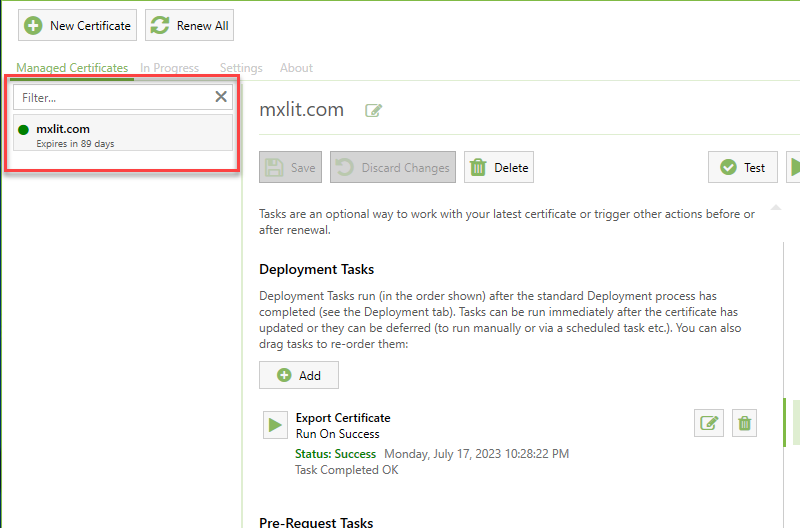
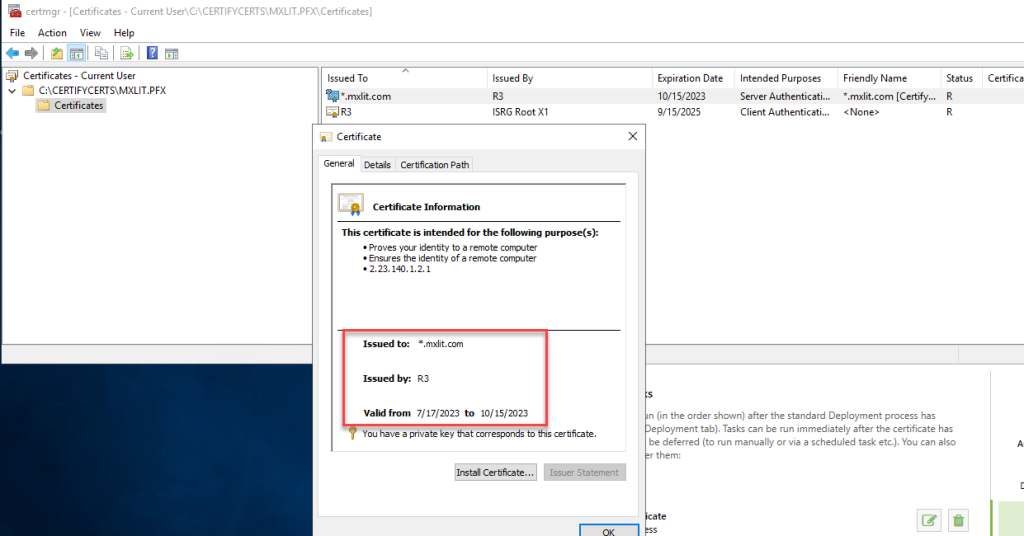
We verify that it has been generated correctly.
By default, the program will display a countdown to when the certificate will expire. Certify The Web will generate a new certificate every 30 days and execute all the tasks we have assigned.
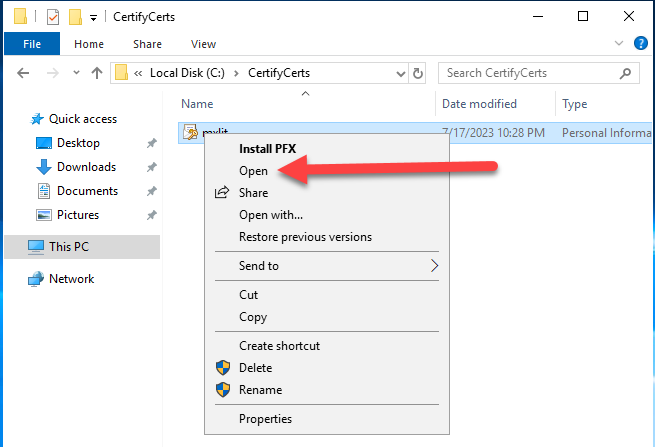
To verify that it is a valid certificate, we can open it and check the data as shown in the images.
Conclusion
Online security is a priority for any website today. SSL certificates offer robust defense against cyber threats and provide users with confidence. Let’s Encrypt, with its focus on free services and automation, has made SSL adoption more accessible to everyone. Don’t miss the opportunity to protect your website and build a solid security reputation for your visitors. Take advantage of Let’s Encrypt’s free certificates and take your website protection to the next level.